Cherry Clafoutis Recipe
There’s something utterly charming about a Cherry Clafoutis Recipe—it’s like the perfect little French hug from your oven. The custardy batter wraps around juicy cherries in a way that’s both simple and sophisticated, making it an absolute joy to bake when you want something sweet but not over the top. Whenever I make this, it instantly reminds me of warm summer days when cherries are in season and how easy it is to impress friends without stressing over complicated baking techniques.
If you’re searching for a dessert that works for breakfast, dessert, or even a cozy afternoon snack, you’ll love this Cherry Clafoutis Recipe. It’s flexible, fuss-free, and downright delicious whether served warm, cold, or room temperature. Plus, it’s a great way to use up fresh cherries or even canned ones when fresh aren’t available—trust me, I’ve done it both ways and the results are always wonderful.
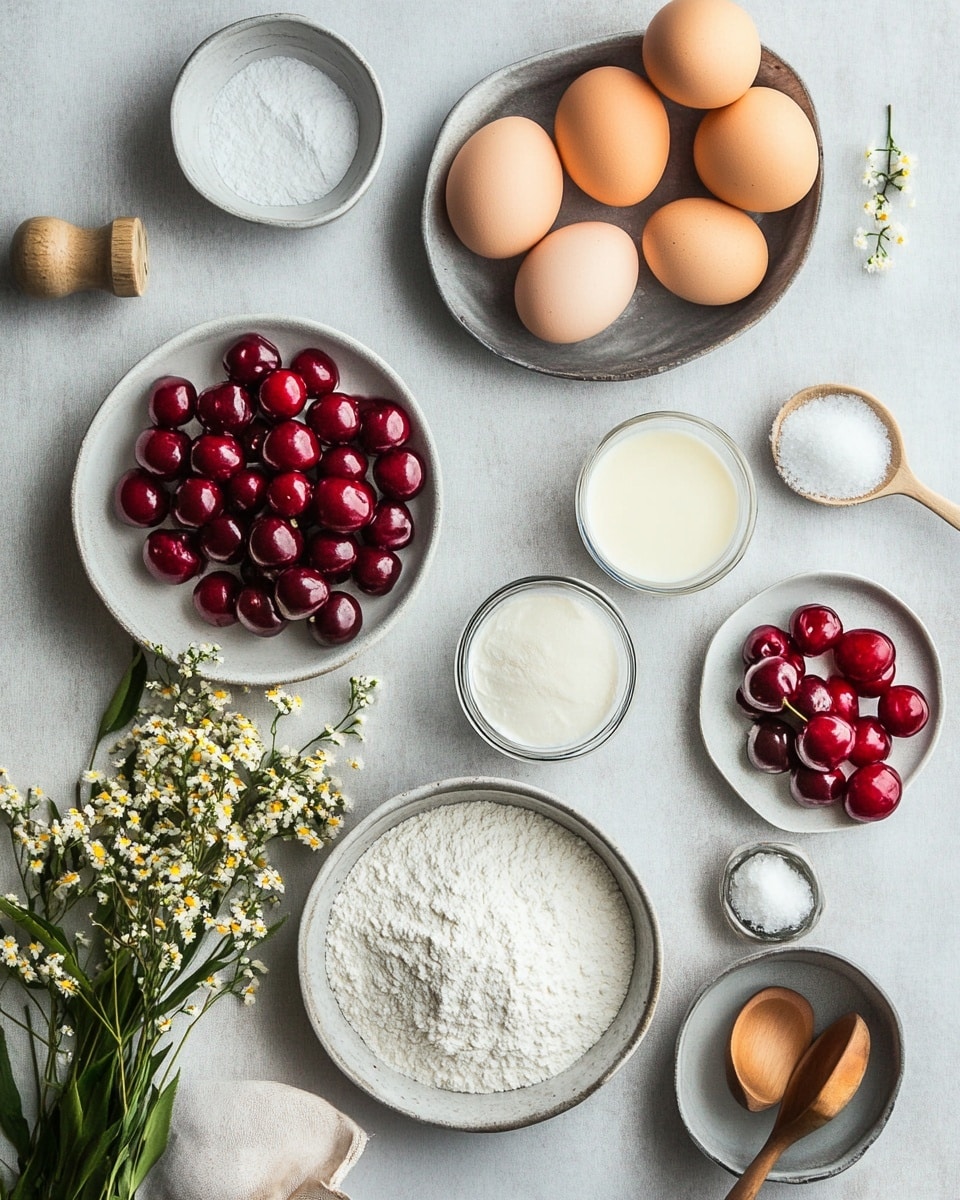
Ingredients You’ll Need
Each ingredient plays a part in creating that perfect balance of light custard and sweet, tart cherries. I like to use fresh cherries when I can, but canned or thawed frozen cherries are excellent alternatives. Here’s a quick rundown of what you’ll need and why each one matters.
- Fresh sweet cherries: Pitted cherries work best for effortless eating, but you can use canned or thawed frozen too. Just make sure they are well-drained to avoid a soggy custard.
- Eggs: They create the custard base that holds everything together, so room temperature is key for smooth blending.
- All-purpose flour: A modest amount thickens the batter just right without being cakey.
- Granulated sugar: Adds necessary sweetness; reserving some to sprinkle on top gives a nice golden, slightly crunchy finish.
- Whole milk or half and half: This keeps your clafoutis creamy and rich. Milk is lighter; half and half makes it even silkier.
- Vanilla extract: A warm, aromatic base note that complements the cherries beautifully.
- Almond extract: Just a splash adds a subtle nuttiness that enhances the cherry flavor—don’t skip it!
- Salt: Balances all the sweetness and rounds out the flavors perfectly.
- Powdered sugar: For dusting on top, because presentation counts and it gives a lovely finishing touch.
Variations
I love experimenting with this Cherry Clafoutis Recipe, adding different fruits or tweaking extracts to suit seasons and moods. Don’t be shy about customizing to your taste; it’s a forgiving and welcoming dessert that invites creativity!
- Swap cherries for other fruits: Plums, apples, pears, or blackberries make lovely seasonal twists. Personally, I made a plum clafoutis last fall that was beautifully rich and comforting.
- Make it dairy-free: Use almond milk or coconut milk instead of whole milk, and try a dairy-free butter substitute for greasing the dish.
- Add a splash of citrus: A teaspoon of lemon zest brightens up the batter and pairs wonderfully with cherries.
- Boost with spices: A pinch of cinnamon or nutmeg can add warmth that’s perfect for colder months.
- Nut topping: Sprinkle sliced almonds or chopped pistachios on top before baking for a delightful crunch.
How to Make Cherry Clafoutis Recipe
Step 1: Prepare Your Baking Dish and Cherries
Start by preheating your oven to 350°F (175°C). While it warms up, generously butter the bottom and sides of a 9 or 10-inch baking dish or pie plate—this helps the clafoutis slide out easily and develops a beautifully golden crust. Then spread your pitted cherries evenly across the bottom. I like to arrange them neatly so each slice gets plenty of fruit, but don’t worry about perfection; this treat is all about rustic charm.
Step 2: Blend the Batter for a Silky Smooth Finish
Into a blender, add your room temperature eggs, granulated sugar (except for the reserved 2 tablespoons), milk, flour, vanilla and almond extracts, and salt. Blend everything until the batter is silky smooth with no lumps—that’s your secret to a custard that’s creamy yet light. I find this step so satisfying because you can almost see the batter transform right before your eyes.
Step 3: Assemble and Bake
Pour the batter evenly over your cherries in the dish. Then sprinkle that reserved 2 tablespoons of sugar on top—this little trick gives you a pretty caramelized finish that adds texture and sweetness. Pop it into the oven and bake for about 35 to 45 minutes, or until the custard is just set and slightly puffed. Keep an eye on it towards the end; you want it firm with just a slight jiggle in the center, not wobbly or undercooked.
Step 4: Cool and Serve
Once out of the oven, allow your Cherry Clafoutis to cool for at least 15 minutes—this resting time helps it settle and develop flavor. You can enjoy it warm, room temperature, or cold, which is great if you’re prepping ahead. Before serving, dust generously with powdered sugar for a pretty, inviting look.
How to Serve Cherry Clafoutis Recipe
Garnishes
My favorite way to garnish this clafoutis is with a simple dusting of powdered sugar—it adds elegance without stealing the show. Sometimes, I add a dollop of lightly whipped cream or a scoop of vanilla ice cream when serving, especially if it’s dessert time. Fresh mint leaves can lift the whole dish with a pop of color and freshness, too.
Side Dishes
This Cherry Clafoutis Recipe pairs beautifully with a light salad if you’re making it for brunch, or a hot cup of coffee or tea for dessert. I’ve also enjoyed it alongside vanilla yogurt or crème fraîche to add a creamy tang that balances the sweet custard.
Creative Ways to Present
For a special occasion, try serving your clafoutis in individual ramekins—each guest gets their own perfectly portioned treat. You can also drizzle melted chocolate or a berry coulis over the top for a fancy twist. When I made this for a summer gathering, I added a sprinkle of toasted almonds and a few fresh cherries as garnish to make it extra festive.
Make Ahead and Storage
Storing Leftovers
When I have leftovers (which doesn’t happen often!), I cover the clafoutis tightly with plastic wrap or store it in an airtight container in the fridge. It keeps well for up to 4 days, giving you plenty of chances to enjoy its flavors again without loss of texture or taste.
Freezing
Freezing clafoutis isn’t my go-to because the texture changes slightly once thawed, but if you do freeze it, wrap it tightly in plastic wrap and foil to prevent freezer burn. Thaw overnight in the fridge before reheating gently.
Reheating
I usually reheat leftover clafoutis in the microwave in short 15-second bursts to keep it soft and moist. If you prefer the oven, cover it loosely with foil and warm at 350°F for about 5 to 10 minutes. Just watch closely so it doesn’t dry out.
FAQs
-
Can I use frozen cherries for this Cherry Clafoutis Recipe?
Absolutely! Frozen cherries work well as long as you thaw them completely and drain any excess liquid before adding them to the dish. This prevents the custard from becoming watery and ensures your clafoutis bakes up beautifully.
-
Do I have to pit the cherries?
Pitting cherries makes eating the clafoutis easier and more enjoyable. The traditional recipe uses unpitted cherries for extra flavor, but I prefer to pit them so no one has to worry about pits while savoring every bite.
-
Can I make this recipe vegan or dairy-free?
Yes! You can swap the milk for almond, coconut, or oat milk and use a vegan butter or oil to grease the dish. To replace eggs, try a commercial egg replacer or a flaxseed “egg” mixture, but keep in mind the texture will be slightly different.
-
How long does the Cherry Clafoutis stay fresh?
This dessert stays fresh in the fridge for up to four days. It’s best enjoyed within the first day for the creamiest texture, but leftovers still taste great chilled or gently reheated.
-
Can I use other fruits besides cherries?
Definitely! Stone fruits like plums, peaches, and apricots work wonderfully, as do berries and even sliced apples or pears. Just adjust bake time slightly depending on the moisture content of your fruit.
Final Thoughts
This Cherry Clafoutis Recipe feels like a little treasure every time I make it—simple ingredients transformed into something that feels special and comforting all at once. Whether you’re new to baking or a seasoned pro, I promise this not-too-sweet, custard-style dessert will become a go-to when cherries are calling your name. So gather your ingredients, put on some music, and enjoy the magic of making this classic French treat in your own kitchen!
PrintCherry Clafoutis Recipe

This Cherry Clafoutis recipe is a classic French dessert featuring fresh sweet cherries baked in a smooth, custard-like batter. Easy to prepare with simple ingredients, it offers a delightful balance of sweet, creamy, and fruity flavors. Perfect for warm or cold serving, it makes a versatile treat for any season.
- Prep Time: 10 minutes
- Cook Time: 45 minutes
- Total Time: 55 minutes
- Yield: 12 servings 1x
- Category: Dessert
- Method: Baking
- Cuisine: French
Ingredients
Fruit
- 1 1/2 cups fresh sweet cherries, pitted (or use canned cherries, drained – about 1 can)
Batter
- 3 large eggs, room temperature
- 1/2 cup all-purpose flour
- 1/2 cup granulated sugar, plus 2 tablespoons for topping
- 1 cup whole milk or half and half
- 1 1/2 teaspoons vanilla extract
- 1/2 teaspoon almond extract
- 1/4 teaspoon salt
Topping
- Powdered sugar, for dusting on top
Instructions
- Preheat and prepare dish: Preheat your oven to 350°F (175°C). Generously butter the bottom and sides of a 9 or 10 inch baking dish or pie plate to prevent sticking and add flavor.
- Arrange cherries: Evenly spread the pitted cherries on the bottom of the prepared baking dish to form a base layer for the clafoutis.
- Make batter: In a blender, combine the eggs, 1/2 cup sugar (reserving 2 tablespoons), milk, flour, vanilla extract, almond extract, and salt. Blend until the batter is completely smooth and homogenous.
- Combine and sprinkle sugar: Pour the batter gently over the cherries in the dish. Then sprinkle the reserved 2 tablespoons of granulated sugar evenly on top to create a slightly crisp, caramelized top after baking.
- Bake: Place the dish in the oven and bake for 35 to 45 minutes, or until the custard is just set and slightly golden on top. The clafoutis should be firm but still tender inside.
- Cool and serve: Allow the clafoutis to cool for at least 15 minutes before serving. Dust the top with powdered sugar just before serving. Enjoy warm, at room temperature, or cold, according to your preference.
- Store leftovers: Place any remaining clafoutis in an airtight container and refrigerate for up to 4 days. To reheat, use a microwave in short intervals or warm gently in the oven covered with foil.
Notes
- Cherries: Use fresh sweet cherries, canned (drained), or thawed frozen cherries with excess liquid removed. Traditionally, unpitted black cherries are used but pitted cherries make the dessert easier to eat. If using unpitted, inform guests accordingly.
- Variations: Substitute cherries with plums, prunes, apples, pears, cranberries, or blackberries for different flavors.
- Reheating: Clafoutis tastes best within 24 hours but can be stored up to 4 days. Reheat in 15-second microwave bursts until warm or in a 350°F oven covered with foil for 5 to 10 minutes.
Keywords: Cherry Clafoutis, French dessert, baked custard, cherry dessert, easy cherry recipe, summer dessert