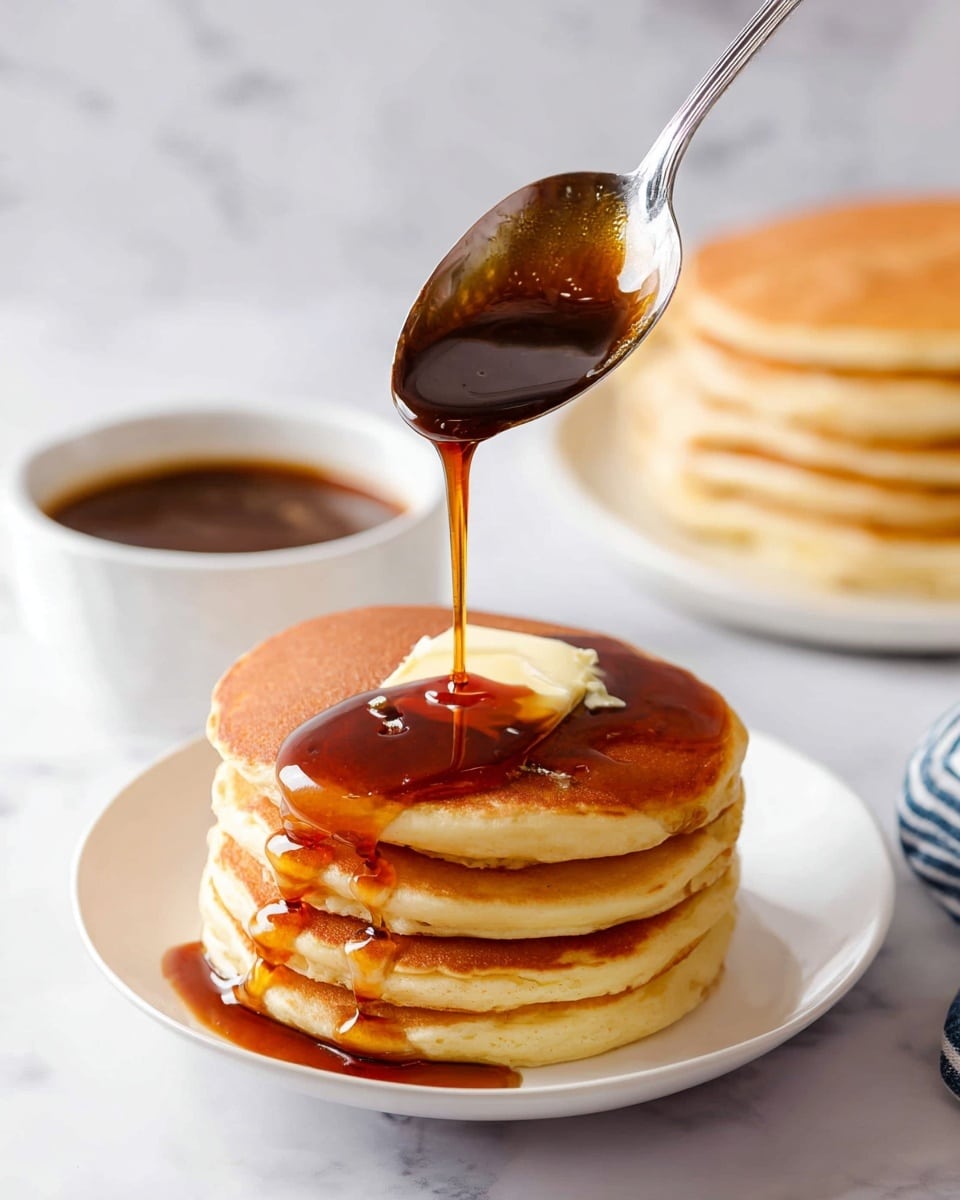
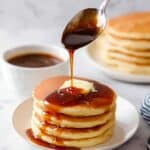
Homemade Pancake Syrup Recipe
There’s something magical about the smell of homemade pancake syrup simmering on the stove—it instantly transports me back to cozy weekend mornings. This Homemade Pancake Syrup Recipe is a total game-changer because it’s rich, buttery, and perfectly balanced between sweet and tangy thanks to the buttermilk. I honestly find it way better than any store-bought syrup, and the best part? You know exactly what’s in it!
Whether you’re outfitting a family breakfast spread or just want a little sweetness to drizzle over your pancakes or waffles, this recipe works beautifully. It’s simple, quick, and made with pantry staples, so you don’t have to think twice about pulling it together last minute. I promise once you try this Homemade Pancake Syrup Recipe, you’ll never go back.
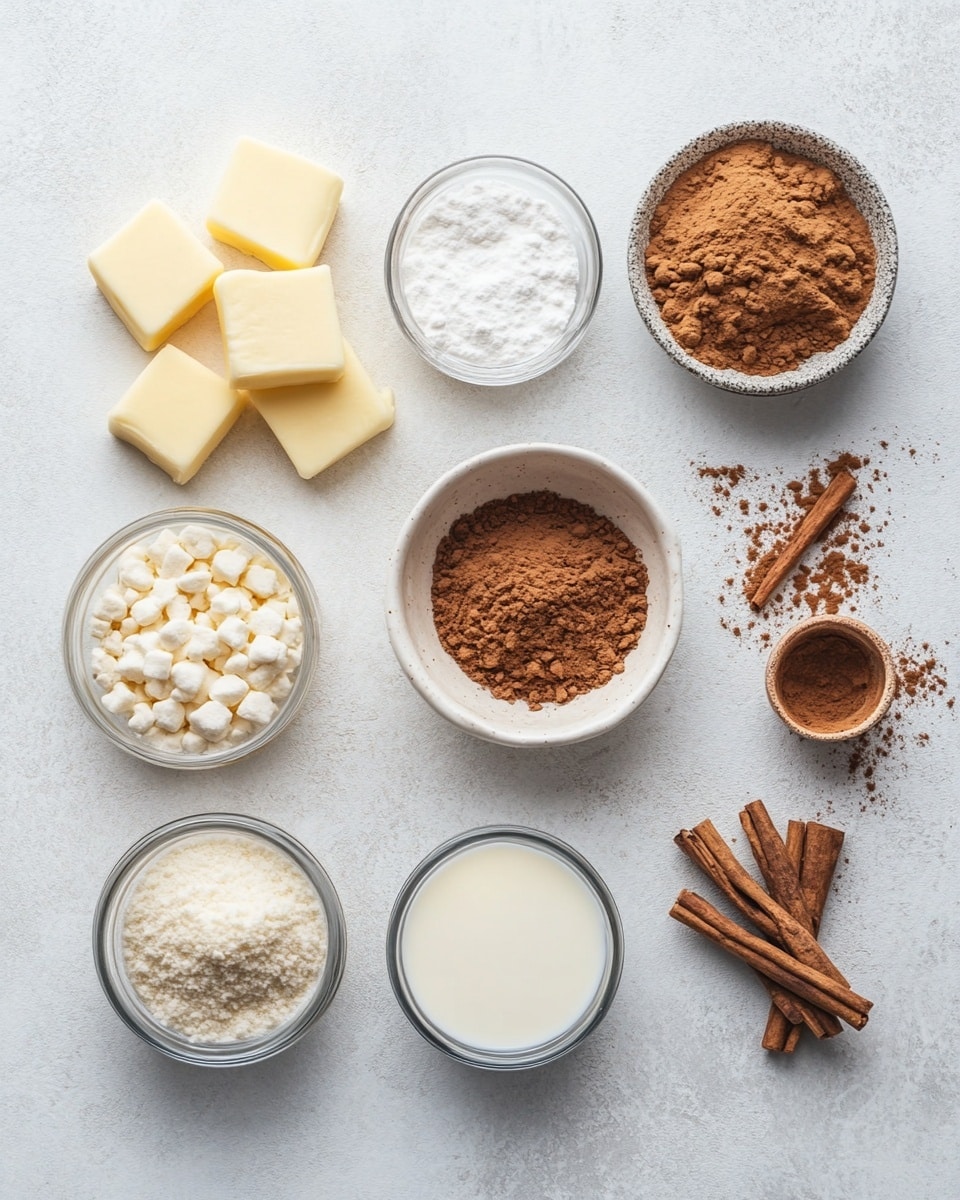
Ingredients You’ll Need
Each ingredient here plays an essential role in building that luscious syrup flavor and texture. When shopping for them, I always aim for quality since the flavors really shine through.
- Butter: Using real butter is a must—it adds richness and depth that margarine just can’t replicate.
- Granulated sugar: This gives the syrup its classic sweetness and helps with the syrup’s thickness.
- Light brown sugar: I love this for its molasses notes which add complexity and a little warmth.
- Buttermilk: It might surprise you, but buttermilk adds a subtle tang and richness that balances the sugary sweetness perfectly. If you don’t have buttermilk handy, you can easily make your own by adding a tablespoon of lemon juice or vinegar to a cup of milk.
- Vanilla extract: This aromatic boost gives the syrup that irresistible homey scent and flavor.
- Ground cinnamon: Just a hint spices up the syrup and adds cozy warmth without overpowering.
- Baking soda: This little addition might seem unusual, but it gives the syrup a light, foamy texture that’s just delightful.
Variations
I love how versatile this Homemade Pancake Syrup Recipe is. You can tweak it a bit depending on your mood and pantry. Personalizing it is half the fun!
- Maple Twist: Adding a tablespoon of real maple syrup intensifies the flavor and adds that authentic maple syrup taste I crave sometimes.
- Spiced Up: For fall vibes, I throw in a pinch of nutmeg or ground cloves along with the cinnamon — it smells heavenly!
- Vegan Version: Swap butter for coconut oil and use a plant-based milk with a dash of vinegar as your buttermilk substitute. It’s delicious, too.
- Extra Creamy: Stir in a splash of heavy cream at the end for an ultra-luxurious finish.
How to Make Homemade Pancake Syrup Recipe
Step 1: Melt and Mix Your Base Ingredients
Start by melting the butter slowly in a large saucepan over medium heat. Patience here is key—melting gently ensures it doesn’t burn. Once melted, add your granulated sugar, light brown sugar, buttermilk, vanilla extract, and ground cinnamon. Give everything a good whisk to fully combine; this helps the sugars dissolve and sets the stage for a smooth syrup.
Step 2: Bring to a Boil and Let It Simmer
Turn the heat up just enough to bring your mixture to a full rolling boil. When it hits that boil, reduce the heat to a simmer and whisk constantly for about 2 minutes. Stirring nonstop helps prevent the syrup from sticking or scorching on the bottom, so keep that whisk moving!
Step 3: Add Baking Soda for That Perfect Foam
Now whisk in your baking soda. The mixture will start to foam and rise, which is totally normal and part of what gives this syrup that irresistible texture. Keep whisking for about 30 seconds as it bubbles up. Then, remove the pan from the heat and let your syrup rest for a few minutes—it’ll thicken slightly and get ready to dazzle your pancakes.
How to Serve Homemade Pancake Syrup Recipe
Garnishes
I usually top my pancakes with a pat of butter and a few fresh berries when I serve this syrup—it adds a burst of color and a little fresh tartness to balance the sweetness. Sometimes I sprinkle chopped nuts on top for a nice crunch. These simple touches make the experience feel extra special.
Side Dishes
Besides classic pancakes or waffles, this syrup pairs beautifully with French toast or even drizzled over vanilla ice cream for a grown-up dessert treat. On lazy weekend mornings, I often add a side of crispy bacon or sausage—the sweet syrup is a perfect contrast to the savory flavors.
Creative Ways to Present
For special occasions, I like to serve this Homemade Pancake Syrup Recipe in cute mini glass jars or little pitchers at the table so everyone can drizzle at will. You could also warm it slightly and pour over baked apples or grilled peaches for a delightful brunch centerpiece. Presentation really makes the syrup feel like the star of the meal.
Make Ahead and Storage
Storing Leftovers
I keep leftovers in a sealed jar or airtight container in the fridge, where it keeps beautifully for several weeks. Just give it a quick stir before storing—that helps maintain its silky consistency. Having this syrup on hand means you can elevate any breakfast or snack in no time.
Freezing
While I haven’t had to freeze this syrup too often, it does freeze well in small containers or ice cube trays for portioning. When you want to use it, just thaw overnight in the fridge and warm gently. This is a great tip if you want to batch make for busy mornings ahead.
Reheating
I reheat leftover syrup in the microwave for just 15-20 seconds, stirring halfway through to make sure it warms evenly without getting hot or burnt. You can also warm it gently in a small saucepan over low heat. Either way, it’s quick and keeps that glorious smooth texture intact.
FAQs
-
Can I make this Homemade Pancake Syrup Recipe without buttermilk?
Absolutely! If you don’t have buttermilk, just mix 1 tablespoon of lemon juice or white vinegar with 1 cup of regular milk and let it sit for 5 minutes before using. This homemade substitute offers the tartness but keeps the syrup creamy and delicious.
-
Why is baking soda added to the syrup?
The baking soda reacts with the acidity from the buttermilk, creating a light foaming effect. This gives the syrup a lovely airy texture instead of it being dense or overly sticky, making it perfect for drizzling.
-
How long does homemade pancake syrup last?
When stored in an airtight container in the fridge, it will keep for around two to three weeks, sometimes even longer. Just give it a good stir and gentle warming before you use it again.
-
Can I make this syrup ahead of time for a big breakfast gathering?
Definitely! This recipe is perfect for making ahead. Store it in the fridge and just warm it up before serving. It’s a total time saver for busy mornings with a crowd.
-
Is this Homemade Pancake Syrup Recipe gluten-free?
Yes, all ingredients in this recipe are naturally gluten-free, making it a safe choice if you’re avoiding gluten.
Final Thoughts
I have to say, this Homemade Pancake Syrup Recipe has become a staple in my kitchen partly because it’s so simple but also because it tastes incredibly indulgent without a ton of fuss. There’s something special about pouring syrup you made yourself that makes breakfast feel like a celebration every time. So go ahead—give it a try and see how it transforms your pancakes or waffles. I promise you’ll love having this go-to recipe in your back pocket!
PrintHomemade Pancake Syrup Recipe
This homemade pancake syrup recipe is a rich, creamy, and flavorful alternative to store-bought syrups. Made with butter, sugars, buttermilk, and a touch of cinnamon and vanilla, it offers a unique, slightly tangy sweetness that perfectly complements your favorite pancakes and breakfast treats. Easy to make and perfect for breakfast or brunch, this syrup can be stored for weeks and reheated quickly.
- Prep Time: 5 minutes
- Cook Time: 5 minutes
- Total Time: 10 minutes
- Yield: Approximately 1 ¾ cups (serves 30) 1x
- Category: Sauce
- Method: Stovetop
- Cuisine: American
Ingredients
Ingredients
- 1/2 cup butter
- 1/2 cup granulated sugar
- 1/2 cup light brown sugar
- 1 cup buttermilk
- 1 Tablespoon vanilla extract
- 1/2 teaspoon ground cinnamon
- 1/2 teaspoon baking soda
Instructions
- Melt Butter and Combine Ingredients: In a large saucepan, melt the butter over medium heat. Once melted, add the granulated sugar, light brown sugar, buttermilk, vanilla extract, and ground cinnamon. Whisk thoroughly to combine all ingredients into a smooth mixture.
- Bring to Boil and Simmer: Bring the mixture to a full boil, then immediately reduce the heat to a simmer. Continue whisking constantly for 2 minutes, allowing the syrup to thicken slightly.
- Add Baking Soda and Foam Up: Whisk in the baking soda and cook for an additional 30 seconds while whisking constantly. The mixture will foam and rise as the baking soda reacts, creating a light texture.
- Rest and Cool: Remove the saucepan from heat and allow the syrup to rest for a few minutes. This will let the foam settle and the syrup to thicken to the perfect consistency before serving.
Notes
- The recipe yields about 1 ¾ cups of syrup, enough for approximately 30 servings.
- Store leftover syrup in an airtight container in the refrigerator for up to several weeks.
- Reheat refrigerated syrup in the microwave for a few seconds before serving to restore its pourable consistency.
Keywords: Homemade pancake syrup, pancake topping, breakfast syrup, easy syrup recipe, buttermilk syrup, cinnamon vanilla syrup