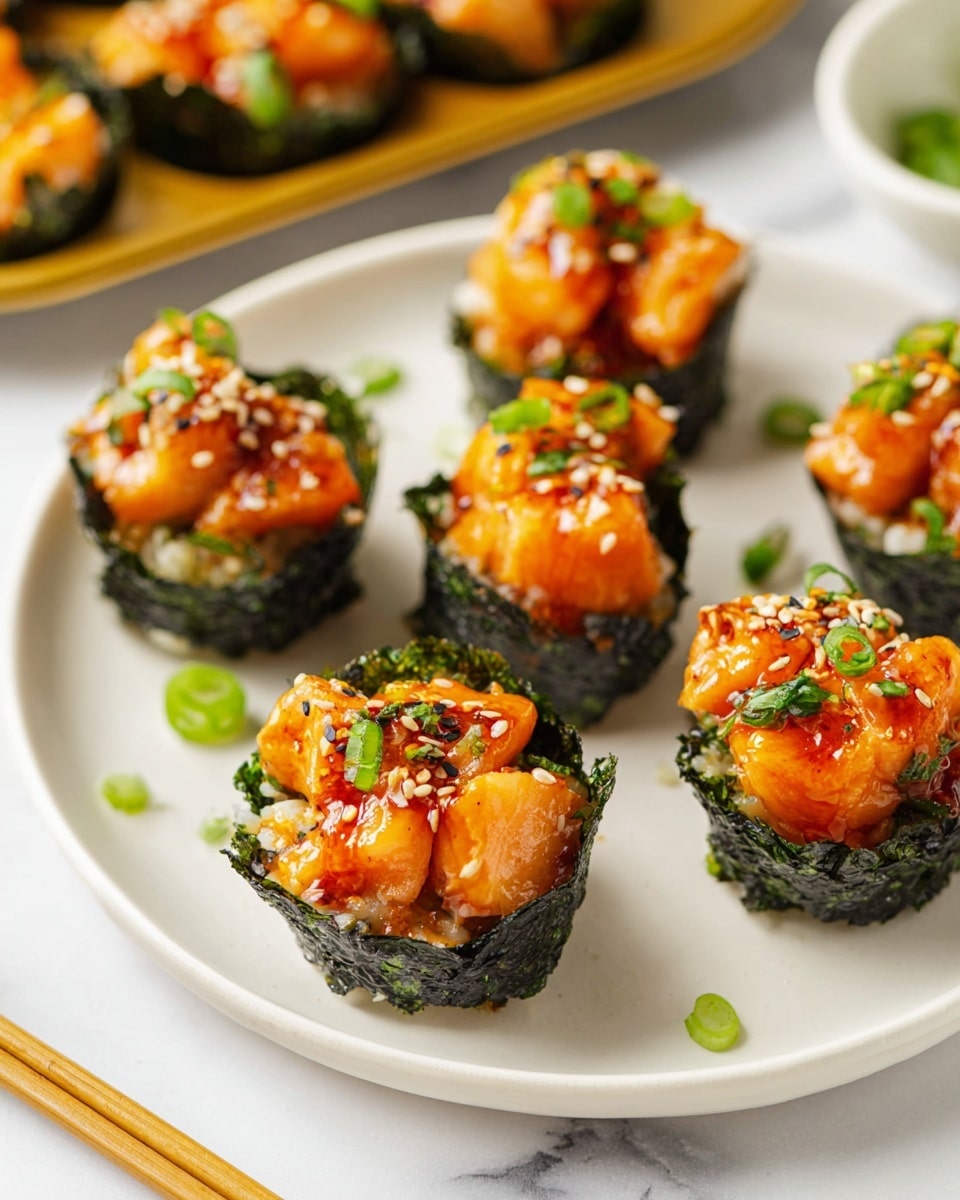
Easy Baked Salmon Sushi Cups Recipe
If you’ve ever wished sushi could be easier to make at home — but still impressive enough to share with friends — then you’re going to love this Easy Baked Salmon Sushi Cups Recipe. It takes all the fun elements of sushi, like that perfect balance of vinegared rice, savory salmon, and bold umami flavors, and turns them into adorable, handheld cups that bake up beautifully. No rolling mats or tricky knife skills required!
I first stumbled upon this recipe when I wanted something quick yet fancy for a casual get-together, and these sushi cups totally stole the show. They’re great for parties, weeknight dinners, or even meal prep since they hold up well. Plus, the baked salmon gets beautifully tender and slightly caramelized on top—making every bite irresistible. Trust me, you’ll want to keep this one in your weekly rotation.
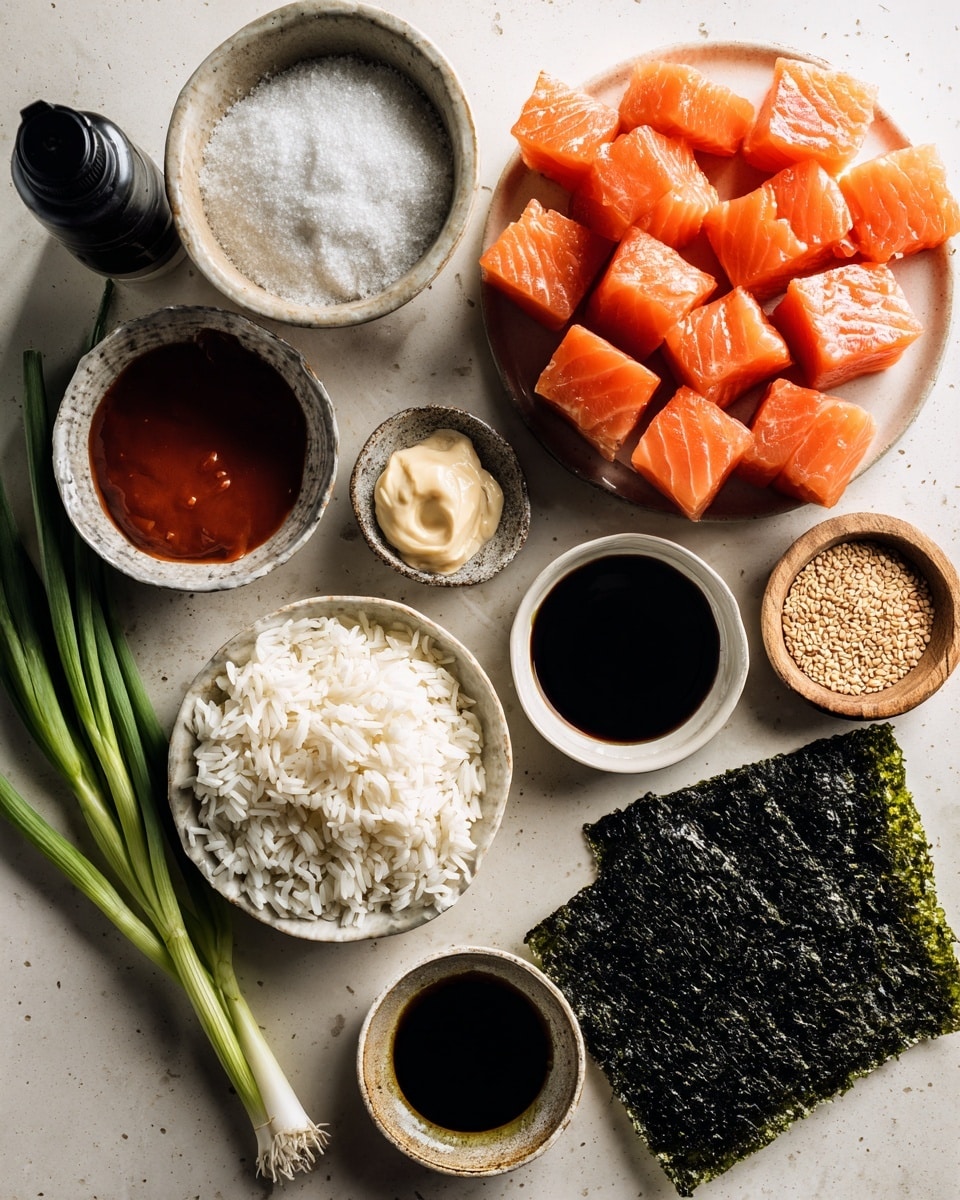
Ingredients You’ll Need
Each ingredient in this recipe plays a key role in marrying Japanese flavors with easy home cooking. Sushi rice gives you that classic sticky texture, while the salmon mixture packs in the rich, spicy, and creamy notes. Grab fresh ingredients, and you’ll be amazed at how simple it is to transform everyday staples into something special.
- Salmon: Choose fresh, sushi-grade if possible for the best texture and flavor.
- Light soy sauce: Adds a mild saltiness without overpowering the salmon’s natural taste.
- Kewpie mayo: This Japanese mayo is creamier and tangier than regular mayo, perfect for that signature sushi creaminess.
- Sriracha: Brings a kick of heat — adjust the amount if you prefer milder spice.
- Sesame oil: Just a touch to add that nutty depth that complements the salmon beautifully.
- Uncooked sushi rice: Essential for that sticky, chewable base that holds the cups together.
- Rice vinegar: Sweetened lightly with sugar to season the rice with that classic sushi tang.
- White sugar: Helps balance the acidity of the vinegar.
- Nori sheets: Cut into squares to line the muffin tins — they add umami and structure.
- Furikake: A Japanese seasoning blend to sprinkle on top, adding flavor and texture.
- Green onion: For fresh, crisp garnish that brightens up each bite.
- Cooking spray: Makes sure your sushi cups lift out easily from the muffin tin.
Variations
I’ve played around with this Easy Baked Salmon Sushi Cups Recipe quite a bit, and the best part is you can totally customize it to suit your taste or dietary needs. Feel free to experiment and make it your own — that’s when cooking gets truly fun!
- Spicy Tuna Variation: Swap cubed salmon for diced tuna and mix with the same mayo and sriracha combo. It’s just as delicious and feels like a sushi bar upgrade at home.
- Vegetarian Version: Leave out the fish and add sautéed shiitake mushrooms or avocado slices for a fresh twist that’s still super satisfying.
- Gluten-Free Adjustment: Use tamari instead of light soy sauce to keep it gluten-friendly without losing flavor.
- Crunch Factor: Toss in some toasted sesame seeds or crushed tempura flakes on top before baking for a fun texture contrast.
How to Make Easy Baked Salmon Sushi Cups Recipe
Step 1: Perfect Your Sushi Rice
Begin by cooking your sushi rice according to package instructions — don’t skip rinsing the rice a few times beforehand to remove excess starch; this keeps it from getting too gummy. While the rice’s finishing, microwave your rice vinegar and sugar mixture for about 30 seconds until the sugar dissolves, then gently fold it into the warm rice. This mix gives that authentic tangy sweetness you expect from sushi rice. Set it aside to cool slightly while you prep the salmon.
Step 2: Mix the Flavor-Packed Salmon
In a bowl, combine your cubed salmon with light soy sauce, Kewpie mayo, sriracha, and sesame oil. I like to use a spoon to fold the ingredients in rather than stir vigorously — this keeps the salmon pieces intact. The mayo and sriracha create this rich, spicy glaze that’s the heart of these sushi cups. Once combined, set it aside and preheat your oven to 400℉.
Step 3: Prep the Muffin Tin and Nori
Cut your nori sheets into about 4 rectangles or squares each, making sure they’ll fit snuggly into your muffin tin cups. Lightly grease your muffin tin with cooking spray — this step is a lifesaver to prevent sticking. Press each nori piece gently into a muffin cup to form a little bowl. Keep the nori’s shiny side facing out for a pretty finish.
Step 4: Assemble and Bake Your Sushi Cups
Begin layering your sushi cups by adding a spoonful of seasoned sushi rice onto the nori, pressing lightly into the muffin cup to form a solid base. Then, add a generous layer of the salmon mixture on top. Don’t overload — you want them to bake evenly and hold their shape. Bake at 400℉ for about 15 minutes until the salmon is cooked through and you see a slight golden caramelization on top.
Step 5: Garnish and Serve
Let these sushi cups cool for a few minutes before gently removing them from the tin. Drizzle extra sriracha or a spicy mayo on top if you’re feeling adventurous — I promise it amps up the flavor. Sprinkle with furikake and chopped green onions for that vibrant, authentic finish. Now, you’re ready to impress!
How to Serve Easy Baked Salmon Sushi Cups Recipe
Garnishes
Whenever I make these sushi cups, furikake is an absolute must — it adds that salty-crunchy umami punch layered with sesame seeds, seaweed, and sometimes dried fish flakes. I also love a sprinkle of finely chopped green onions because they add freshness and a little bite that contrasts nicely with the creaminess of the salmon. If I’m in the mood, a little fresh pickled ginger on the side brightens everything up.
Side Dishes
I often serve these sushi cups with a simple cucumber salad tossed in rice vinegar and a pinch of sugar to keep things light. Another favorite is edamame sprinkled with sea salt—it’s classic sushi bar fare that complements the savory cups perfectly. For a heartier meal, miso soup always rounds out the flavors beautifully.
Creative Ways to Present
For entertaining, I like arranging the Easy Baked Salmon Sushi Cups Recipe on a long wooden platter with slices of lemon or lime zest tucked between each cup. You can also serve them in small individual bamboo baskets or on square plates with dipping sauces on the side for a chic, restaurant-style vibe. Tiny edible flowers or fresh herbs like shiso leaves can add unexpected elegance, too!
Make Ahead and Storage
Storing Leftovers
When I have leftovers, I pop the sushi cups into an airtight container and keep them in the fridge for up to 2 days. Because of the baked salmon and seasoned rice, they hold up really well without getting soggy. Just make sure they cool completely before sealing the container to avoid condensation.
Freezing
Freezing isn’t my go-to for this recipe since the rice texture can change, but if you need to, flash freeze the cups on a tray first, then transfer to a freezer-safe bag. They can last about a month. To thaw, leave them in the fridge overnight, then reheat gently.
Reheating
I like reheating the sushi cups in a 350℉ oven for 8-10 minutes so the salmon warms through without drying out, and the rice texture stays intact. Microwaving is faster but can make the nori soggy, so I save that for quick snacks. A quick broil at the end of reheating can help toast the salmon’s top layer if you want to revive the baked look.
FAQs
-
Can I use other types of fish for Easy Baked Salmon Sushi Cups Recipe?
Absolutely! While salmon is wonderful for its rich flavor and texture, you can substitute tuna or even cooked shrimp depending on your preference. Just make sure any raw fish you use is sushi-grade for safety and best taste.
-
Is it necessary to bake the sushi cups, or can they be served raw?
Baking the salmon sushi cups cooks the fish through and melds the flavors nicely, especially with the mayo and sriracha topping. If you prefer raw fish, you could skip baking, but I recommend making sure your salmon is very fresh and adjusting seasoning accordingly. The baking also crisps the nori slightly, adding texture.
-
How do I prevent the sushi rice from sticking too much to the muffin tin?
Lightly greasing your muffin tin with cooking spray before adding the nori and rice is key. This prevents sticking without changing the flavor. Also, avoid overpacking the rice — gently pressing it down is enough to form a good base.
-
Can I prepare the salmon mixture in advance?
Yes, you can prepare the salmon mixture a few hours ahead and keep it refrigerated. Just give it a gentle stir before assembling the sushi cups. This prep step actually makes day-of assembly quicker and less stressful.
-
What if I don’t have Kewpie mayo?
You can use regular mayonnaise as a substitute, though the flavor won’t be quite as rich or tangy. Mixing regular mayo with a tiny bit of rice vinegar or lemon juice can approximate that signature tang. But if you love Japanese flavors, I highly recommend picking up a bottle of Kewpie for this and other recipes!
Final Thoughts
This Easy Baked Salmon Sushi Cups Recipe has quickly become one of my favorite kitchen go-tos because it’s reliable, tasty, and fun to make with others. There’s something so satisfying about serving sushi in a new, approachable format — whether you’re feeding family, impressing friends, or just treating yourself. Once you try it, I have a feeling it’ll become a beloved staple in your meal ideas too. Go ahead, give it a whirl—you’ll be amazed at how simple and delicious making sushi at home can be!
PrintEasy Baked Salmon Sushi Cups Recipe

These Easy Baked Salmon Sushi Cups are a fun and delicious twist on traditional sushi, featuring seasoned salmon and sushi rice baked in nori-lined muffin tins. Perfect as a party appetizer or a unique dinner option, they combine the creaminess of Kewpie mayo, the heat of sriracha, and the nutty flavor of sesame oil for a flavorful bite-sized treat.
- Prep Time: 15 minutes
- Cook Time: 15 minutes
- Total Time: 30 minutes
- Yield: 12 sushi cups 1x
- Category: Appetizer
- Method: Baking
- Cuisine: Japanese
Ingredients
Sushi Rice
- 1 ½ cup uncooked sushi rice
- 1 tbsp rice vinegar
- 2 tsp white sugar
Salmon Mixture
- 1 lb salmon, cubed
- 1 tbsp light soy sauce
- 1 tbsp Kewpie Mayo
- 1 tbsp Sriracha
- 1 tsp sesame oil
Other Ingredients
- 3 large nori sheets
- Furikake, for garnish
- 1 green onion, chopped for garnish
- Cooking spray
Instructions
- Cook Rice: Cook the sushi rice according to the package instructions, ensuring it is fluffy and sticky enough to form cups.
- Prepare Vinegar Mixture: In a microwave-safe bowl, combine rice vinegar and sugar. Microwave for about 30 seconds until the sugar dissolves completely. Pour this mixture over the cooked rice and gently mix to combine. Set aside to cool.
- Preheat Oven: Preheat your oven to 400℉ (204℃) to get ready for baking the sushi cups.
- Mix Salmon: In a bowl, combine the cubed salmon with light soy sauce, Kewpie mayo, sriracha, and sesame oil. Stir until all ingredients are well incorporated. Set aside.
- Prepare Nori Sheets: Cut the nori sheets into 4 rectangles or squares large enough to fit into muffin tin cups.
- Assemble Sushi Cups: Lightly grease a muffin tin with cooking spray. Place one nori square into each muffin cup. Add a spoonful of the sushi rice onto the center of each nori piece and press it down gently to form a base. Then add a layer of the salmon mixture on top of the rice, filling each cup.
- Bake: Place the muffin tin in the preheated oven and bake at 400℉ for 15 minutes, or until the salmon is cooked through and the tops are slightly golden brown.
- Garnish and Serve: Remove the sushi cups from the oven and let them cool for a few minutes. Drizzle more sriracha or spicy mayo on top if desired. Garnish with furikake and chopped green onions and serve immediately.
Notes
- You can adjust the level of spiciness by varying the amount of sriracha.
- If you don’t have Kewpie mayo, regular mayonnaise mixed with a little rice vinegar can be a substitute.
- If you want a crispier nori, broil the sushi cups for an additional 1-2 minutes after baking, but watch carefully to avoid burning.
- Leftovers can be stored in the refrigerator for up to 2 days but are best eaten fresh.
- Try adding avocado slices or cucumber inside the cups for extra freshness and texture.
Keywords: baked salmon sushi cups, sushi cups recipe, salmon sushi bites, easy sushi recipe, baked sushi, party appetizers