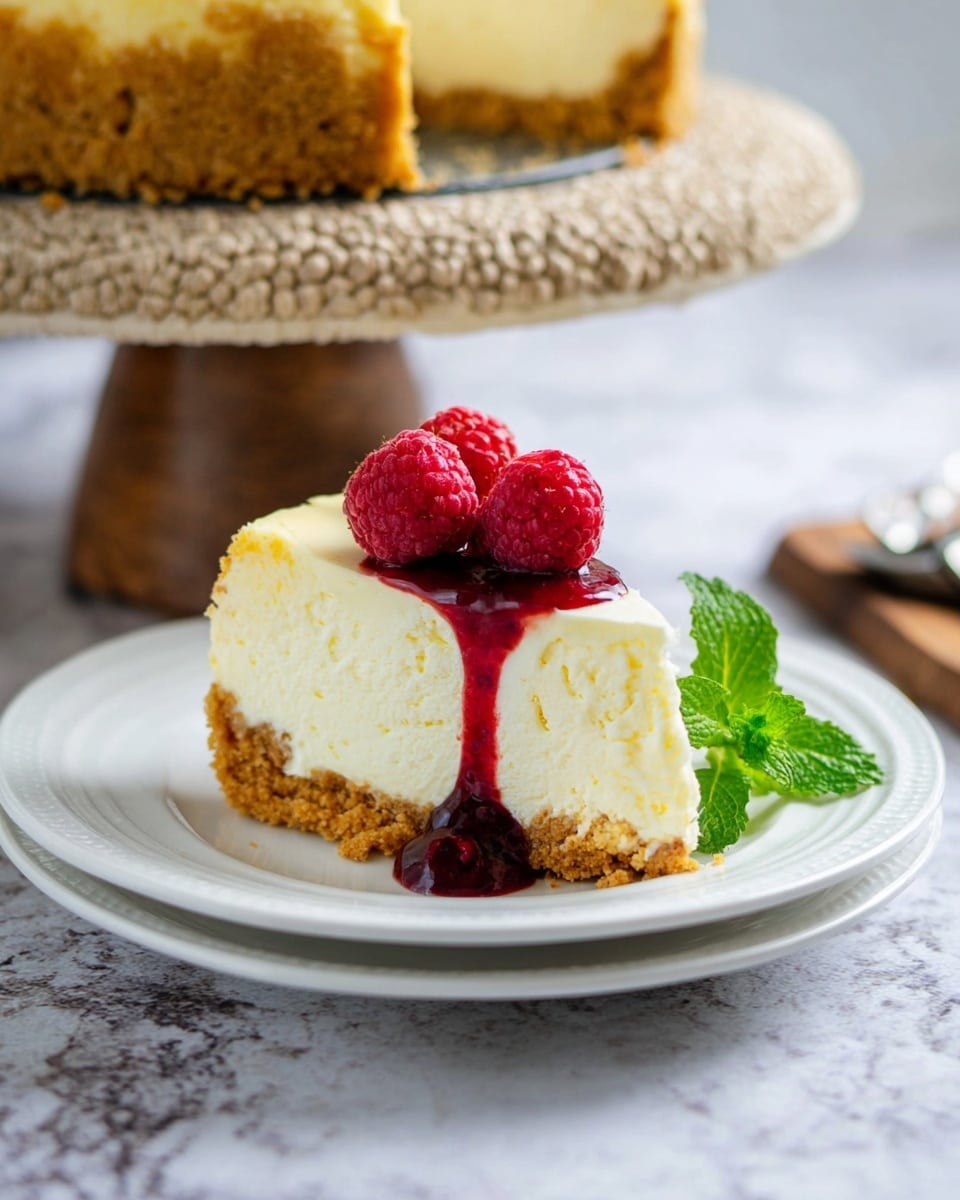
Classic Cheesecake Recipe
I have to say, this Classic Cheesecake Recipe is one of my all-time favorite desserts to make and share. It’s rich, creamy, and has that perfect balance of sweetness with a tangy hint from the sour cream and lemon juice. Whether you’re making it for a special celebration or just because you’re craving something indulgent, this cheesecake always hits the spot.
What I love most about this recipe is how approachable it feels despite delivering bakery-quality results. From the buttery graham cracker crust to the smooth, luscious filling, it’s a reliable recipe that works beautifully every time. Trust me, once you try this Classic Cheesecake Recipe, you’ll want to keep it in your baking rotation forever.
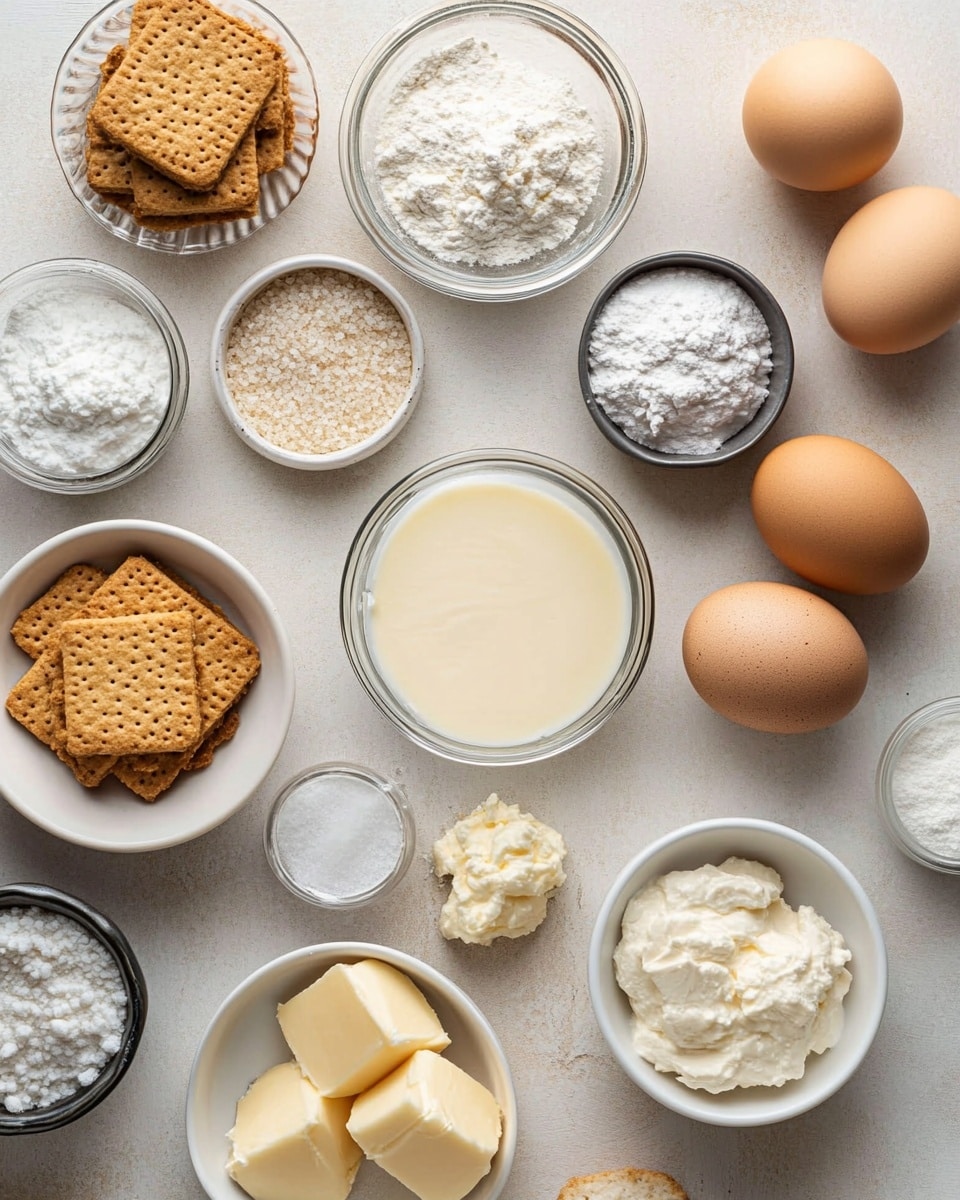
Ingredients You’ll Need
Every ingredient in this Classic Cheesecake Recipe plays a key role, coming together to create that iconic creamy texture and buttery crust you expect. I always recommend using quality cream cheese and fresh lemon juice for the best flavor.
- Graham cracker crumbs: Use plain or honey graham crackers for a slightly sweet, crispy base.
- Granulated sugar: This sweetens both the crust and the filling perfectly without overpowering.
- Butter: Melted butter binds the crust crumbs together, so don’t skip it.
- Kosher salt: Just a pinch enhances all the flavors.
- Cream cheese: Use full-fat, block-style cream cheese at room temperature for a smooth batter.
- Vanilla extract: Adds a lovely aroma and depth to the cheesecake filling.
- Sour cream: This brings a slight tang and creaminess, making the texture incomparable.
- Lemon juice: Freshly squeezed is best—it brightens the whole cheesecake beautifully.
- Eggs: Room temperature eggs help bind the filling while keeping it silky and firm.
Variations
One of the joys of my Classic Cheesecake Recipe is how easy it is to customize—so feel free to make it your own! I’ve played around with toppings and crusts depending on the season or occasion.
- Berry Swirl: I love swirling in fresh raspberry or blueberry puree into the batter before baking. It adds a vibrant color and fresh flavor that pairs perfectly with the creamy base.
- Chocolate Crust: Swap the graham crackers for chocolate cookie crumbs for a fudgy twist. It’s a crowd-pleaser, especially with chocolate lovers.
- Gluten-Free: Use gluten-free graham cracker crumbs or almond flour for the crust. The cheesecake’s texture remains just as dreamy!
- Lemon Cheesecake: Add extra lemon zest for a bright, citrus-forward version that’s refreshing on warm days.
How to Make Classic Cheesecake Recipe
Step 1: Create the Perfect Graham Cracker Crust
First things first, preheat your oven to 350°F and adjust your rack to the lower middle position to make space for a water bath later. Take your graham crackers and pulse them in a food processor until you get fine crumbs. If you don’t have one, no worries—throw them in a ziplock bag and crush with a rolling pin until they resemble sandy crumbs. Then mix the crumbs with granulated sugar and melted butter to form that perfect crust mixture.
Press the crumbs firmly into the bottom and slightly up the sides of a 9 or 10 inch springform pan. I find using the bottom of a measuring cup helps pack it down evenly. Pre-bake the crust for 8 to 10 minutes until it starts to set and smells toasty. This step adds a wonderful crunch and stops the crust from getting soggy once the filling goes in.
Step 2: Mix the Creamy Filling Just Right
After the crust is done, lower the oven temperature to 325°F. Use a mixer fitted with a paddle attachment or a handheld mixer to beat together the cream cheese and sugar on medium-high speed until smooth and creamy—about 2 minutes. This smoothing step is crucial because lumps in the cream cheese can cause uneven texture in the final cheesecake.
Next, blend in the sour cream, vanilla extract, and fresh lemon juice until combined. On medium-low speed, add the eggs one at a time, mixing gently after each addition. The key here is not to overmix—stop as soon as each egg is incorporated to avoid adding too much air, which can cause cracks during baking.
Step 3: Bake in a Water Bath for Silky Smooth Results
Before pouring the filling into your crust, wrap the outside of the springform pan with heavy-duty foil to prevent leaks. Pour boiling water into a large roasting pan so it’s about an inch deep—this will be your water bath. Carefully pour the cheesecake batter over the crust, smoothing the top with a spatula.
Place the wrapped springform pan inside the roasting pan, and gently pour hot water around it. Pop it in the oven and bake for 55 to 70 minutes. The cheesecake should be mostly set but still jiggle a little in the center when done. This water bath method is a game-changer—it creates steam that helps the cheesecake bake evenly and stay creamy.
After baking, turn off the oven and crack the door open slightly. Leave the cheesecake in the water bath to cool slowly for about an hour; this step helps avoid cracks and improves texture.
Step 4: Chill and Serve
Once the cheesecake has cooled from the water bath, remove it from the pan and let it cool completely at room temperature. Then pop it in the fridge for at least four hours, but overnight is best if you can wait. This chilling time lets the flavors deepen and the texture firm up to that classic cheesecake consistency.
To serve, run a knife around the edge to loosen the cheesecake from the pan’s rim, then remove the springform ring. Cut with a clean sharp knife for neat slices. From there, you’re ready to enjoy or dress it up with your favorite toppings!
How to Serve Classic Cheesecake Recipe
Garnishes
I’m a big fan of fresh berries as a simple, colorful garnish—they add a bit of brightness and a fresh contrast to the creamy cheesecake. Sometimes I drizzle homemade raspberry sauce or a tangy lemon curd on top to elevate it. Whipped cream is always a classic, silky addition that never disappoints.
Side Dishes
Pairing cheesecake with a light, refreshing side helps balance the richness. A crisp mixed green salad with a citrus vinaigrette or a simple fruit salad works great if you’re serving it after a big meal. Coffee or a dessert wine is also a lovely way to complement the flavors.
Creative Ways to Present
For festive occasions, I like to decorate the edges with piped whipped cream rosettes and fresh edible flowers when I can get them. Another fun idea is serving individual cheesecakes in small mason jars with layered fruit or chocolate toppings—perfect for parties and easy to grab.
Make Ahead and Storage
Storing Leftovers
Cheesecake leftovers? Absolutely delicious! I keep mine tightly covered with plastic wrap and store it in the fridge, where it stays fresh for up to five days. It’s important to keep it sealed well to prevent the cheesecake from absorbing fridge odors.
Freezing
If you want to freeze this Classic Cheesecake Recipe, it freezes beautifully. After chilling the cheesecake overnight, slice it into portions and wrap each piece tightly in plastic wrap and then foil or a freezer-safe container. It keeps well for up to two months. When you’re ready to enjoy, thaw overnight in the fridge for the best texture.
Reheating
Cheesecake is best served chilled, so I usually eat leftovers straight from the fridge. If you prefer it a little less cold, take it out about 15 minutes before serving. I don’t recommend reheating in a microwave because it can change the texture and make it grainy.
FAQs
-
Can I make this Classic Cheesecake Recipe without a springform pan?
While I highly recommend a springform pan for easy removal and the classic shape, you can use a regular cake pan lined with parchment paper. Just be sure to line the sides well and gently loosen the cheesecake before serving. Keep in mind, the water bath may be trickier to manage without leaks, so wrapping the pan tightly with foil is crucial.
-
How do I prevent cracks on my cheesecake?
The biggest factors to prevent cracking are mixing the batter gently without overbeating, baking in a water bath, and allowing the cheesecake to cool gradually in a warm oven with the door slightly open. Also, make sure your cream cheese and eggs are at room temperature before mixing to create a smooth batter.
-
Can I use low-fat cream cheese or sour cream?
For the creamiest, richest cheesecake, full-fat cream cheese and sour cream are best. Low-fat versions tend to affect the texture and may cause the cheesecake to be less smooth or firm. If you’re watching calories, you can try lighter versions but expect a slightly different result.
-
How long can I store Classic Cheesecake Recipe in the fridge?
Stored in an airtight container or well-wrapped, this cheesecake will stay fresh in the fridge for up to 5 days. After that, the texture and flavor may start to degrade, so it’s best enjoyed sooner rather than later.
-
Is it necessary to bake the crust before adding the filling?
Baking the crust for about 8 to 10 minutes helps it set and become crisp, which keeps it from getting soggy once the cheesecake fills it. It also brings out a nutty, toasty flavor that complements the creamy filling. I wouldn’t skip this step for best results.
Final Thoughts
This Classic Cheesecake Recipe holds a special place in my kitchen because it’s a dessert that’s both comforting and impressive. It’s the kind of recipe I love to make when friends drop by or when I want to turn an ordinary day into a celebration. Give it a try—you’ll enjoy every creamy, dreamy bite and the compliments that come with it.
PrintClassic Cheesecake Recipe

This classic cheesecake recipe features a smooth, creamy filling atop a buttery graham cracker crust. Baked in a water bath, this cheesecake is rich yet delicate, with a hint of lemon brightness and a velvety texture that melts in your mouth. Perfect for any occasion, it can be served plain or with your favorite toppings.
- Prep Time: 20 minutes
- Cook Time: 1 hour 15 minutes
- Total Time: 9 hours 35 minutes
- Yield: 12 servings 1x
- Category: Dessert
- Method: Baking
- Cuisine: American
Ingredients
For the Graham Cracker Crust
- 2 cups graham cracker crumbs
- ¼ cup granulated sugar
- 7 tablespoons butter – melted
- Pinch kosher salt
For the Cheesecake Filling
- 4 – 8 ounce blocks cream cheese – room temperature
- 1 cup granulated sugar
- 1 teaspoon vanilla extract
- 1 cup sour cream – room temperature
- 2 teaspoons fresh squeezed lemon juice
- 3 large eggs – room temperature
Instructions
- Making the Graham Cracker Crust: Adjust the oven rack to the lower middle position to fit a roasting pan and preheat oven to 350°F. Use a food processor to pulse graham crackers into fine crumbs, then add sugar and melted butter and pulse until sandy textured. Press this mixture firmly into the bottom and up the sides of a 9 or 10-inch springform pan, optionally lined with parchment or foil for easier removal.
- Pre-baking the Crust: Bake the crust for 8 to 10 minutes, then remove it and let it cool slightly on a rack while you prepare the filling. Reduce oven temperature to 325°F.
- Preparing the Cheesecake Filling: Using a mixer fitted with a paddle attachment, beat cream cheese and sugar on medium-high speed for about 2 minutes until smooth and creamy. Add sour cream, vanilla extract, and lemon juice, mixing until combined. On medium-low speed, add eggs one at a time, incorporating each fully before adding the next, taking care not to overmix to prevent cracking.
- Preparing the Water Bath & Baking: Boil water in a kettle or pot to have enough for a 1-inch depth in a roasting pan. Wrap the springform pan tightly with heavy-duty aluminum foil to prevent leaks. Pour the cheesecake batter evenly over the crust and smooth the top. Place the springform pan into the roasting pan and carefully pour the hot water into the roasting pan to reach 1 inch high around the cheesecake pan.
- Bake the Cheesecake: Bake for 55 to 70 minutes until the center is almost set but still jiggles slightly when shaken. Turn the oven off and crack the door open slightly. Let the cheesecake cool in the water bath and oven for 1 hour.
- Cooling and Chilling: Remove the cheesecake from the oven and water bath. Cool completely on the counter, then refrigerate for at least 4 hours or overnight to set fully.
- Serving: Run a knife around the edges to loosen the cheesecake from the springform pan rim, then remove the rim. Slice the cheesecake with a clean sharp knife and serve plain or with preferred toppings.
- Storage: Cover leftovers and store in the refrigerator for up to 5 days.
Notes
- Room temperature ingredients help to achieve a smooth and creamy filling consistency.
- Wrapping the springform pan with foil is essential to prevent water from leaking into the cheesecake during the water bath baking.
- Do not overmix the batter once eggs are added to reduce the risk of cracking.
- The water bath ensures gentle, even cooking for the cheesecake, preventing drying and cracking.
- Allowing the cheesecake to cool gradually inside the oven helps avoid temperature shock which can cause cracking.
Keywords: classic cheesecake, graham cracker crust, baked cheesecake, creamy cheesecake, dessert, water bath cheesecake