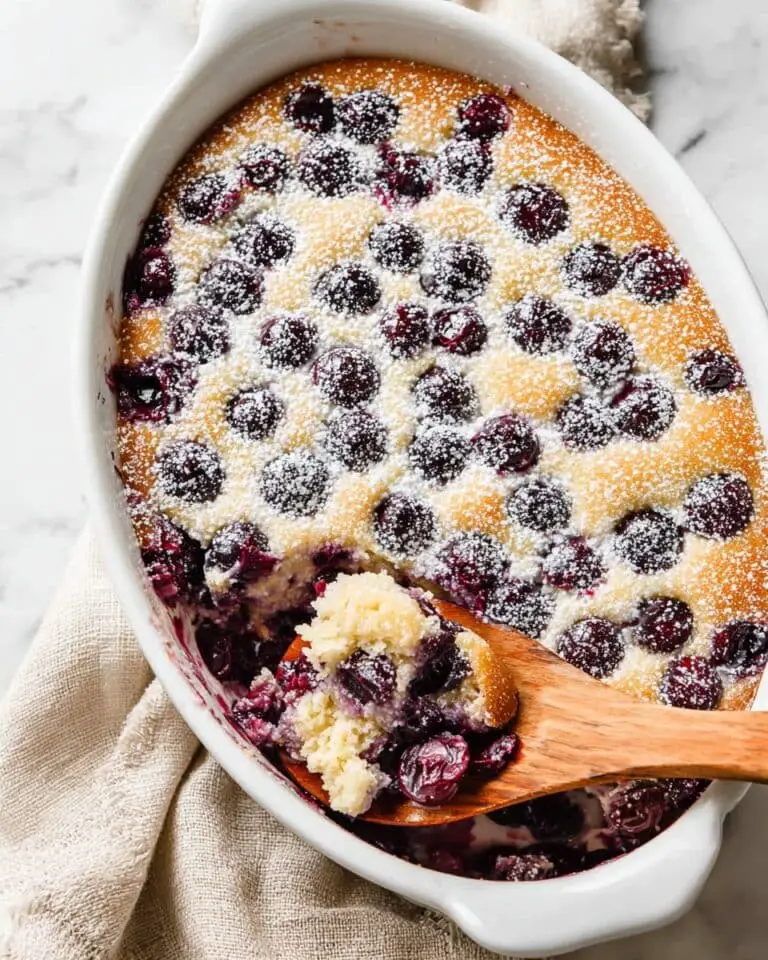
Deliciously Flaky Cheese Danish Recipe for Perfect Mornings Recipe
You know those mornings when you want something extra special but still cozy and comforting? This Deliciously Flaky Cheese Danish Recipe for Perfect Mornings Recipe is exactly what you need to start your day with a little touch of bakery magic right at home. The flaky layers are buttery and tender, while the creamy cheese filling brings a perfect balance of sweet and tangy that I find absolutely irresistible.
What’s fantastic about this recipe is how it works equally well for a lazy weekend brunch or a quick treat to impress guests. I love making a batch on a Saturday morning—it fills the house with that amazing buttery aroma—and the best part is you don’t have to be a professional baker to pull it off. Trust me, once you nail this Deliciously Flaky Cheese Danish Recipe for Perfect Mornings Recipe, it quickly becomes a go-to for breakfast celebrations.
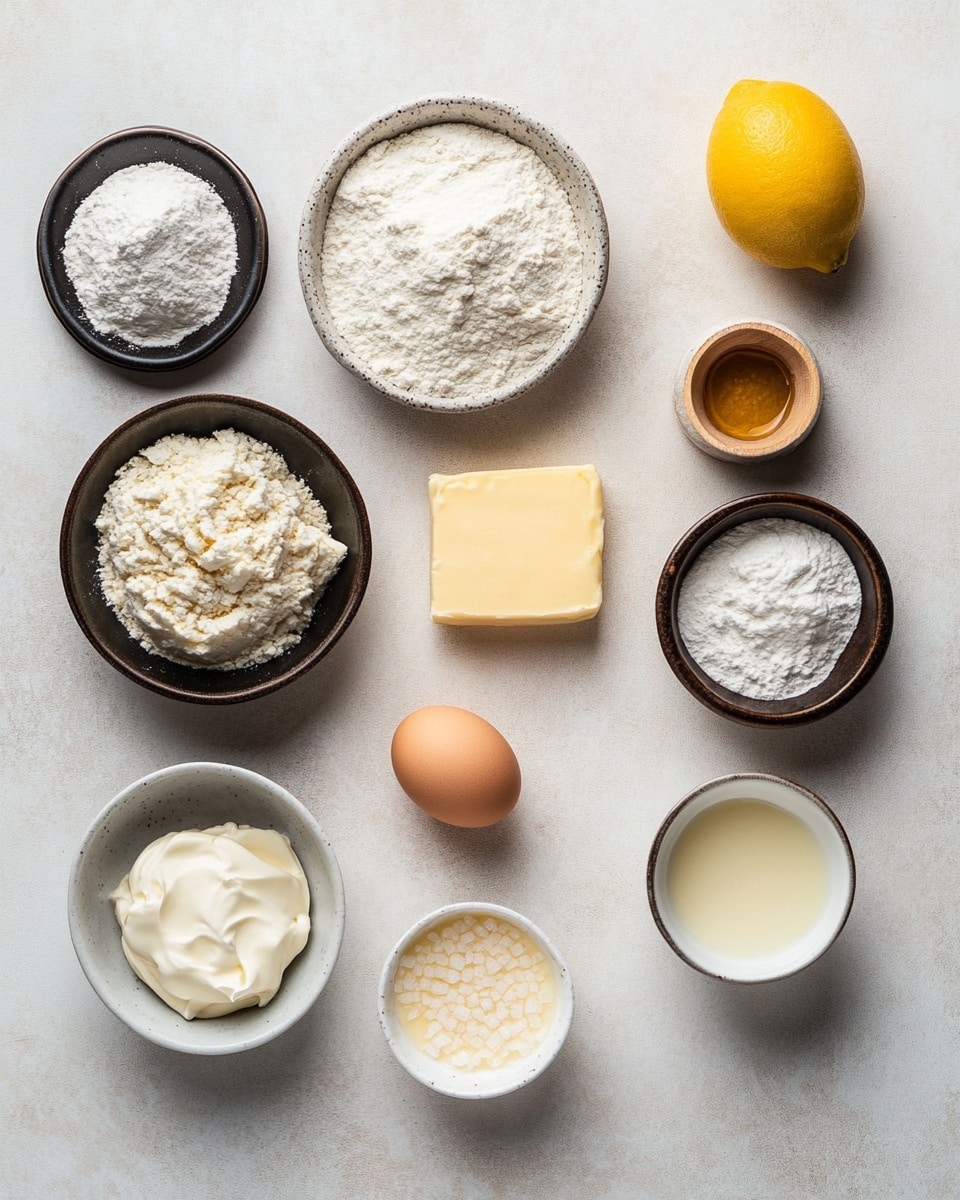
Ingredients You’ll Need
The ingredients here come together beautifully to create the rich, flaky dough and luscious cheese filling. When you shop for these, try to pick the freshest butter and good-quality cream cheese—it really makes a noticeable difference in flavor and texture.
- All-purpose flour: Provides structure for flaky dough without being too dense.
- Granulated sugar: Sweetens both dough and filling just enough to balance flavors.
- Salt: Enhances flavor and balances the sweetness in the recipe.
- Active dry yeast: Creates that light, airy texture in the dough—make sure your yeast is fresh and active.
- Whole milk (warm): Activates the yeast and keeps the dough tender.
- Egg (room temperature): Adds richness and helps bind the dough.
- Cold unsalted butter: The key to layering flaky pastry—cold butter creates all those magical layers!
- Cream cheese (softened): The star of the filling—smooth and creamy with a delicious tang.
- Vanilla extract: Adds warmth and depth to the cheese filling and glaze.
- Lemon zest (optional): Brightens the filling with a fresh citrus kick.
- Powdered sugar: For the icing glaze to add sweetness and shine.
- Milk or lemon juice (for glaze): Adjusts glaze consistency and adds subtle flavor depending on your mood.
- Optional toppings like fruit preserves, fresh berries, or sliced almonds: For that extra layer of flavor and prettiness.
Variations
I love how this recipe invites you to play around with flavors. Feel free to tweak the fillings or toppings to suit your mood—you’ll find your own favorite combo in no time.
- Ricotta or Mascarpone filling: I switched to ricotta once for a lighter, less tangy filling and loved the creamier texture it gave. Perfect if you’re looking for something gentler on the palate.
- Berry jam or fruit preserves: Adding raspberry or apricot jam on top adds a pop of color and tangy sweetness that pairs beautifully with the cheese.
- Almond topping: Toasted sliced almonds on top add a delightful crunch and nutty flavor—my go-to when hosting brunch guests.
- Gluten-free adaptation: While I haven’t tried it myself, you can experiment with gluten-free flour blends—just be mindful of the dough’s elasticity.
How to Make Deliciously Flaky Cheese Danish Recipe for Perfect Mornings Recipe
Step 1: Make the Dough—Start with Friendly Yeast Activation
Start by mixing the flour, sugar, and salt in a big bowl. Then, in a separate small bowl, combine warm milk with the yeast and let it sit until it gets foamy—this signals the yeast is alive and kicking. I like to give it around 5–10 minutes, but if it doesn’t foam, it might be time to grab fresh yeast. Next, stir the egg into your yeast mix and add everything to the dry ingredients. Knead the dough for about 6–8 minutes until it’s smooth and elastic. Cover it up and pop it in the fridge for half an hour—this rest period is gold for your dough’s texture.
Step 2: Prepare the Butter Block—The Secret to Flakiness
While the dough chills, take your cold butter and sandwich it between parchment paper. Then pound and shape it into roughly an 8-inch square. You want it firm but still pliable—that way, it will integrate perfectly with the dough layers without melting away too soon. Stick this back in the fridge while your dough rests.
Step 3: Laminate the Dough—Folding Magic in Action
Roll your dough out into a 16-inch square on a lightly floured surface. Place the butter block right in the center, rotated like a diamond, and fold each corner of the dough over to encase the butter completely. Then, roll the package gently into a long 8×24-inch rectangle. Fold it into thirds, like folding a letter. Chill for 30 minutes to keep everything cool. You’ll repeat this rolling, folding, and chilling two more times. It’s a bit of a process, but these folds create those perfectly flaky layers that make this Danish stand out.
Step 4: Shape the Danish—Fill and Fold with Care
Once your dough has had its final chill, roll it out to a 1/4-inch thickness. Cut it into 4-inch squares—you can make classic diamond shapes or get creative. Place about a tablespoon of the cream cheese filling in the center of each square—don’t overfill or it’ll spill during baking. Fold the corners inward or form a little envelope—whatever shapes make you happy! Add a dollop of fruit preserves or a few berries on top if you’re using them.
Step 5: Proof and Bake—Patience Pays Off
Place your shaped Danishes on parchment-lined sheets and let them rise at room temperature for about an hour. You’ll notice the dough puffing slightly—that means the yeast is doing its magic. Preheat your oven to 390°F (200°C). Just before baking, brush the tops with egg wash or milk to get that gorgeous golden color. Bake for 15 to 20 minutes until they’re golden and irresistible.
Step 6: Glaze and Serve—The Sweet Finale
Let your Danishes cool completely on a rack. Whip up the glaze by combining powdered sugar with a tablespoon or two of milk or lemon juice—adjust until silky smooth—and stir in vanilla extract. Drizzle it generously over the cooled pastries. This finishing touch adds a bright sweetness that perfectly complements the flaky layers and creamy filling.
How to Serve Deliciously Flaky Cheese Danish Recipe for Perfect Mornings Recipe
Garnishes
I personally love sprinkling some sliced almonds or a few fresh berries on top before glazing—it adds a pop of color and a subtle crunch that’s delightful. A little lemon zest on top after glazing also lifts the flavor beautifully.
Side Dishes
I often serve these with a cup of freshly brewed coffee or a chilled glass of fresh orange juice. If you want a heartier breakfast, sautéed spinach or a simple fruit salad pairs nicely without overpowering the Danish.
Creative Ways to Present
For special occasions, I like arranging a variety of these Danishes on a beautiful platter with edible flowers and a drizzle of honey. You could also stack smaller Danish bites on a tiered cake stand for a brunch spread that feels extra festive and inviting.
Make Ahead and Storage
Storing Leftovers
Whenever I have leftovers, I store them loosely covered in the fridge. This keeps the pastry from getting soggy, and they stay fresh for about 5 days. Just bring them to room temperature before reheating for the best texture.
Freezing
I love freezing unbaked, shaped Danishes so I can pop them into the oven fresh whenever I want. Wrap them tightly on a baking sheet, freeze until solid, then transfer to a bag. They keep for up to a month. When it’s time, bake straight from frozen, just add a few minutes to the baking time.
Reheating
To reheat, I preheat the oven to 325°F (160°C) and warm the Danish for about 5–7 minutes. This revives the crisp layers without drying out the filling. A quick zap in the microwave often makes them cakey, so oven reheating is definitely my preferred method.
FAQs
-
Can I use store-bought puff pastry instead of making the dough from scratch?
Absolutely! Store-bought puff pastry is a great shortcut if you’re short on time. While homemade dough in this Deliciously Flaky Cheese Danish Recipe for Perfect Mornings Recipe offers a richer flavor and texture, using puff pastry still yields tasty results with less effort.
-
How important is chilling between folds?
Chilling is crucial! It keeps the butter firm, which creates those flaky layers as the dough bakes. Skipping or shortening chilling times can result in butter melting into the dough, making it less flaky.
- Can I make these Danishes vegan?
With some ingredient swaps, yes. Use a plant-based butter and a vegan cream cheese alternative. Also, replace the egg wash with a plant milk glaze. Keep in mind this will slightly change the flavor and texture.
- How do I know when the Danish are fully baked?
Look for a deep golden brown color on top and a puffed, flaky texture. The bottoms should be firm and not doughy. Usually, 15–20 minutes at 390°F is perfect, but ovens vary.
- Can I prepare the Danish the night before baking?
Yes! You can shape and proof them overnight in the fridge, then bake fresh in the morning. Just cover the pastries tightly to prevent drying out.
Final Thoughts
Honestly, this Deliciously Flaky Cheese Danish Recipe for Perfect Mornings Recipe has become my little culinary secret for turning ordinary mornings into special ones. I love how approachable it is, and your kitchen will smell like a cozy bakery, too. Give it a try—you might find yourself making these flaky delights more often than you think. And trust me, once you share them with friends or family, they’ll be asking for the recipe too!
PrintDeliciously Flaky Cheese Danish Recipe for Perfect Mornings Recipe

This Deliciously Flaky Cheese Danish recipe is perfect for starting your mornings with a touch of homemade bakery goodness. Featuring a buttery, laminated dough with a creamy, tangy cream cheese filling, these danishes offer a perfect balance of flaky layers and rich flavor. Topped optionally with fruit preserves, fresh berries, or sliced almonds, they make an impressive yet approachable treat for breakfast or brunch.
- Prep Time: 1 hour
- Cook Time: 20 minutes
- Total Time: 1 hour 20 minutes
- Yield: 8 servings 1x
- Category: Breakfast Pastry
- Method: Baking
- Cuisine: American
Ingredients
Dough Ingredients
- 4 cups (500g) all-purpose flour
- 1/3 cup (75g) granulated sugar
- 1 tsp salt
- 1 tbsp (10g) active dry yeast
- 1 cup (240ml) whole milk, warm
- 1 large egg, room temperature
Butter Block
- 1 cup + 2 tbsp (250g) cold unsalted butter, for laminating
Cream Cheese Filling
- 7 oz (200g) cream cheese, softened
- 1/4 cup (50g) granulated sugar
- 1 tsp vanilla extract
- Zest of 1 lemon (optional)
Glaze
- 1 cup (100g) powdered sugar
- 1–2 tbsp milk or lemon juice
- 1/2 tsp vanilla extract
Optional Toppings
- Fruit preserves (raspberry, apricot, etc.)
- Fresh berries
- Sliced almonds
Instructions
- Make the Dough: In a large bowl, combine the flour, sugar, and salt. In a separate bowl, mix the warm milk with active dry yeast and let it sit for 5–10 minutes until foamy. Add the egg and yeast mixture to the dry ingredients, then mix and knead until the dough is smooth, about 6–8 minutes. Cover the dough and chill in the refrigerator for 30 minutes to rest.
- Prepare Butter Block: Place cold unsalted butter between two sheets of parchment paper and pound with a rolling pin or mallet to shape it into an 8-inch square. Chill the butter block until it is firm yet pliable to ensure easy lamination with the dough.
- Laminate the Dough: Roll out the chilled dough into a 16-inch square on a floured surface. Position the butter block in the center of the dough as a diamond shape. Fold the dough corners over the butter to fully encase it. Roll the dough into a long rectangle approximately 8 by 24 inches. Fold the dough into thirds like a letter. Chill for 30 minutes. Repeat the rolling, folding, and chilling process two more times to create flaky layers.
- Shape the Danish: Roll the laminated dough to about 1/4-inch thickness. Cut the dough into 4-inch squares. Place a tablespoon of the cream cheese filling in the center of each square. Fold the corners inward or shape the danish as desired. Add optional toppings such as berries or jam at this stage for extra flavor and decoration.
- Proof and Bake: Arrange the shaped danishes on parchment-lined baking sheets. Allow them to rise at room temperature for about 1 hour until slightly puffed. Preheat the oven to 390°F (200°C). Brush the tops lightly with egg wash or milk to achieve a golden finish. Bake for 15–20 minutes or until the danishes turn golden brown and cooked through.
- Glaze and Serve: Allow the danishes to cool completely on a wire rack. Prepare the glaze by mixing powdered sugar with milk or lemon juice and vanilla extract until smooth. Drizzle the glaze over the cooled danishes and serve immediately for a delightful treat.
Notes
- Ricotta or mascarpone cheese can be used instead of cream cheese for a lighter filling.
- Chilling the dough between folds is essential to achieve the characteristic flaky layers.
- Fruit preserves such as raspberry or apricot add wonderful flavor and vibrant color.
- Store baked danishes in the refrigerator for up to 5 days and reheat at 325°F (160°C) for 5–7 minutes before serving.
- Unbaked, shaped pastries can be frozen for up to 1 month; bake directly from frozen with a few extra minutes added to the baking time.
Keywords: Cheese Danish, Danish Pastry, Flaky Pastry, Breakfast Recipe, Cream Cheese Filling, Laminated Dough