Red Velvet Cheesecake Bliss Recipe
If you’re craving something that just screams celebration in every bite, the Red Velvet Cheesecake Bliss Recipe is my go-to crowd-pleaser. It’s that perfect combo of classic red velvet cake’s tender crumb and the luscious, creamy cheesecake layer – truly a match made in dessert heaven. I love how it’s rich but balanced, making it great for birthdays, holidays, or when you just want to treat yourself without going overboard.
Whenever I make this Red Velvet Cheesecake Bliss Recipe, it feels like pulling out all the stops but with surprisingly simple steps. The cake’s velvety texture infused with that hint of cocoa blends beautifully with the tangy cheesecake, and the whipped cream topping adds just the right lightness. Trust me, once you try this recipe, you’ll find yourself wanting to make it again and again for all your special gatherings.
Ingredients You’ll Need
The ingredients come together to create layers that work beautifully both in flavor and texture. I always recommend using fresh cream cheese and buttermilk – they make a noticeable difference. Also, keep an eye out for good quality cocoa powder and vanilla to elevate the overall richness.
- All-purpose flour: Provides structure to both the cake and cheesecake layers; measure carefully for perfect texture.
- Granulated sugar: Sweetens both layers evenly without overpowering the flavors.
- Cocoa powder: Adds that subtle chocolate flavor essential for red velvet’s unique taste.
- Baking powder and baking soda: Give the cake its light, airy lift.
- Salt: Balances sweetness and enhances all other flavors.
- Buttermilk: Gives the cake moisture and a slight tang; if you don’t have it, add a splash of vinegar to milk as a substitute.
- Large eggs: Provide structure and richness to both layers.
- Vegetable oil: Keeps the cake moist and tender.
- Red food coloring or beetroot powder: For that iconic vibrant red hue; beetroot offers a natural alternative.
- Vanilla extract: Brings depth and warmth to the flavor profile.
- White vinegar: Reacts with baking soda, helping the cake rise and intensifying the red color.
- Cream cheese: The star of the cheesecake layer—make sure it’s softened for smooth mixing.
- Sour cream: Adds tang and creaminess to the cheesecake.
- All-purpose flour (for cheesecake): Helps stabilize the cheesecake filling to prevent cracking.
- Heavy cream: Whipped for that perfect airy topping, balancing richness.
- Powdered sugar: Sweetens the whipped cream without graininess.
- Fresh berries and red velvet cake crumbs: Optional garnishes to make your dessert look and taste even more irresistible.
Variations
I love tweaking this Red Velvet Cheesecake Bliss Recipe depending on the occasion or my mood. There’s so much room to play around—whether you want it more chocolatey, lighter, or with a fun twist. Feel free to make it your own!
- Use beetroot powder instead of red food coloring: I’ve tried this to keep things natural and loved the slightly earthier flavor it adds.
- Gluten-free version: Substitute all-purpose flour with a 1:1 gluten-free mix; just watch the baking time closely as it may vary.
- Chocolate ganache topping: Instead of whipped cream, a bittersweet ganache adds decadence for a rich finish.
- Mini cheesecake cups: Perfect for parties, I’ve made individual servings in jars, which are crowd favorites and super fun to eat.
How to Make Red Velvet Cheesecake Bliss Recipe
Step 1: Whisk Together Dry Ingredients for the Red Velvet Cake Layer
Start by sifting the all-purpose flour, cocoa powder, baking powder, baking soda, and salt into a large bowl. This step is crucial—it makes sure the cocoa and rising agents are evenly distributed, so your cake bakes evenly without lumps. I always sift twice because it helps lighten the mixture for that soft crumb.
Step 2: Mix Wet Ingredients and Combine with Dry
In another bowl, whisk together buttermilk, egg, vegetable oil, red food coloring (or beetroot powder), vanilla extract, and white vinegar. Slowly pour this into your dry ingredients, stirring gently until just combined. Don’t overmix here—you want the batter smooth but still light. Overworking will make the cake dense, and trust me, you want that tender softness.
Step 3: Prepare the Cheesecake Filling
Using softened cream cheese, beat it until creamy and lump-free. Add sour cream, sugar, and vanilla extract, beating well after each addition. Then, incorporate eggs one at a time, followed by the flour, which helps keep the filling firm. The key here is to avoid incorporating too much air, so mix on low speed and stop as soon as the batter is smooth.
Step 4: Assemble and Bake
Preheat your oven to 325°F (160°C). Pour half of your red velvet batter into a greased springform pan. Gently spread the cheesecake filling on top, then cover with the remaining red velvet batter. A quick tip: Use a spoon or spatula to lightly swirl the top layers for a marbled effect, if you’re feeling creative. Bake for about 55-65 minutes, until the edges are set and the center slightly jiggles. Let it cool completely in the pan to avoid cracks.
Step 5: Whip the Cream Topping
Just before serving, whip heavy cream with powdered sugar and vanilla extract until soft peaks form. This topping adds a light, fluffy counterpoint to the richness of the cake and cheesecake. Spread it generously on top or pipe it for a pretty finish.
How to Serve Red Velvet Cheesecake Bliss Recipe
Garnishes
I usually garnish with fresh berries—strawberries and raspberries are my favorite because their tartness complements the sweetness perfectly. And don’t skip sprinkling some red velvet cake crumbs from the edges—it adds that extra texture and looks stunning. You can also add a dusting of cocoa powder for a subtle chocolate touch.
Side Dishes
This dessert pairs beautifully with a simple cup of coffee or a dollop of homemade vanilla bean ice cream. For brunch gatherings, I often serve it alongside fresh fruit salad to lighten the plate and balance the indulgence.
Creative Ways to Present
For birthdays or special celebrations, I’ve turned this into mini individual cheesecakes in jars decorated with edible flowers and berries. Layering the cake crumbs and cheesecake filling in clear jars is not only eye-catching but also super convenient for guests.
Make Ahead and Storage
Storing Leftovers
Leftovers? No problem. I store mine tightly wrapped in the fridge, ideally in the springform pan covered with foil or plastic wrap. It stays fresh for about 4-5 days, so you can enjoy your Red Velvet Cheesecake Bliss Recipe leisurely without any rush.
Freezing
I’ve frozen this cheesecake a couple of times with great success. Slice it into portions, wrap each piece tightly in plastic wrap, then foil, and freeze. When you want to enjoy it, thaw overnight in the fridge to keep that creamy texture intact.
Reheating
Since it’s a cheesecake, reheating isn’t really needed, but if you want to take the chill off frozen slices, you can leave them on the counter for 20 minutes. Avoid microwaving as that can make it alter texture or become grainy.
FAQs
-
Can I make the Red Velvet Cheesecake Bliss Recipe without food coloring?
Absolutely! If you prefer to skip artificial colors, beetroot powder is a fantastic natural option that also adds a subtle earthy flavor. Another trick is to use freeze-dried raspberry powder for a different but beautiful red hue.
-
Why does my cheesecake crack when baking?
Cracks usually happen when cheesecake is baked at too high a temperature or overbaked. Use a water bath if possible, and don’t overmix your filling. Also, letting the cheesecake cool gradually in the oven with the door slightly open helps prevent cracks.
-
Can I prepare the cake and cheesecake layers ahead of time?
Yes! You can prepare the red velvet cake batter and cheesecake filling the day before. Just keep them covered tightly in the fridge and assemble right before baking for best results.
-
How do I know when the cheesecake is done baking?
The edges should look set and may have started to turn golden, but the center will still have a slight wobble when you gently shake the pan. It will firm up as it cools, so avoid baking it until it’s completely firm to prevent dryness.
-
What’s the best way to serve the Red Velvet Cheesecake Bliss?
I like to serve it chilled with freshly whipped cream on top, garnished with berries and cake crumbs. It tastes amazing with a warm cup of coffee or tea – perfect for a cozy evening or party dessert.
Final Thoughts
This Red Velvet Cheesecake Bliss Recipe holds a special spot in my recipe collection because it’s that rare dessert that wows guests every time and feels luxurious without a ton of fuss. I hope you enjoy making and sharing it as much as I do—nothing beats the smile when someone bites into that perfect slice. Give it a try, and soon you’ll have your own happy ritual around this gorgeous treat.
PrintRed Velvet Cheesecake Bliss Recipe

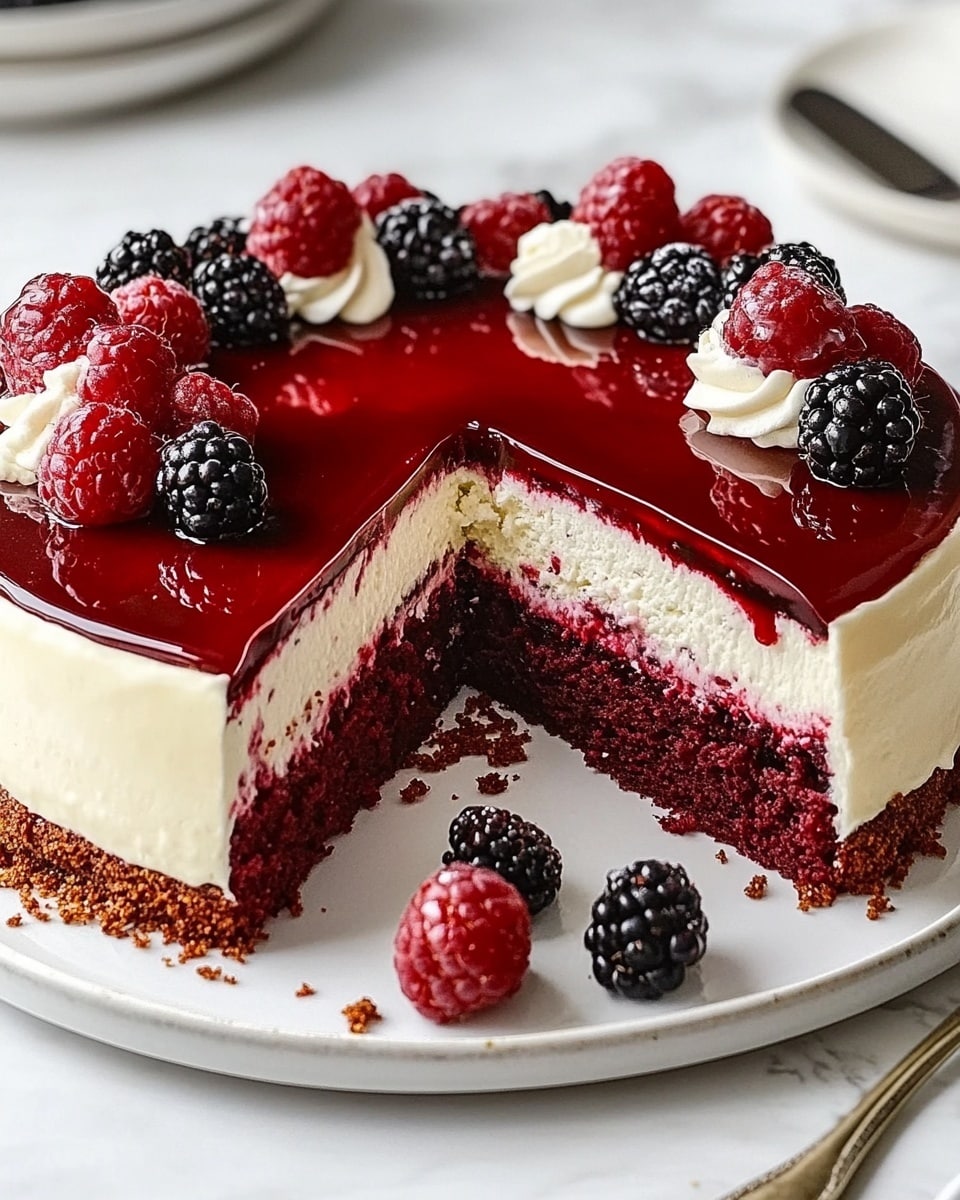
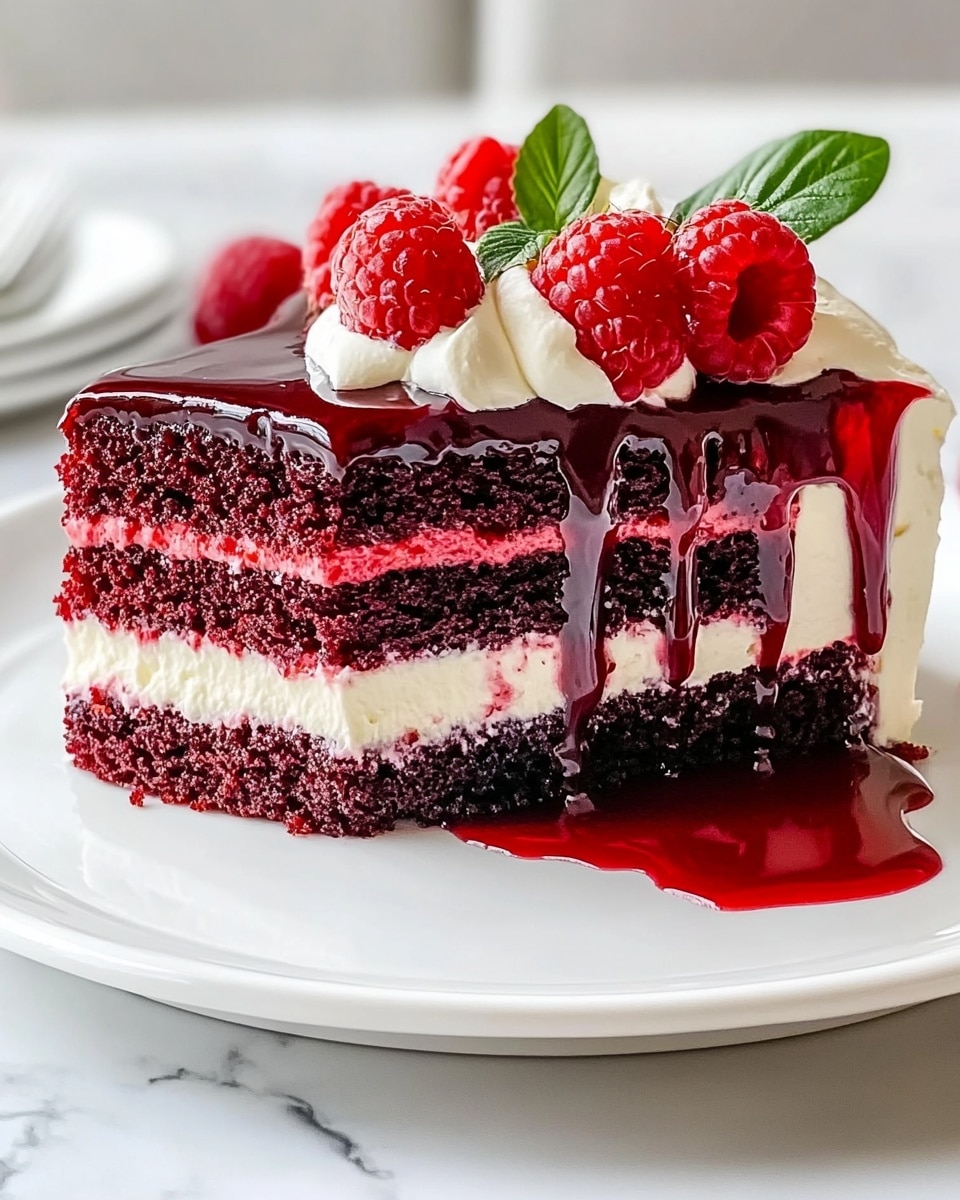
This Red Velvet Cheesecake Bliss is a decadent, layered dessert combining a moist red velvet cake base with a rich, creamy cheesecake layer topped with fluffy whipped cream. Finished with fresh berries and red velvet crumbs, it’s perfect for celebrations or anytime you crave a luxurious treat.
- Prep Time: 20 minutes
- Cook Time: 1 hour 20 minutes
- Total Time: 5 hours 40 minutes
- Yield: 12 servings 1x
- Category: Dessert
- Method: Baking
- Cuisine: American
Ingredients
Red Velvet Cake Layer
- 1 ½ cups all-purpose flour
- 1 cup granulated sugar
- 1 tbsp cocoa powder
- 1 tsp baking powder
- ½ tsp baking soda
- ½ tsp salt
- 1 cup buttermilk
- 1 large egg
- ½ cup vegetable oil
- 2 tbsp red food coloring or beetroot powder for natural option
- 1 tsp vanilla extract
- 1 tsp white vinegar
Cheesecake Layer
- 16 oz cream cheese, softened
- ½ cup sour cream
- ½ cup granulated sugar
- 2 large eggs
- 1 tsp vanilla extract
- 2 tbsp all-purpose flour
Whipped Cream Topping
- 1 cup heavy cream
- 2 tbsp powdered sugar
- 1 tsp vanilla extract
Garnish (optional)
- Fresh berries
- Red velvet cake crumbs
Instructions
- Prepare the Red Velvet Cake Batter: In a large mixing bowl, whisk together all-purpose flour, granulated sugar, cocoa powder, baking powder, baking soda, and salt until combined. In another bowl, mix buttermilk, egg, vegetable oil, red food coloring or beetroot powder, vanilla extract, and white vinegar. Slowly add the wet ingredients to the dry ingredients, mixing until smooth and fully incorporated.
- Bake the Red Velvet Cake Layer: Preheat your oven to 350°F (177°C). Grease and flour a 9-inch springform pan. Pour the red velvet cake batter evenly into the prepared pan. Bake for 25-30 minutes or until a toothpick inserted into the center comes out clean. Remove from oven and let cool slightly.
- Prepare the Cheesecake Layer: In a mixing bowl, beat the softened cream cheese until smooth and creamy. Add sour cream and sugar, mixing until well blended. Beat in the eggs one at a time, ensuring each is fully incorporated before adding the next. Stir in vanilla extract and flour until smooth.
- Assemble and Bake the Cheesecake Layer: Pour the cheesecake batter evenly over the slightly cooled red velvet cake layer in the springform pan. Smooth the top carefully to avoid mixing layers. Return the pan to the oven and bake for an additional 45-50 minutes until the cheesecake layer is set and edges are lightly golden. The center may have a slight jiggle but will firm up during cooling.
- Cool and Refrigerate: Remove the pan from the oven and let it cool to room temperature. Then refrigerate the cheesecake for at least 4 hours, preferably overnight, to set fully and enhance the flavors.
- Prepare Whipped Cream Topping: In a chilled bowl, whip the heavy cream until it begins to thicken. Gradually add powdered sugar and vanilla extract, continuing to whip until soft peaks form. Be careful not to overbeat.
- Add Whipped Cream and Garnish: Once the cheesecake has set, spread the whipped cream topping evenly over the surface. Garnish with fresh berries and sprinkle red velvet cake crumbs for an elegant finish.
- Serve: Carefully remove the springform pan sides, slice, and serve chilled. Enjoy the rich, moist flavors of this red velvet cheesecake bliss!
Notes
- For a natural color option, use beetroot powder instead of red food coloring.
- Room temperature ingredients help to create a smooth batter and creamy cheesecake layer.
- Do not overmix the cheesecake batter to avoid cracks during baking.
- Use a water bath for baking cheesecake if preferred, to prevent cracking and ensure even baking.
- The cheesecake layer can have a slight jiggle in the center when done; it will firm up as it cools.
- Make sure to chill the bowl and beaters before whipping cream for best results.
- Store leftovers in the refrigerator covered for up to 3 days.
Keywords: Red Velvet Cheesecake, layered dessert, creamy cheesecake, red velvet cake, whipped cream topping, party dessert