Peanut Butter Spider Cookies Recipe
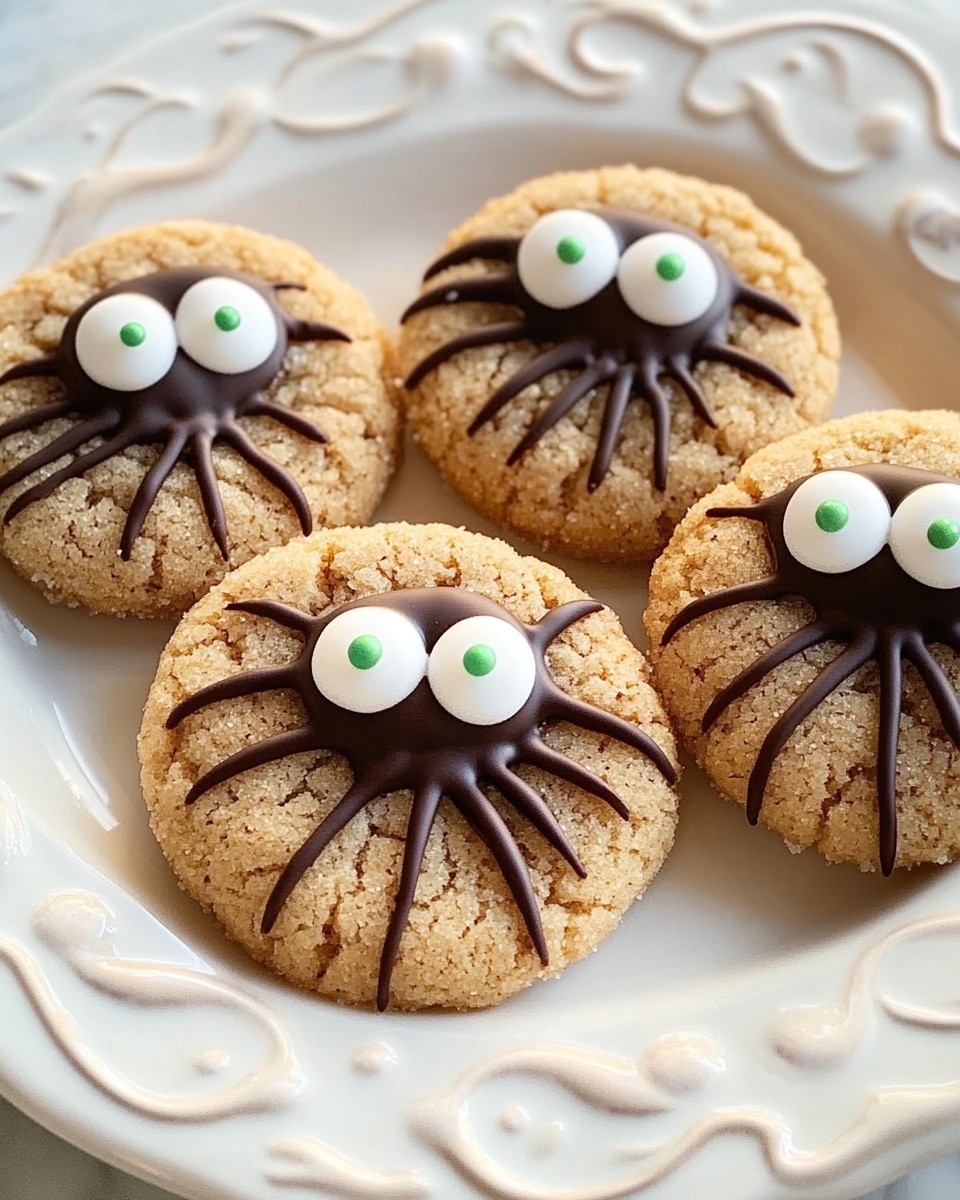
If you’re looking for a fun, festive treat that’s part spooky, part scrumptious, this Peanut Butter Spider Cookies Recipe is just the ticket. Imagine peanut butter cookies with a soft, chewy texture that’s perfectly balanced by a touch of chocolate and a playful spider design—these cookies truly make any gathering feel special, especially around Halloween or themed parties.
I love making these because they’re not only delightful to eat but also a creative project. You get to shape each cookie into an adorable yet slightly creepy spider, which is just the kind of whimsy that gets kids and adults excited. Plus, the combination of peanut butter and chocolate in this Peanut Butter Spider Cookies Recipe hits all the right flavor notes every single time.
Ingredients You’ll Need
We keep things simple but flavorful here. Each ingredient plays an important role—from the peanut butter that brings the star flavor to the chocolate candies that help bring the spider to life. Here’s what you’ll want to grab before we start mixing and baking.
- Shortening: Helps keep the cookies tender and gives them a nice structure without being too greasy.
- Peanut butter: Creamy and rich, this lends that classic peanut butter cookie flavor you can’t miss.
- Brown sugar: Adds moisture and a hint of caramel depth to balance the peanut butter.
- White sugar: Sweetens without weighing down the dough, giving a lovely crisp edge to the cookies.
- Egg: Binds everything together and gives the cookies their chewiness.
- Milk: Just a little to keep the dough smooth and easy to work with.
- Vanilla extract: A splash of warmth that elevates all the other flavors.
- All-purpose flour: The structure base for these cookies, measured carefully to keep them soft yet firm enough to hold the spider form.
- Baking soda: For a gentle lift, so they’re not flat but still dense enough for decoration.
- Salt: Balances sweetness and enhances peanut butter’s flavor.
- Additional white sugar for rolling: Adds a textured surface and subtle sweetness on the outside.
- Chocolate candy spheres (like Lindt Lindor Truffles): These chilled gems form the spider’s body—soft, smooth, and irresistible.
- Candy eyeballs: What would a spider be without spooky eyes? These bring the critters to life.
- Prepared chocolate frosting: Used as “glue” to stick those eyes on and secure parts when you assemble your spiders.
Variations
I’ve tried tweaking this Peanut Butter Spider Cookies Recipe a few ways depending on what I have on hand or dietary needs, and it’s surprisingly flexible. Definitely feel free to make it your own! Here are a few variations I recommend.
- Variation: Swap peanut butter for almond butter for a different nutty twist. I tried this once when I ran out of peanut butter, and it added a lovely subtle flavor that paired beautifully with the chocolate spiders.
- Variation: Use dark chocolate candy spheres instead of milk chocolate for a richer taste, especially if you’re serving to a crowd that loves deep chocolate notes.
- Variation: For a gluten-free version, substitute the all-purpose flour with a 1:1 gluten-free baking flour. The cookies stay just as chewy but cater to those avoiding gluten.
- Variation: Add a pinch of cinnamon or a splash of maple extract to the dough to bring a warm spice element that works wonderfully in fall or winter.
How to Make Peanut Butter Spider Cookies Recipe
Step 1: Cream the Shortening and Peanut Butter
Start by mixing the shortening and peanut butter together until smooth and creamy. I usually use a hand mixer on medium speed for about 2 minutes. This makes sure everything blends well without lumps, setting you up for a smooth dough later. It’s also a great time to scrape down the bowl so nothing’s left behind.
Step 2: Add Sugars and Eggs
Next, toss in both your brown and white sugars and beat them into the peanut butter mixture until fluffy—around 3 minutes if you want. After that, add in the beaten egg, milk, and vanilla extract, mixing until fully combined. This combo gives the dough its sweet and moist foundation.
Step 3: Combine Dry Ingredients
In a separate bowl, whisk together the flour, baking soda, and salt. This step helps evenly distribute the leavening agent and salt, so each cookie tastes consistent. Slowly mix these dry ingredients into the wet mix; a few folds with a spatula is usually enough until you have a uniform dough.
Step 4: Shape and Chill the Dough Balls
Now, here’s the fun part: rolling your dough into balls about 1 inch in diameter, then rolling those balls in the extra white sugar to get a slight crunch on the outside. I like to chill them briefly while I get the other ingredients ready, which helps them hold their shape and makes the spiders neatly round.
Step 5: Bake and Add the Spider Bodies
Bake your cookies at 350°F (175°C) for 9–11 minutes, until the edges are set but the centers are still soft. Right when they come out, press a cold chocolate candy sphere gently in the center of each cookie—that’s your spider’s body. I learned that if the candy is too warm, it melts too quickly, so chilling them beforehand is key!
Step 6: Create Legs and Add Eyes
Use a piping bag or a small knife to spread the chocolate frosting over the candy sphere and the cookie around it. This frosting acts as glue and gives your spiders a polished look. Then, stick on two candy eyeballs per spider body. For legs, you can draw them with frosting or use thin pretzel sticks for a crunchy leg effect—this part is where your creativity shines!
How to Serve Peanut Butter Spider Cookies Recipe
Garnishes
I usually keep it simple with the candy eyeballs and some extra frosting piped as spiders’ legs, but sometimes I sprinkle a bit of colored sugar or edible glitter for a little festive sparkle. It’s a fun touch, especially if you’re serving these for a party or a kid’s event.
Side Dishes
These Peanut Butter Spider Cookies pair surprisingly well with a cold glass of milk or even a warm cup of spiced chai. For parties, I like to arrange them alongside pumpkin spice cupcakes or simple fruit platters to offer some balance between sweet and fresh.
Creative Ways to Present
One of my favorite ways to serve these is on a platter decorated with fake spider webs and little Halloween props—guaranteed to be a conversation starter! You can also package individual cookies in clear bags tied with orange and black ribbons for party favors. The playful presentation gets everyone excited before the first bite.
Make Ahead and Storage
Storing Leftovers
I store these cookies in an airtight container at room temperature, layering parchment paper between them to keep the decorations intact. They stay fresh and chewy for about 3 to 4 days this way, which is perfect for a long weekend of snacking.
Freezing
If you want to freeze them, I recommend freezing unbaked dough balls wrapped tightly in plastic wrap and placed inside a freezer bag. When you’re ready to bake, just thaw the dough overnight in the fridge before rolling and baking. Freezing after baking can make the candy bodies and frosting tricky, so this method works best for preserving texture and flavor.
Reheating
Since these are best enjoyed at room temperature, I usually just let frozen cookies thaw on the counter for about 30 minutes. If you prefer them warm, pop them in the microwave for 10-15 seconds, but be careful not to overheat or the chocolate candy centers might melt too much.
FAQs
-
Can I use natural peanut butter for the Peanut Butter Spider Cookies Recipe?
Natural peanut butter often has more oil separation and less stabilizer, which can affect cookie texture. If you do use natural peanut butter, stir it well and consider chilling your dough slightly longer to help maintain shape during baking.
-
What if I don’t have chocolate candy spheres? What can I use instead?
If you can’t find chocolate candy spheres, try using chocolate-covered malt balls, small truffles, or even large chocolate chips. Just pick something with a smooth, round shape so your spider’s “body” looks just right.
-
How do I keep the candy eyes from sliding off?
The trick is using enough chocolate frosting as glue and pressing the candy eyes gently but firmly in place. Refrigerating the cookies for about 15 minutes after adding decorations helps set everything securely.
-
Can these cookies be made vegan?
You can make this recipe vegan by swapping the egg for a flax egg (1 tbsp flaxseed meal + 3 tbsp water) and using vegan shortening and frosting. Just check your candy eyes and chocolate candies to make sure they’re vegan-friendly.
-
Why does my peanut butter cookie dough sometimes spread too much in the oven?
It usually means the dough is too warm or has too much fat. Chilling your dough balls before baking and measuring ingredients accurately can help. Also, using shortening instead of butter helps control spread in this recipe.
Final Thoughts
This Peanut Butter Spider Cookies Recipe has become one of my go-to festive treats that never fails to bring smiles and a bit of fun to the table. It’s such a simple way to add some personality to peanut butter cookies, and the balance of flavors always impresses guests. I really hope you give it a try—you’ll enjoy how easy it is to make these playful spiders become the star of your dessert spread!
PrintPeanut Butter Spider Cookies Recipe

These Peanut Butter Spider Cookies are a fun and festive treat perfect for Halloween or any occasion where you want to impress with adorable spider-shaped cookies. Made from a classic peanut butter cookie base, they’re rolled in sugar and topped with rich chocolate truffles and candy eyeballs for a spooky, playful twist. The cookies combine creamy peanut butter, a touch of sweetness, and a delightful chewy texture, finished with decorative details that kids and adults alike will love.
- Prep Time: 15 minutes
- Cook Time: 10 minutes
- Total Time: 25 minutes
- Yield: 24 cookies 1x
- Category: Dessert
- Method: Baking
- Cuisine: American
Ingredients
Cookie Dough
- ½ cup shortening
- ½ cup peanut butter
- ½ cup packed brown sugar
- ½ cup white sugar
- 1 large egg, beaten
- 2 tablespoons milk
- 1 teaspoon vanilla extract
- 1 ¾ cups all-purpose flour
- 1 teaspoon baking soda
- ½ teaspoon salt
- ¼ cup white sugar for rolling
Decorations
- 24 chocolate candy spheres with smooth chocolate filling (such as Lindt Lindor Truffles), refrigerated until cold
- 48 decorative candy eyeballs
- ½ cup prepared chocolate frosting
Instructions
- Prepare the Dough: In a large mixing bowl, cream together the shortening, peanut butter, brown sugar, and white sugar until smooth and creamy. Beat in the egg, milk, and vanilla extract until well combined. In a separate bowl, whisk together the flour, baking soda, and salt. Gradually add the dry ingredients to the wet mixture and mix until a soft dough forms.
- Form and Roll Cookies: Preheat your oven to 375°F (190°C). Shape the dough into 1-inch balls, then roll each ball in the ¼ cup white sugar to coat them evenly. Place the dough balls 2 inches apart on an ungreased cookie sheet.
- Bake Cookies: Bake the cookies in the preheated oven for 8-10 minutes, or until the edges are lightly browned but the centers are still soft. Remove the cookies from the oven and let them cool on the baking sheet for 2 minutes before transferring to a wire rack to cool completely.
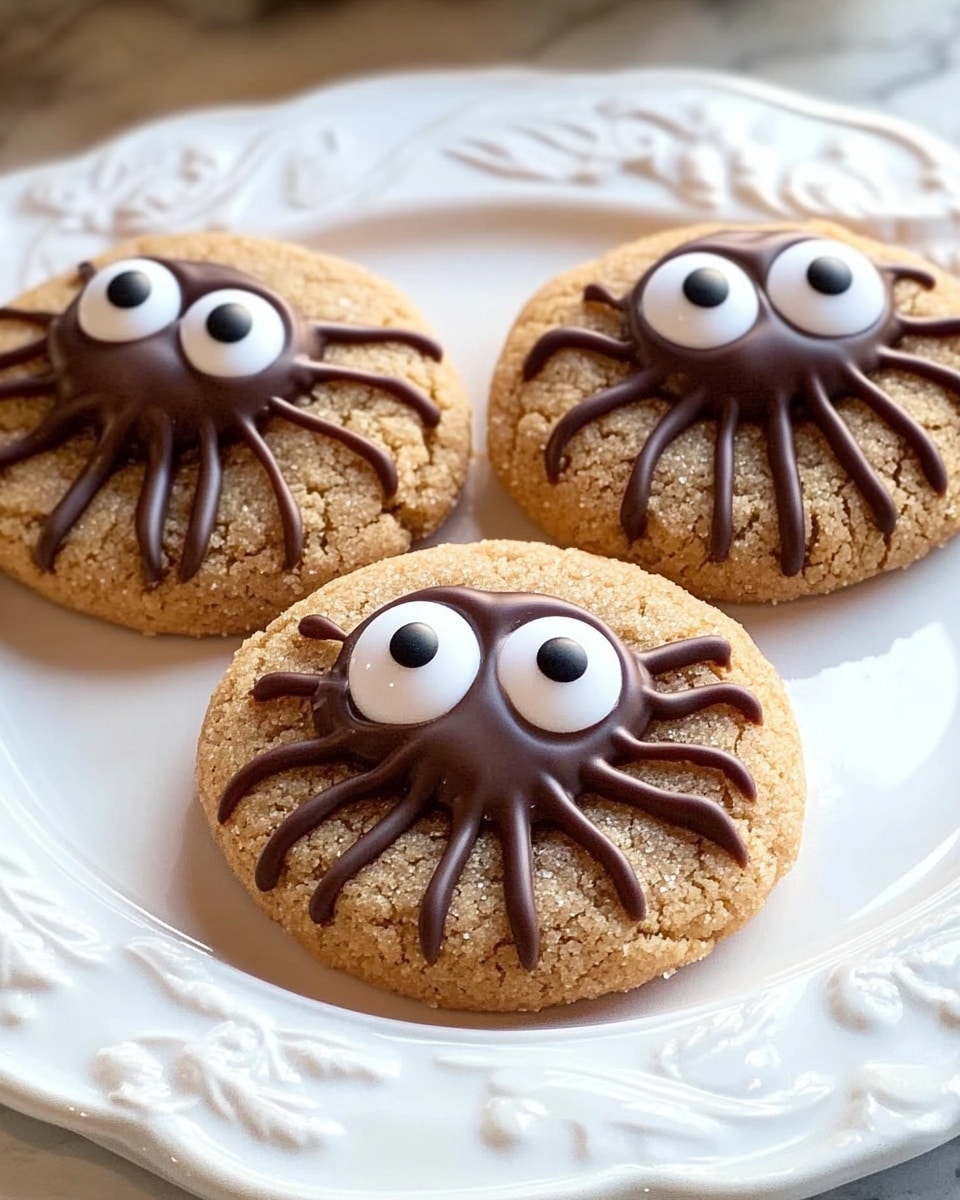
- Decorate Spiders: Once the cookies are cool, use about a teaspoon of prepared chocolate frosting on each cookie as glue. Place one chilled chocolate candy sphere in the center of each cookie to create the spider’s body. Attach two candy eyeballs to the chocolate sphere using additional frosting. To form the spider legs, spread chocolate frosting in eight lines coming out from under the candy sphere, resembling spider legs. Allow the frosting to set before serving.
Notes
- For best results, chill the chocolate truffles until just before assembling to prevent melting while handling.
- You can substitute shortening with unsalted butter for a richer flavor, but the texture might be slightly different.
- If you cannot find candy eyeballs, small dots of white and dark chocolate can be piped to create eyes.
- Store cookies in an airtight container at room temperature for up to 3 days.
- These cookies are perfect for Halloween parties or themed events with children.
Keywords: Peanut Butter Cookies, Spider Cookies, Halloween Cookies, Chocolate Candy, Festive Desserts, Peanut Butter Dessert