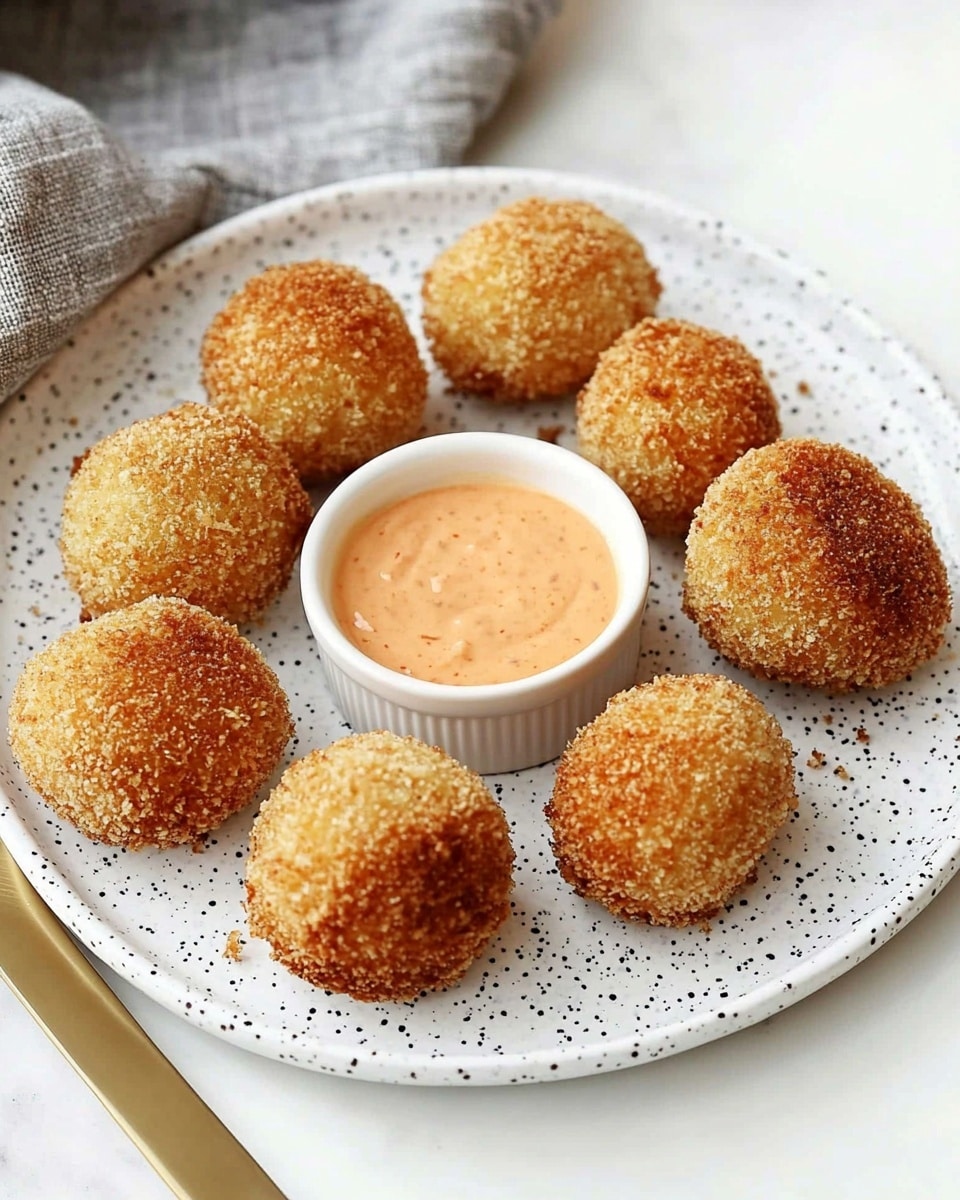
Healthier Chicken Coxinhas with Cream Cheese Filling Recipe
If you’re craving a comforting snack that’s lighter but still packs all the cozy flavors, these Healthier Chicken Coxinhas with Cream Cheese Filling Recipe are exactly what you need. This Brazilian classic gets a makeover that lets you enjoy every bite without the usual guilt. I love how the creamy filling pairs with the crispy shell, making it perfect for casual gatherings or cozy nights in.
Whenever I make these, I’m amazed at how a few simple swaps keep the magic intact while making the dish a bit kinder to your waistline. Whether you’re serving them as party appetizers or a fun family treat, you’ll find this Healthier Chicken Coxinhas with Cream Cheese Filling Recipe invites smiles and seconds. Plus, it’s easier than you might think to nail that flaky outside and tender, cheesy inside.
Ingredients You’ll Need
The beauty of this recipe lies in simple, wholesome ingredients working beautifully together. Each component plays a role, whether it’s creating a silky chicken broth dough or giving you that creamy, flavorful filling. When shopping, I recommend picking fresh chicken breast and quality cream cheese to make the flavors really shine.
- Chicken breast: Using lean chicken breast keeps the filling light but protein-packed. Make sure it’s fresh for the best tenderness.
- Onion: Finely chopped to dissolve nicely into the filling and add subtle sweetness.
- Garlic: Just one clove is enough to bring a hint of aromatic warmth without overpowering.
- Olive oil: A heart-healthy option for sautéing that adds a gentle richness.
- Bay leaf (optional): Adds a warm herbal note when cooking the chicken—don’t forget to remove it!
- Tomato paste (optional): I like this for its depth and a touch of color in the filling.
- Cream cheese: Catupiry is traditional, but any mild cream cheese works great for that luscious texture.
- Parsley or green onion: Fresh herbs brighten up the filling and cut the richness.
- Salt and black pepper: Essential for bringing all the flavors together just right.
- Chicken broth: You’ll reserve this from cooking the chicken—it’s key to both flavor and the dough’s texture.
- All-purpose flour: The base of the dough, choose a good quality brand for better elasticity.
- Butter: Adds richness and helps the dough stay elastic and soft.
- Egg: For coating, which helps the breadcrumbs stick perfectly during cooking.
- Cooking spray or oil: Use lightly for brushing before air frying to get a golden crust without deep frying.
- Breadcrumbs (preferably panko): Panko breadcrumbs give you that unbeatable crunch on the outside.
Variations
I love how flexible these Healthier Chicken Coxinhas with Cream Cheese Filling Recipe are. Over time, I’ve tweaked the cozy filling or tried different cooking methods depending on what’s on hand or who I’m cooking for. Don’t be shy to make it your own!
- Spicy twist: Adding a pinch of cayenne or finely chopped jalapeños to the filling kicked things up a notch for my spice-loving friends.
- Herb swap: Sometimes I swap parsley for cilantro or chives to give a fresh but different aroma.
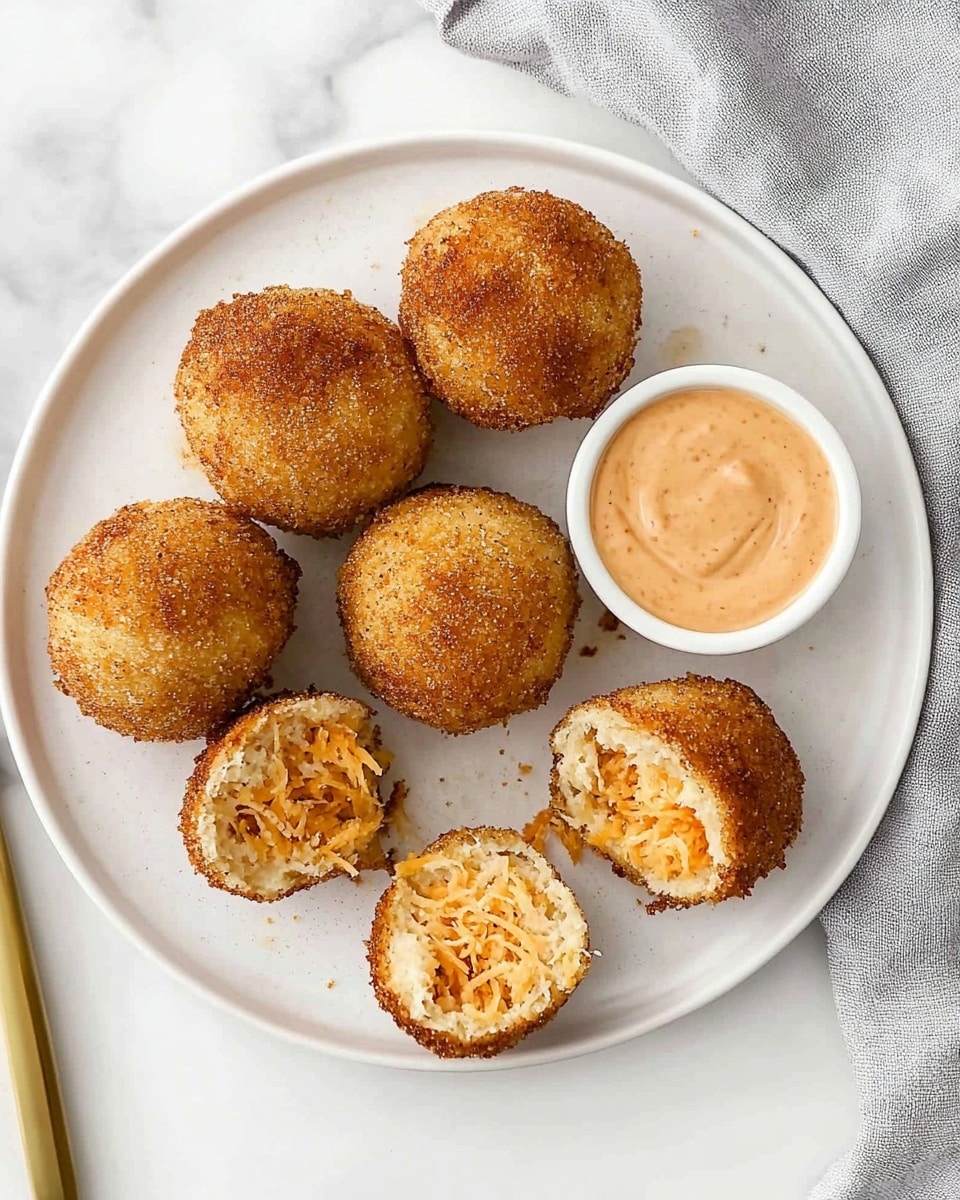
- Cheese alternatives: Using part mozzarella instead of cream cheese gave a gooey pull that my nephew couldn’t stop raving about.
- Baking instead of air frying: For an even lighter option, I’ve baked them on a parchment-lined tray—still crunchy but with less oil.
- Gluten-free: Substituting with gluten-free flour and breadcrumbs worked well, just watch the dough’s texture as it might need slight adjustments.
How to Make Healthier Chicken Coxinhas with Cream Cheese Filling Recipe
Step 1: Cook the Chicken and Reserve Broth
Start by boiling your chicken breast in water with the bay leaf and a pinch of salt. This infuses gentle flavor, and as the chicken cooks (about 15-20 minutes), you’ll create the perfect broth for your dough. Don’t toss that cooking liquid! Once the chicken is tender, shred it finely and keep the broth handy—you’ll want 1 ½ cups for the dough.
Step 2: Sauté the Filling Base
In a small pan, warm the olive oil then gently sauté your finely chopped onion and minced garlic until soft and fragrant. Stir in the tomato paste if you’re using it. This step builds layers of flavor that make the chicken filling irresistible. Once cooled, mix in the shredded chicken, cream cheese, fresh herbs, salt, and pepper. The cream cheese adds that signature creamy texture you’ll love.
Step 3: Make the Dough
Heat the reserved chicken broth with butter and a pinch of salt until the butter melts completely and the mixture is hot but not boiling. Gradually add all-purpose flour, stirring vigorously to prevent lumps and form a smooth dough. This might be a bit of arm workout—you want a soft, elastic dough that doesn’t stick to your hands. Let it rest for a few minutes; it’ll be easier to handle.
Step 4: Assemble the Coxinhas
Take a small handful of dough and flatten it into a disc in your palm. Place a tablespoon or so of the chicken cream cheese filling in the center, then carefully fold the edges over and shape it into a teardrop or drumstick shape. I find wetting my fingers helps seal the edges better so no filling escapes during cooking. Repeat until all the dough and filling are used up.
Step 5: Coat and Air Fry
Dip each coxinha in beaten egg, then roll in panko breadcrumbs to coat evenly. Place them on a tray, spray or brush lightly with oil, then air fry at 375°F (190°C) for about 15 minutes, turning halfway through, until golden and crispy. If you don’t have an air fryer, a quick shallow pan-fry with minimal oil works, too, then finish in the oven to keep it light but crunchy.
How to Serve Healthier Chicken Coxinhas with Cream Cheese Filling Recipe
Garnishes
I usually sprinkle fresh parsley on top for a burst of color and freshness. Sometimes I serve alongside lime wedges or a spicy dipping sauce like a garlic aioli or a sweet chili sauce—it adds a fun zing that pairs beautifully with the creamy filling.
Side Dishes
This recipe goes well with a crisp, simple salad to balance the richness. I love pairing it with a bright guacamole, roasted veggies, or even a light quinoa salad if you’re aiming for a balanced, healthful meal.
Creative Ways to Present
For parties, I’ve arranged these on a wooden board with colorful dipping sauces in small bowls—the teardrop shapes look adorable lined up like little golden gems. You can also thread them on skewers to create fun “coxinha kebabs” which are always a hit with kids and adults alike!
Make Ahead and Storage
Storing Leftovers
I store leftovers in an airtight container in the fridge and try to enjoy them within 2 days for the best taste and texture. When ready, just reheat them gently in the air fryer or oven to regain that crispy outer shell.
Freezing
If I’m making a big batch, I flash freeze the assembled, raw coxinhas on a baking sheet before transferring them to a freezer bag. This way, they don’t stick together and you can grab just what you need — then air fry solid from frozen, just adding a few extra minutes.
Reheating
Reheating is best done in an air fryer or oven to bring back that crispiness. I avoid microwaving since it tends to make the breading soggy and the filling less creamy. A quick 5-7 minute air fry at 350°F works wonders.
FAQs
-
Can I bake these instead of air frying?
Absolutely! Baking works great if you want to keep them light and don’t have an air fryer. Just lay them on a parchment-lined tray, brush lightly with oil, and bake at 375°F (190°C) for 20-25 minutes, flipping halfway through for even browning.
-
What cream cheese is best for the filling?
I recommend a soft, mild cream cheese like Catupiry to mimic the traditional Brazilian style. If you can’t find that, any plain cream cheese will do—just make sure it’s not too dense or tangy to maintain the creamy texture.
-
How do I prevent the dough from being sticky?
Working with a hot broth when adding the flour helps develop the right dough texture. Stir continuously until it forms a smooth ball. If it’s still sticky after resting, add a tiny bit more flour gradually while kneading until manageable.
-
Can I prepare the filling a day in advance?
Yes! Prepping the filling a day ahead actually helps the flavors meld beautifully. Just keep it refrigerated and bring it to room temperature before assembling.
-
Are these suitable for kids?
Definitely. The creamy filling and crispy outside make them a kid-friendly snack. To make them extra mild, simply skip any spicy variations and serve with a favorite dipping sauce.
Final Thoughts
These Healthier Chicken Coxinhas with Cream Cheese Filling Recipe hold a special place in my kitchen because they’re proof you can enjoy indulgent flavors without the deep-frying guilt. Every time I make them, it feels like a little celebration with every bite—crispy, creamy, and utterly satisfying. I hope you give them a try and discover your own favorite twists because once you do, these will become a go-to snack that’s both delicious and nourishing.
PrintHealthier Chicken Coxinhas with Cream Cheese Filling Recipe

This Healthier Coxinhas Recipe offers a nutritious twist on the classic Brazilian snack by incorporating lean chicken breast and baking with an air fryer instead of deep-frying. The coxinhas feature a creamy chicken filling with tomato paste and cream cheese wrapped in a soft, flavorful dough, coated in breadcrumbs, and air-fried to golden, crispy perfection.
- Prep Time: 30 minutes
- Cook Time: 25 minutes
- Total Time: 55 minutes
- Yield: 12 coxinhas 1x
- Category: Snack
- Method: Air Frying
- Cuisine: Brazilian
- Diet: Low Fat
Ingredients
Filling
- 1 medium chicken breast (200–250 g / 7–9 oz)
- ½ small onion, finely chopped (40 g / 1.5 oz)
- 1 garlic clove, minced
- 1 tsp olive oil (5 ml)
- 1 bay leaf (optional)
- 1 tbsp tomato paste (15 g / 0.5 oz, optional)
- 2 tbsp cream cheese (30 g / 1 oz, Catupiry or similar)
- 1 tbsp parsley or green onion, chopped (5 g)
- Salt and black pepper to taste
Dough
- 1 ½ cups chicken broth (375 ml) – reserved from cooking chicken
- 1 ½ cups all-purpose flour (190 g / 6.7 oz)
- 1 tbsp butter (14 g / 0.5 oz)
- Pinch of salt
Coating
- 1 egg, beaten
- Cooking spray or a little oil for brushing
- 1 ¼ cups breadcrumbs (125 g / 4.5 oz, panko preferred)
Instructions
- Cook the Chicken: In a pot, place the chicken breast with the bay leaf and cover with water. Bring to a boil, then simmer until the chicken is cooked through, about 15-20 minutes. Reserve 1 ½ cups of the broth and shred the chicken finely.
- Prepare the Filling: In a skillet, heat 1 tsp olive oil over medium heat. Sauté the finely chopped onion and minced garlic until translucent and fragrant. Add tomato paste if using, and stir well. Mix in the shredded chicken, cream cheese, and chopped parsley or green onion. Season with salt and black pepper. Cook for a few more minutes until the filling is creamy and heated through. Set aside to cool.
- Make the Dough: In a saucepan, bring the reserved chicken broth, butter, and pinch of salt to a boil. Remove from heat and immediately add the all-purpose flour. Stir vigorously until the mixture forms a smooth, cohesive dough that pulls away from the sides of the pan. Allow the dough to cool until warm enough to handle.
- Assemble the Coxinhas: Take small portions of dough and flatten them in your palm. Place a spoonful of the chicken filling in the center, then carefully mold the dough around the filling to form a drumstick-shaped coxinha. Ensure the filling is completely enclosed.
- Coat the Coxinhas: Dip each coxinha into the beaten egg, then roll it in the breadcrumbs, ensuring an even coating. Place them on a tray.
- Air Frying: Preheat your air fryer to 180°C (356°F). Lightly spray the coxinhas with cooking spray or brush with a little oil to encourage browning. Place them in the air fryer basket without overcrowding. Cook for 15-20 minutes, turning halfway, until golden brown and crispy on all sides.
- Serving: Once cooked, remove the coxinhas and let them cool slightly before serving. Enjoy these healthier, crispy Brazilian snacks warm.
Notes
- Using an air fryer instead of deep-frying significantly reduces oil and calories.
- Substitute cream cheese with Catupiry for a more authentic flavor if available.
- Adjust seasoning and herbs in the filling to your taste.
- Make sure the dough is cool enough to handle but still pliable for shaping.
- Ensure coxinhas are sealed well to prevent filling leaks during cooking.
Keywords: coxinhas, Brazilian snack, air fryer recipe, healthy coxinhas, chicken coxinhas, Brazilian appetizer, low fat snack