Halloween Chocolate Cookies Recipe
If you’re on the hunt for a Halloween treat that’s both spooky and downright delicious, this Halloween Chocolate Cookies Recipe is going to be your new go-to. These cookies pack rich cocoa flavor and a soft, chewy texture that feels like a perfect hug in cookie form—just what you want when the nights get cooler and the pumpkin spice mugs come out. Plus, making these is such a fun way to kick off your Halloween baking tradition!
I remember the first time I tried this recipe at home, my kitchen smelled like chocolate heaven for hours. What makes this Halloween Chocolate Cookies Recipe extra special is not just the chocolatey goodness, but how versatile it is—you can roll them in cocoa for a little rustic charm or decorate them with royal icing for a fun, festive flair. Whether you’re baking for a classroom party or family movie night, these cookies never disappoint.
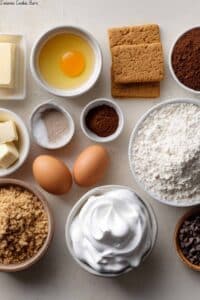
Ingredients You’ll Need
This list might look simple, but each ingredient plays a key role in making these cookies perfectly soft, fudgy, and ready to decorate. A quick shopping tip: pick good quality vanilla and fresh cocoa powder—you’ll taste the difference.
- All-purpose flour: Spoon and level it to avoid dense cookies.
- Unsweetened cocoa powder: Choose natural or Dutch process depending on your taste; I use Dutch for a milder chocolate flavor.
- Baking powder: Gives the cookie a slight lift, keeping it tender.
- Salt: Just a pinch enhances the chocolate flavors beautifully.
- Unsalted butter: Softened to room temp for easy mixing and creamy texture.
- Granulated sugar: Provides just the right amount of sweetness and crunch.
- Egg: Helps bind everything and keep the cookie tender.
- Pure vanilla extract: Adds warmth and depth to the chocolate.
- Royal icing or easy cookie icing (optional): Perfect for adding spooky Halloween designs, plus gel food coloring to tint your icing.
Variations
I love that you can really make this Halloween Chocolate Cookies Recipe your own, whether you want to keep it classic or toss in some fun twists. I often customize mine depending on the mood or who I’m baking for!
- Double chocolate: Add chocolate chips or chunks for an extra melty surprise—I’ve found this is a big crowd-pleaser at parties.
- Spicy twist: Sprinkle a little cayenne or cinnamon into the dry mix for a subtle heat that pairs perfectly with the rich cocoa.
- Gluten-free: Swap the all-purpose flour for a cup-for-cup gluten-free blend, but be mindful of the texture changing slightly.
- Decorating fun: Use colored royal icing to paint cute spiders, pumpkins, or bats. My kids go wild for this hands-on decorating session.
- Nutty addition: Mix in chopped walnuts or pecans if you like a bit of crunch in your cookie.
How to Make Halloween Chocolate Cookies Recipe
Step 1: Mix the Dry Ingredients
Start by whisking together the all-purpose flour, cocoa powder, baking powder, and salt in a medium bowl. This step ensures your cocoa and leavening agents are evenly distributed, which helps avoid any surprises like bitter pockets of cocoa or uneven rising later on. I usually sift these ingredients to keep things super smooth and light.
Step 2: Cream the Butter and Sugar
Using a hand mixer or stand mixer, beat the softened butter with the granulated sugar until it’s fluffy and pale. This usually takes about 3-5 minutes. This step is crucial—you want to trap air in the butter to help the cookie rise just enough while staying soft inside. Don’t rush it!
Step 3: Add Egg and Vanilla
Next, add the egg and vanilla extract to the butter mixture. Beat until well combined. Be sure both the egg and vanilla are at room temperature to prevent the butter from splitting. If your batter looks a bit curdled here, don’t freak out—it usually smooths out once you add the dry mix.
Step 4: Combine Wet and Dry Ingredients
Slowly add the dry ingredients to the wet mix, folding gently with a spatula or mixing on low speed. You want to mix just until no flour streaks remain to avoid tough cookies. The dough will be thick—if it feels too sticky to roll, sprinkle a little extra cocoa powder onto your work surface and hands.
Step 5: Shape and Bake
Preheat your oven to 350°F (175°C). Roll dough into 1-inch balls, then roll each ball in extra cocoa powder for a beautiful, slightly dusty finish. Place on a parchment-lined baking sheet with some space between—they spread some but not too much.
Bake for 10-12 minutes. The key here is to pull them out when they still look a touch soft in the center; they’ll firm up as they cool and stay soft inside. I usually cool mine on the baking sheet for 5 minutes before moving to a wire rack.
How to Serve Halloween Chocolate Cookies Recipe
Garnishes
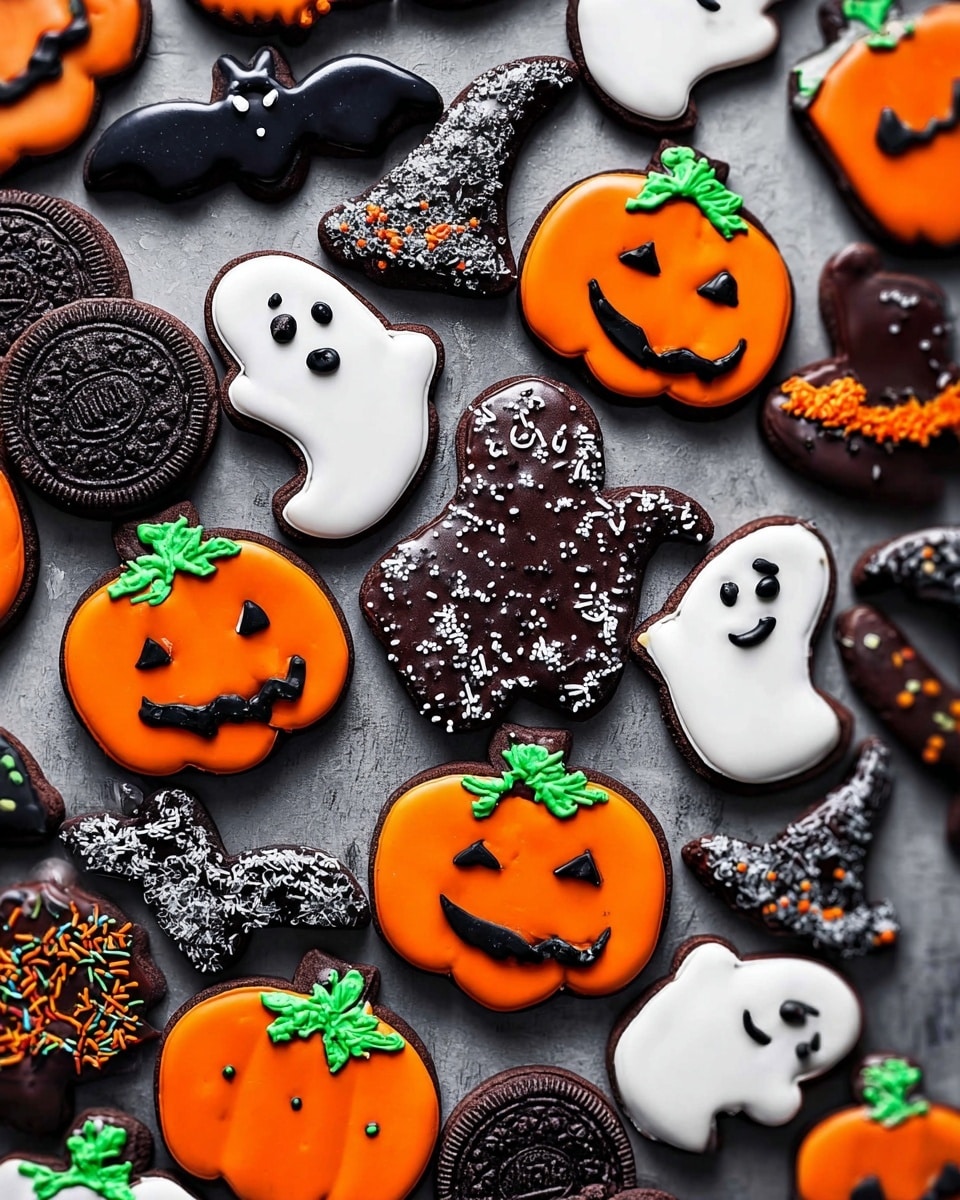
For garnishes, I love topping these cookies with spooky royal icing decorations—think black spiders, orange pumpkins, or ghostly white swirls. A light dusting of powdered sugar also adds a nice, ghostly effect without much effort. Sometimes, just a sprinkle of colored sugar crystals before baking adds a fun crunch and color pop.
Side Dishes
These cookies pair amazingly with a cold glass of milk, but if you want to get festive, serve alongside pumpkin spice latte or hot chocolate with a swirl of whipped cream. For grown-ups, a splash of peppermint schnapps or coffee liqueur really complements the deep cocoa flavor.
Creative Ways to Present
I once set up a Halloween cookie decorating station for my niece’s party—everyone got their own cookie, a bit of icing, and a handful of edible eyes and sprinkles. Kids and adults alike loved it! For a more elegant twist, arrange the cookies on a vintage tray with some autumn leaves and miniature pumpkins for a charming seasonal display.
Make Ahead and Storage
Storing Leftovers
I keep leftover Halloween Chocolate Cookies in an airtight container at room temperature. They stay soft and delicious for up to 4 days. If you want to keep them fresh even longer, add a slice of bread in the container—it helps keep that lovely moisture locked in.
Freezing
These cookies freeze beautifully! I flash freeze the shaped cookie dough balls on a tray first, then transfer them to a freezer-safe bag. You can bake directly from frozen, just add an extra minute or two to the baking time. It’s a lifesaver when you want fresh cookies on short notice.
Reheating
To refresh leftover or frozen cookies, pop them in a preheated oven at 300°F for about 5 minutes. This helps bring back that freshly-baked softness and revives the chocolate aroma. Microwaving is a quick fix but can make cookies tougher, so I prefer the oven method.
FAQs
-
Can I use Dutch-process cocoa in this Halloween Chocolate Cookies Recipe?
Yes! Dutch-process cocoa works very well here and results in a slightly smoother, less acidic chocolate flavor. Just be aware that it may slightly affect the cookie’s rise because it’s less acidic than natural cocoa, but with the baking powder included, your cookies will still turn out soft and lovely.
-
How can I make these cookies vegan?
You can substitute the butter with vegan margarine or coconut oil and the egg with a flax or chia egg (1 tablespoon ground flaxseed or chia seeds soaked in 3 tablespoons water). The texture might be a little different but still delicious and perfect for vegans celebrating Halloween!
- What’s the best way to decorate these cookies for Halloween?
I recommend using royal icing colored with gel food coloring for vibrant, durable decorations. You can pipe spiders, pumpkin faces, bats, or ghosts easily. If you want a quicker option, use colored sugar sprinkles or edible markers to create spooky designs.
- How long can I store these cookies after baking?
Stored in an airtight container at room temperature, these Halloween Chocolate Cookies stay fresh for up to 4 days. For longer storage, freezing is your best bet to maintain flavor and texture.
- Can I double this Halloween Chocolate Cookies Recipe?
Absolutely! Just double all ingredients and bake the cookies in batches. Make sure not to overcrowd your baking sheets to ensure even baking and perfect results every time.
Final Thoughts
Honestly, this Halloween Chocolate Cookies Recipe has become one of my favorites for the season. It’s reliable, delicious, and has just the right amount of flexibility to make it feel personal. If you want to impress friends or celebrate with your kids, these cookies will bring joy and that magical cozy feeling in every bite. I’m confident you’ll have as much fun baking and decorating them as you will eating them—give it a try and enjoy your spooky, chocolatey treat!
PrintHalloween Chocolate Cookies Recipe

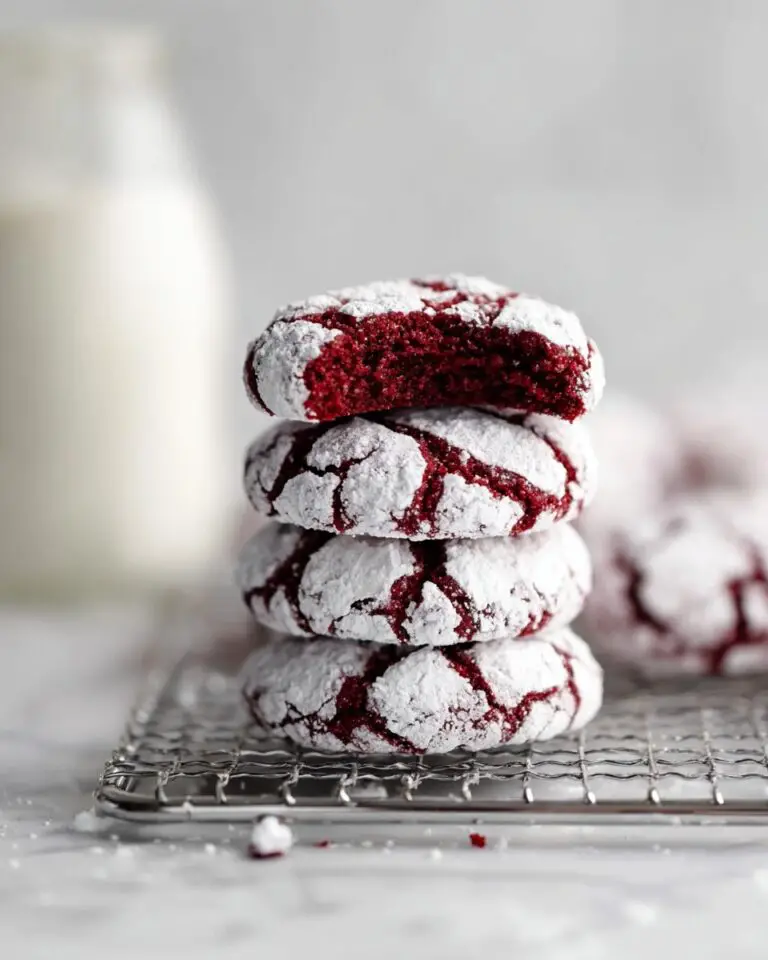
These Halloween Chocolate Cookies are rich, fudgy, and perfectly cocoa-flavored, making them an ideal treat for the spooky season. Rolled in cocoa powder to prevent sticking and topped with optional royal or easy cookie icing, these cookies offer a delightful texture and festive appearance that’s sure to impress at any Halloween celebration.
- Prep Time: 15 minutes
- Cook Time: 12 minutes
- Total Time: 27 minutes
- Yield: About 24 cookies 1x
- Category: Dessert
- Method: Baking
- Cuisine: American
Ingredients
Dry Ingredients
- 1 and 1/2 cups (188g) all-purpose flour (spooned & leveled)
- 3/4 cup (62g) unsweetened natural cocoa powder (or dutch process cocoa powder), plus more as needed for rolling and work surface
- 1 teaspoon baking powder
- 1/8 teaspoon salt
Wet Ingredients
- 3/4 cup (12 Tbsp; 170g) unsalted butter, softened to room temperature
- 1 cup (200g) granulated sugar
- 1 large egg, at room temperature
- 1 teaspoon pure vanilla extract
Optional Topping
- Royal Icing or Easy Cookie Icing
- Gel food coloring for tinting icings
Instructions
- Preheat Oven: Preheat your oven to 350°F (175°C). This ensures the cookies bake evenly and develop a nice texture.
- Mix Dry Ingredients: In a medium bowl, sift together the all-purpose flour, unsweetened cocoa powder, baking powder, and salt. This helps to avoid lumps and evenly distribute the leavening agents.
- Cream Butter and Sugar: In a large bowl, beat the softened unsalted butter and granulated sugar together using an electric mixer until the mixture is light and fluffy, about 3-4 minutes. This aerates the batter and leads to tender cookies.
- Add Egg and Vanilla: Add the room temperature egg and pure vanilla extract to the butter-sugar mixture. Beat until fully incorporated and smooth.
- Combine Wet and Dry: Gradually add the dry ingredients into the wet ingredients, mixing on low speed to combine. Be careful not to overmix to keep the cookies tender.
- Shape the Dough: Roll the dough into 1-inch balls. Then roll each ball lightly in additional cocoa powder to prevent sticking and create a beautiful dark crust after baking.
- Place on Baking Sheet: Arrange the coated dough balls on a parchment-lined baking sheet, spacing them about 2 inches apart to allow for spreading.
- Bake: Bake in the preheated oven for 10-12 minutes or until the cookies have spread and the edges look set but the center still appears slightly soft.
- Cool: Allow the cookies to cool on the baking sheet for 5 minutes before transferring to a wire rack to cool completely. This prevents breakage.
- Decorate (Optional): Once cooled, decorate with royal icing or easy cookie icing tinted with gel food coloring to add festive Halloween designs.
Notes
- Ensure the butter and egg are at room temperature for proper mixing and texture.
- If you do not have Dutch-process cocoa, natural cocoa works well but may give a slightly more acidic, sharper chocolate flavor.
- Rolling the dough balls in cocoa powder enhances the cookie’s texture and appearance.
- For best results, chill the dough for 30 minutes before baking if your kitchen is warm.
- Decorating with royal icing is optional but adds a fun Halloween touch and makes the cookies more festive.
- Store cookies in an airtight container at room temperature for up to 5 days or freeze for longer storage.
Keywords: Halloween cookies, chocolate cookies, cocoa cookies, festive cookies, holiday baking, royal icing cookies