Gnome Mini Cheesecakes Recipe
I’m so excited to share my Gnome Mini Cheesecakes recipe with you because these little treats are just pure magic! They’re not only adorable but also super delicious with a creamy, dreamy cheesecake filling atop a crunchy graham cracker crust. This recipe is perfect when you want something whimsical yet simple to impress friends or family without spending hours in the kitchen.
What makes this Gnome Mini Cheesecakes recipe really special is how versatile and fun it is — you get a perfectly sized dessert that’s great for parties, holiday gatherings, or even as a sweet surprise after a midweek meal. Plus, decorating them with strawberries and tiny candy “noses” adds that charming touch that always gets compliments. I’ve found they’re a real crowd-pleaser, and I can’t wait for you to try making them yourself!
Ingredients You’ll Need
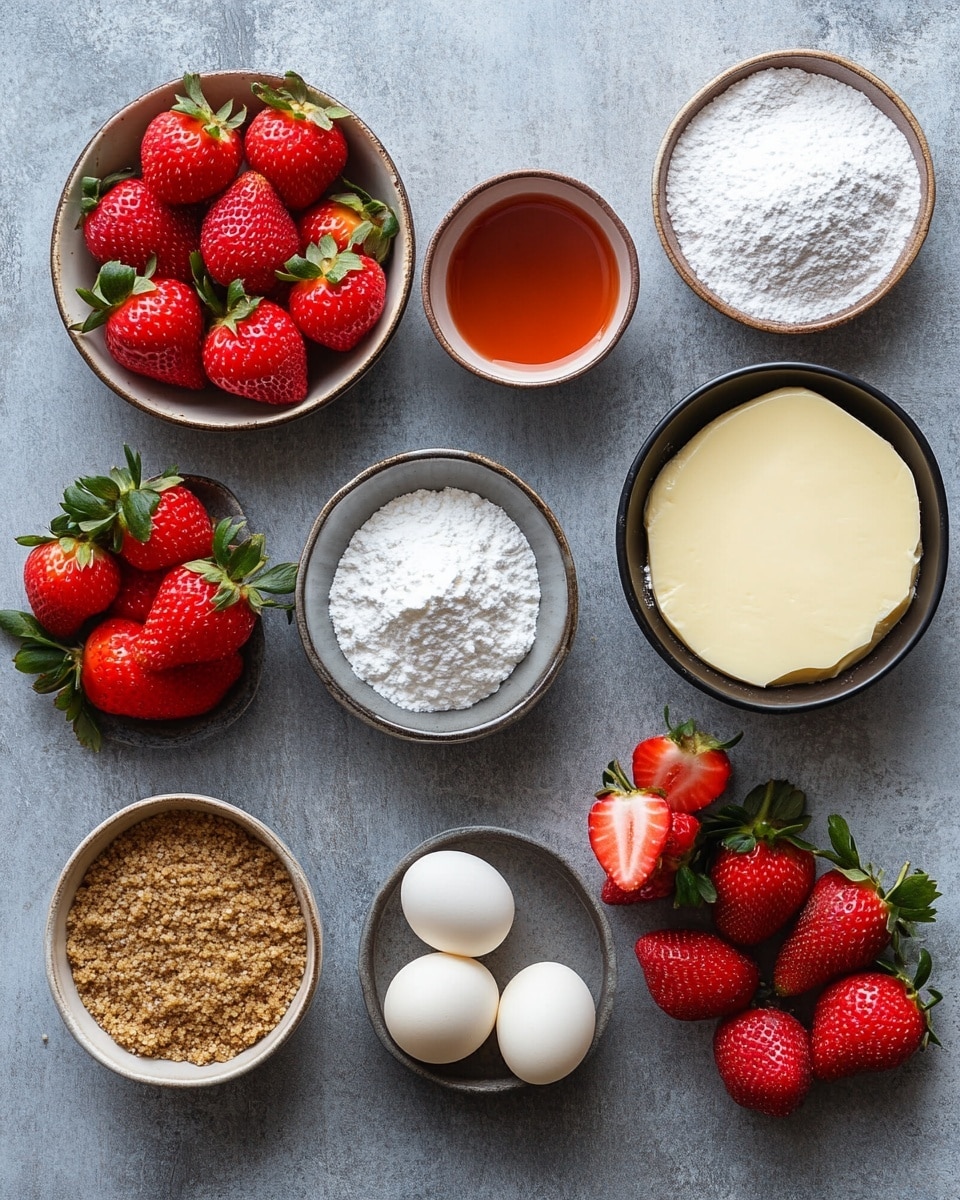
The flavors here are simple but come together beautifully. Using quality cream cheese and fresh sour cream or Greek yogurt makes the cheesecake super creamy, while the graham cracker crust adds just the right crunch. Grab fresh strawberries and cute little candies for the fun gnome decorations!
- Graham cracker crumbs: Go for finely crushed crumbs to make a sturdy, even crust that holds up well.
- Melted butter: This is the glue for your crust — use unsalted for the best balance.
- Granulated sugar: Adds sweetness to both the crust and filling—baking it right will caramelize it nicely.
- Cream cheese: Make sure it’s softened for smooth mixing—cold cream cheese ruins the texture!
- Vanilla extract: A splash really brightens up the cheesecake flavor without overpowering it.
- Eggs: They bind everything together and create that silky cheesecake texture.
- Sour cream or Greek yogurt: Adds a subtle tang and keeps the filling creamy and moist.
- Fresh strawberries: Pick firm strawberries that’ll hold their shape for decorating the gnome hats.
- Whipped cream: You can use store-bought or whip your own for a fresh topping.
- Mini white chocolate chips or candy pearls: These tiny touches become the cute little noses for your gnomes!
- Powdered sugar: Just a light dusting gives a magical snowy effect.
Variations
One of the best things about the Gnome Mini Cheesecakes recipe is how easy it is to make your own. I often switch up the decorations or tweak the filling to fit the season or my mood. Don’t be afraid to get creative!
- Berry Twist: Swap strawberries for raspberries or blueberries for a different fruity flair — my kids especially love the raspberry version in summer.
- Chocolate Crust: Using crushed chocolate cookies instead of graham crackers creates a rich base that pairs beautifully with the creamy filling.
- Dairy-Free: Use dairy-free cream cheese and coconut yogurt to make this recipe vegan-friendly without losing any creaminess.
- Mini Cheesecake Bites: Make them smaller using a mini muffin tin for party platters—guaranteed to disappear fast in my experience!
- Festive Flavors: Add a pinch of cinnamon or pumpkin pie spice to the filling during fall for a cozy twist.
How to Make Gnome Mini Cheesecakes Recipe
Step 1: Create the Perfect Crust Base
Start by mixing your graham cracker crumbs with melted butter and sugar until evenly moistened. This is the foundation for your gnome cheesecakes, so press the mixture firmly into the bottoms of your muffin tin cups (lined with cupcake liners if you want easy removal). I like to use the bottom of a small glass to press it evenly and tight — this prevents cracks later on.
Step 2: Whip Up That Creamy Filling
Beat your softened cream cheese with sugar until super smooth and fluffy. Adding the vanilla, eggs one by one, and then sour cream keeps the texture creamy and luscious. Make sure not to overmix once the eggs go in to avoid cracks while baking—trust me, it’s a game changer!
Step 3: Fill and Bake
Pour or spoon the filling evenly over the crusts, filling each muffin cup almost to the top. Bake in a preheated oven (typically 325°F/163°C) for about 18-20 minutes—until the edges are set but the center still jiggles slightly. It’s tempting to overbake, but patience pays off here for that creamy richness.
Step 4: Cool and Decorate Your Gnomes
Once baked, let the mini cheesecakes cool completely in the pan before chilling for a few hours (overnight is ideal). Then the fun begins: top each with a fresh strawberry “hat,” a little whipped cream beard, and a mini white chocolate chip or candy pearl for that cute gnome nose. Dust a pinch of powdered sugar for the snowy effect—I swear, your guests will adore them!
How to Serve Gnome Mini Cheesecakes Recipe
Garnishes
I always stick to fresh strawberries and whipped cream for the classic look, but sometimes I add tiny mint leaves as “hair” or swap in red currants for a tangy twist. The mini white chocolate chips are my go-to nose—they add a subtle sweetness and look adorable. A quick dusting of powdered sugar finishes them off perfectly and gives that magical winter vibe.
Side Dishes
These mini cheesecakes shine as a stand-alone dessert, but I love serving them alongside warm mulled wine or a light fruit salad during holidays. A small scoop of vanilla ice cream or homemade berry compote also pairs beautifully and balances the richness.
Creative Ways to Present
One time, I set up a “build your own gnome” station at a birthday party where guests could add their own decorations—berries, candies, whipped cream swirls—it was a huge hit! For festive occasions, arrange them on a rustic wooden tray with pine sprigs and fairy lights for that enchanted forest vibe. Presentation can make all the difference and really ups the wow factor.
Make Ahead and Storage
Storing Leftovers
I always store leftover Gnome Mini Cheesecakes covered tightly in the fridge. They keep beautifully for about 3-4 days, which is plenty of time because they rarely last longer in my house! Covering them well prevents drying out and keeps the whipped cream fresh if you’re adding it on before serving.
Freezing
Freezing these mini cheesecakes works pretty well if you want to make them ahead. I recommend freezing them un-decorated and wrapped individually in plastic wrap, then storing in an airtight container. When you’re ready to serve, thaw overnight in the fridge before adding the fresh toppings. This way, the texture stays creamy, and your decorations don’t get soggy.
Reheating
Since this is a no-bake set cheesecake, reheating isn’t usually necessary and can mess with texture. If you prefer your cheesecake at room temperature, just let it sit out for about 15 minutes before serving—that softens it perfectly without losing that silky feel.
FAQs
-
Can I use low-fat cream cheese for the Gnome Mini Cheesecakes recipe?
You can, but keep in mind that using low-fat cream cheese might affect the cheesecakes’ creaminess and texture, making them slightly less rich and dense. For best results, I recommend full-fat cream cheese for that classic smooth and indulgent bite.
-
How do I prevent cracks in the mini cheesecakes?
To avoid cracking, don’t overmix the batter once the eggs are added and bake at a moderate temperature (about 325°F/163°C). Also, avoid overbaking—the centers should still jiggle slightly when you take them out of the oven. Cooling them gradually helps too.
-
Can I make these Gnome Mini Cheesecakes ahead of time?
Absolutely! You can prepare them a day or two in advance, refrigerate, and decorate just before serving to keep them fresh and pretty. They also freeze well if you want to prep even further ahead (just decorate after thawing).
-
What is the best way to remove cheesecakes from the muffin tin?
I like to use cupcake liners, which makes removal super easy—just peel them off carefully. If you skip liners, run a small, thin knife around the edges gently before lifting them out with a small spoon or spatula.
-
Any tips for decorating the gnome faces perfectly?
Definitely! Use a small piping bag or a spoon to place whipped cream beards, then gently place the mini candy nose just above. Make sure strawberries are dry so they don’t slip around, and dust powdered sugar last to avoid melting your decorations.
Final Thoughts
I hope you enjoy making the Gnome Mini Cheesecakes recipe as much as I do! These little desserts bring out the kid in me every time I decorate them, and they’ve become a charming tradition in my home. Whether you’re baking for a special holiday or just because, they’re sure to delight everyone who tries them. Grab your ingredients, have fun with the decorations, and treat yourself to something truly sweet and whimsical!
PrintGnome Mini Cheesecakes Recipe

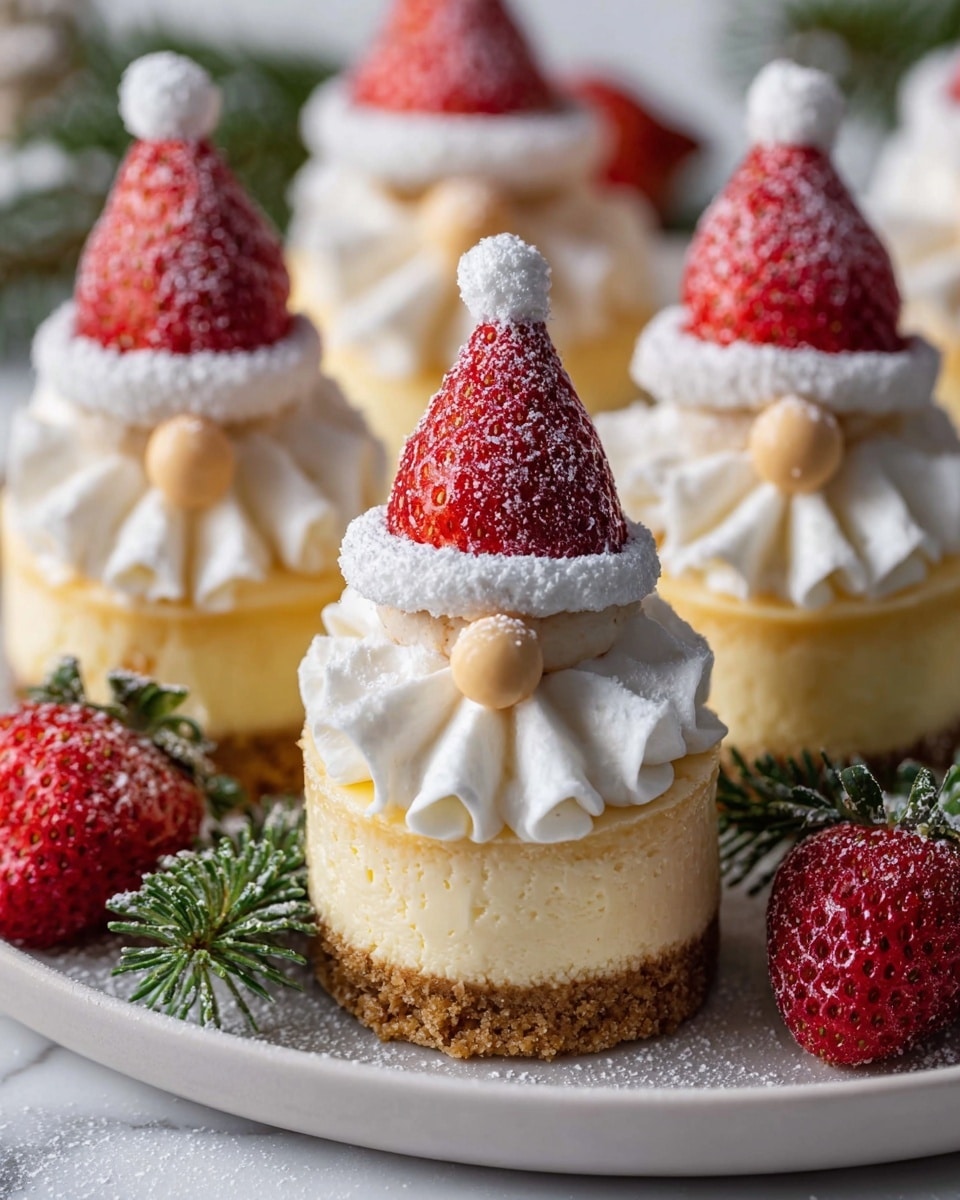
These charming Gnome Mini Cheesecakes combine a classic creamy cheesecake filling atop a buttery graham cracker crust, decorated with whimsical fresh strawberries and whipped cream to resemble cute gnome hats. Perfect for festive occasions or as a delightful dessert treat, these individual cheesecakes are both visually fun and delectably rich.
- Prep Time: 20 minutes
- Cook Time: 20 minutes
- Total Time: 3 hours 40 minutes
- Yield: 12 mini cheesecakes 1x
- Category: Dessert
- Method: Baking
- Cuisine: American
Ingredients
For the Crust:
- 1 cup graham cracker crumbs
- 3 tablespoons melted butter
- 2 tablespoons granulated sugar
For the Cheesecake Filling:
- 16 oz (2 blocks) cream cheese, softened
- ½ cup granulated sugar
- 1 teaspoon vanilla extract
- 2 large eggs
- ¼ cup sour cream or Greek yogurt
Decoration:
- Fresh strawberries (1 per cheesecake)
- Whipped cream (store-bought or homemade)
- Mini white chocolate chips or small candy pearls (for noses)
- Powdered sugar (for dusting)
Instructions
- Prepare the crust: Preheat the oven to 325°F (163°C). In a medium bowl, mix the graham cracker crumbs, melted butter, and granulated sugar until well combined. Press the mixture evenly into the bottom of a muffin tin lined with paper liners to form the crust.
- Make the cheesecake filling: In a large bowl, beat the softened cream cheese with an electric mixer until smooth and creamy. Add the granulated sugar and vanilla extract, mixing until combined. Incorporate the eggs one at a time, beating well after each addition. Finally, fold in the sour cream or Greek yogurt until the mixture is smooth.
- Fill and bake: Pour the cheesecake filling evenly over the prepared crusts in the muffin tin, filling each about three-quarters full to allow space for rising. Bake in the preheated oven for 18-22 minutes or until the centers are mostly set but still slightly jiggly.
- Cool and chill: Remove the cheesecakes from the oven and let them cool to room temperature. Afterward, refrigerate for at least 3 hours or preferably overnight to firm up completely.
- Decorate the gnomes: Once chilled, top each mini cheesecake with a dollop of whipped cream shaped like a gnome’s hat. Place a fresh strawberry upside down on the whipped cream to resemble the hat. Add a mini white chocolate chip or small candy pearl at the base of the strawberry for the gnome’s nose. Lightly dust with powdered sugar for a whimsical snowy effect.
- Serve: Carefully remove the paper liners before serving or serve them as-is for easy handling. Enjoy your adorable and delicious gnome mini cheesecakes!
Notes
- Ensure cream cheese is softened to room temperature for a smooth filling.
- Use sour cream or Greek yogurt depending on your preference for tanginess.
- Do not overbake; the cheesecakes should be slightly jiggly in the center when done.
- Decorate just before serving to keep whipped cream fresh.
- These cheesecakes can be stored covered in the refrigerator for up to 3 days.
Keywords: mini cheesecake, gnome dessert, cute cheesecakes, holiday dessert, strawberry cheesecake, individual cheesecakes