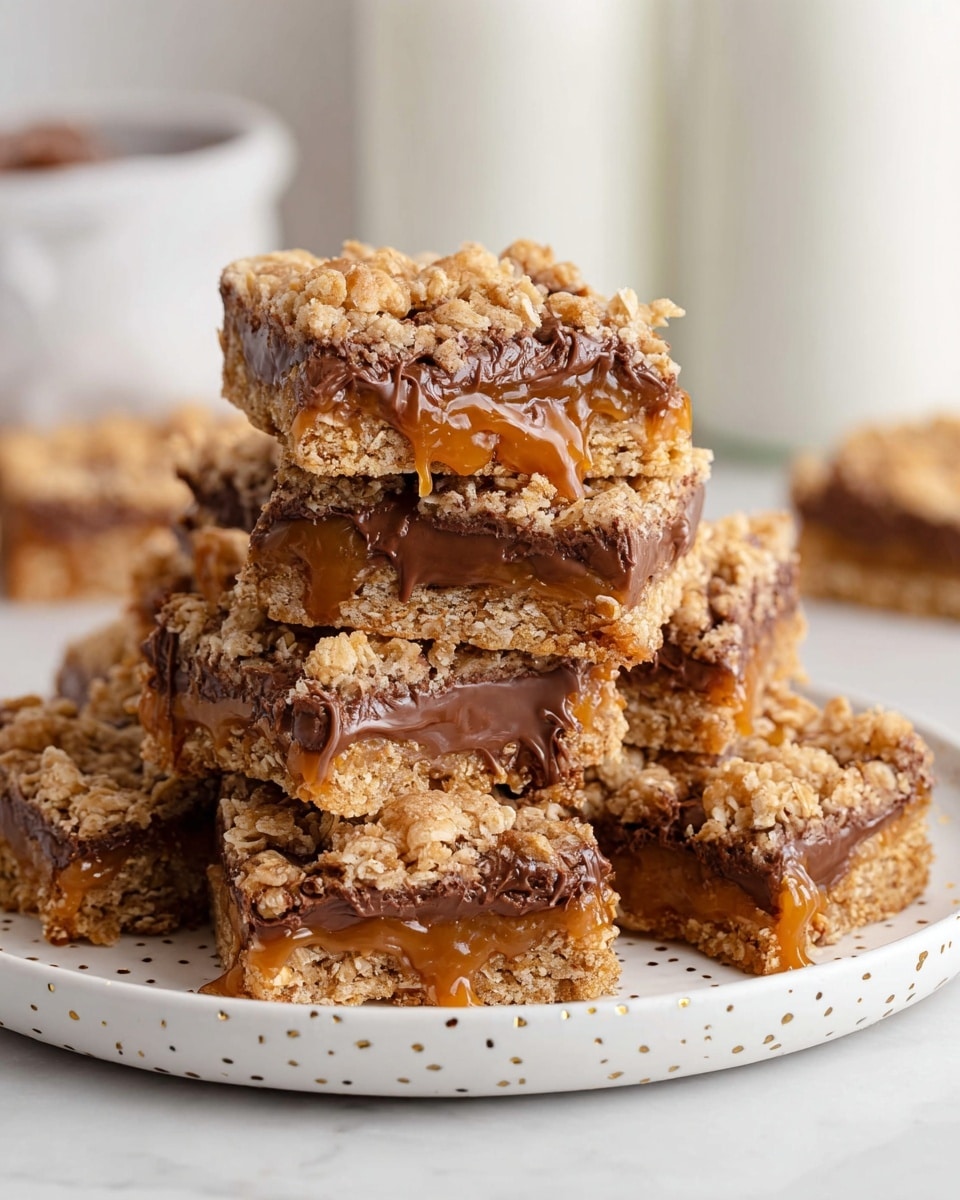
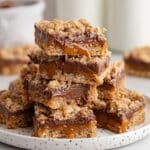
Decadent Caramelitas with Milk Chocolate and Caramel Recipe
If you’re anything like me, you know that sometimes the best desserts are the ones that bring a little bit of everything — crunch, chew, sweetness, and a hint of luxury. That’s exactly why I’m so excited to share this Decadent Caramelitas with Milk Chocolate and Caramel Recipe with you! It’s a fantastic sweet treat that blends a buttery oat crust with luscious milk chocolate and layers of gooey caramel, making each bite a pure delight. Whether you’re whipping up something for a casual get-together or a cozy night in, these caramelitas will always impress.
What I love most about this Decadent Caramelitas with Milk Chocolate and Caramel Recipe is how approachable it is — no fancy techniques or rare ingredients, just good old-fashioned baking with ingredients you can find easily. Plus, once you get that rhythm going, it’s a breeze to make, and the aroma of melting caramel and chocolate is just intoxicating. Trust me, you’ll want to bake a batch just to fill your kitchen with that amazing scent!
Ingredients You’ll Need
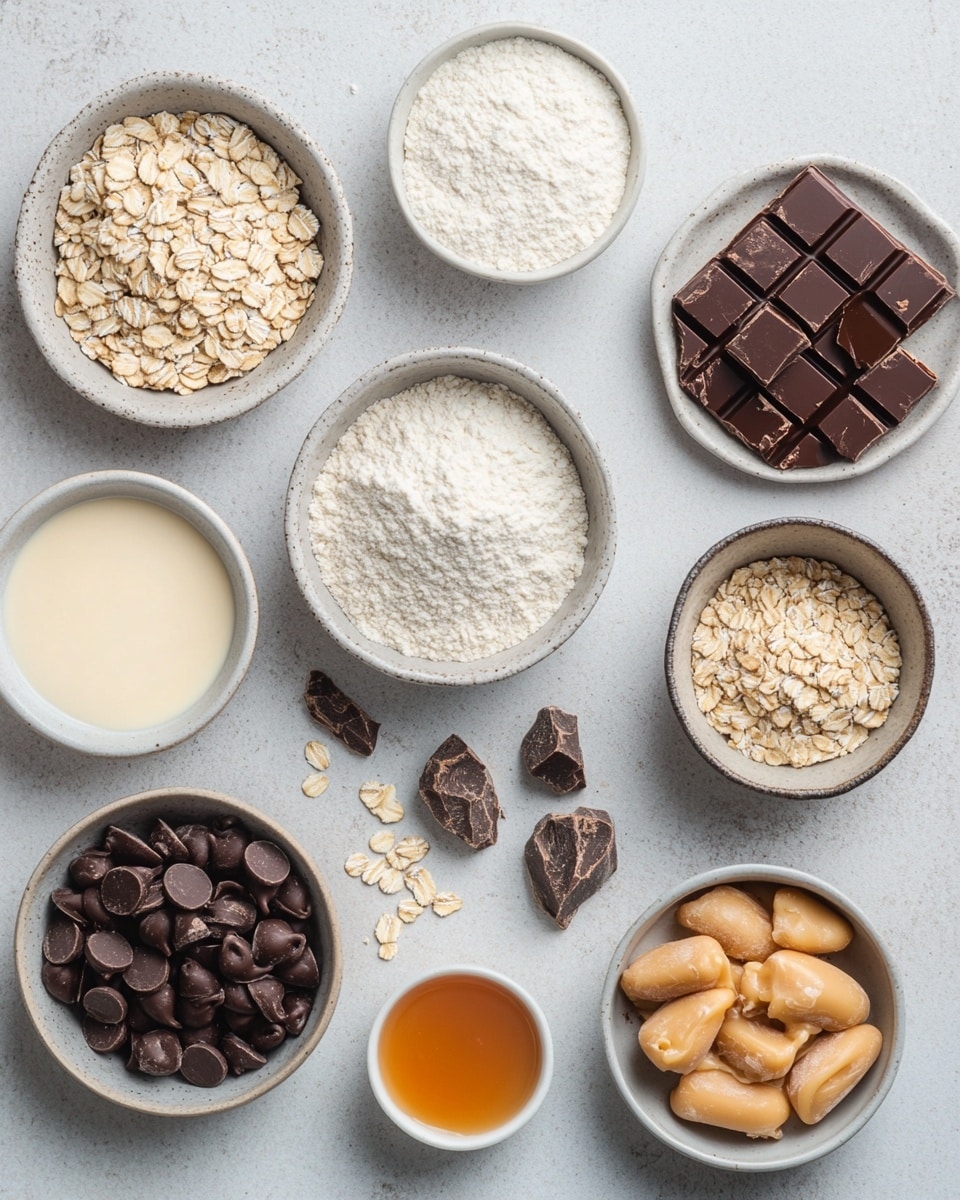
This recipe is all about simple pantry staples coming together to create something way more than the sum of their parts. Here’s a quick tip: using good quality milk chocolate chips will make a big difference — they melt beautifully and taste heavenly combined with those creamy caramels.
- All-purpose flour: The base for that sturdy yet tender crust, make sure it’s well-sifted for an even texture.
- Old fashioned oats: For that chewy, nutty texture — don’t swap out for quick oats, or you’ll lose the right bite.
- Salted butter: Melted butter adds richness and helps bind everything together perfectly.
- Light brown sugar: The molasses in brown sugar adds moisture and depth to the caramelitas.
- Pure vanilla extract: A splash of vanilla elevates the flavor and complements the caramel and chocolate.
- Baking soda: Gives just enough lift without making things cakey.
- Kosher salt: Balances the sweetness while enhancing all the flavors.
- Milk chocolate chips: Use high-quality chips or chopped milk chocolate bars for a creamy melting layer.
- Individually wrapped caramels: These gooey pockets are what make these bars extra special — unwrap and soften before layering.
- Heavy cream: Used to melt the caramels smoothly, ensuring that luscious caramel layer everyone dreams about.
Variations
One of the best parts about this Decadent Caramelitas with Milk Chocolate and Caramel Recipe is how easily customizable it is. I’ve played around with different nuts, flavors, and even dairy-free options depending on the crowd, and it always turns out amazing.
- Add toasted pecans or walnuts: I love tossing a handful of toasted nuts into the crust mix for a toasty crunch that pairs beautifully with the sweet caramel.
- Swap milk chocolate for dark chocolate: If you prefer a less sweet, richer flavor, go dark chocolate — it adds a sophisticated twist.
- Make it gluten-free: Use gluten-free oats and a blend of gluten-free flours; just be mindful of the texture when baking.
- Add a hint of espresso powder: A pinch mixed in with the crust brings out the chocolate flavor — perfect if you love that mocha vibe.
How to Make Decadent Caramelitas with Milk Chocolate and Caramel Recipe
Step 1: Prepare Your Oat Crust Base
Start by preheating your oven to 350°F (175°C) and lining a 9×13 inch baking pan with parchment paper, allowing some overhang for easy removal later. Mix together the all-purpose flour, old fashioned oats, baking soda, and kosher salt in a large bowl. In another bowl, whisk the melted salted butter, light brown sugar, and vanilla extract until smooth. Combine the wet and dry ingredients gently until the mixture looks crumbly but holds together when pressed — this will be your sturdy, buttery crust.
Step 2: Bake the Base
Press about two-thirds of the oat mixture firmly and evenly into the bottom of your prepared pan. Make sure it’s well compacted to avoid crumbling later. Pop it into the oven for about 15-18 minutes or until it turns a light golden brown. This step is key — it creates a perfect base that holds all those luscious toppings without getting soggy.
Step 3: Melt the Caramel and Cream
While the crust is baking, unwrap all your caramels and add them to a small saucepan with the heavy cream over low heat. Stir gently and constantly until the caramels have melted into a smooth, velvety sauce. Be patient here — if the heat is too high, you risk burning the caramel. Keep it low and slow.
Step 4: Assemble the Chocolate and Caramel Layers
Once the crust is out of the oven but still warm, sprinkle the milk chocolate chips evenly over the surface. Pour the warm caramel cream mixture over the top, spreading it gently with a spatula if needed to cover the chocolate chips. The residual heat from the crust will help soften the chocolate chips — don’t try to fully melt them before pouring, you want that contrast in texture.
Step 5: Finish With Crumbly Topping & Bake Again
Take the remaining one-third of your oat mixture and sprinkle it over the caramel and chocolate layers. This will give you that delightful crumbly top that’s so good to bite into. Bake the whole pan for another 15-20 minutes, until the topping is golden and crisp. Be careful not to overbake — you want the caramel to stay soft inside while the edges turn slightly chewy.
Step 6: Cool and Slice
Once out of the oven, let your caramelitas cool completely in the pan — this usually takes a couple of hours. It’s tempting to dig in sooner, but cooling helps the layers set so you get those perfect bars instead of messy slices. Use the parchment overhang to lift the whole batch out, then cut into squares or rectangles. I find a sharp knife warmed in hot water helps get clean edges.
How to Serve Decadent Caramelitas with Milk Chocolate and Caramel Recipe
Garnishes
I often dust the tops of my caramelitas with a tiny pinch of flaky sea salt right after baking — it’s extraordinary how that little sprinkle balances sweetness and makes the chocolate and caramel flavors pop. If you feel fancy, a drizzle of extra caramel sauce or a handful of toasted nuts on top adds a lovely finishing touch.
Side Dishes
These bars are pretty indulgent on their own, but they’re fantastic alongside a scoop of vanilla ice cream or even a dollop of whipped cream for a more dessert-like experience. If you want something less sweet, a simple cup of black coffee or strong tea pairs beautifully — trust me, the bitterness cuts through the richness in the best way.
Creative Ways to Present
For birthdays or special occasions, I like to present these caramelitas on a rustic wooden board, sprinkled with extra chocolate shavings and edible flowers for a touch of elegance. Another fun idea is to cut them into mini squares and serve in decorative cupcake liners — they become the perfect bite-sized treats for parties or afternoon snacks.
Make Ahead and Storage
Storing Leftovers
I store my leftover caramelitas in an airtight container at room temperature for up to 3 days, but if it’s humid, the toppings might soften. For best texture, I recommend keeping them in a cool, dry spot or the fridge if needed. Just bring them to room temp before eating for that perfect chewy-crunchy balance.
Freezing
Freezing these bars works wonderfully. I cut them into individual squares, wrap each piece in plastic wrap, then pop them in a freezer-safe bag or container. When you want a treat, just thaw at room temperature for an hour or so — they’ll taste almost as fresh as the day you baked them.
Reheating
If you prefer your caramelitas slightly warm (and who doesn’t?), a quick 10-15 second zap in the microwave does the trick nicely. It re-softens the chocolate and caramel without melting the topping, giving you that freshly-baked feel without all the oven time.
FAQs
-
Can I use dark chocolate instead of milk chocolate in this Decadent Caramelitas with Milk Chocolate and Caramel Recipe?
Absolutely! Dark chocolate is a great alternative that adds a richer, less sweet flavor profile. It complements the caramel beautifully and is perfect if you want to balance out the sweetness a bit.
-
How do I prevent the caramel layer from becoming too runny?
Using heavy cream with your caramels helps control the consistency, making it smooth but firm enough to set as it cools. Also, avoid overheating the caramel mixture and allow the bars to cool completely before slicing — this really helps the caramel set into that perfect gooey texture.
- Can I make these Decadent Caramelitas with Milk Chocolate and Caramel Recipe gluten-free?
Yes, you can swap the all-purpose flour for a gluten-free flour blend and ensure your oats are certified gluten-free. The texture might be slightly different but just as delicious.
- How do I cut the bars cleanly?
Use a sharp knife heated under hot water and wiped dry before slicing. Cut slowly and in a single motion if possible to avoid crumbling or sticky edges.
Final Thoughts
Honestly, this Decadent Caramelitas with Milk Chocolate and Caramel Recipe holds a special place in my heart because it manages to feel both indulgent and homey at the same time. It’s one of those recipes that, once you try it, you’ll want to make again and again for celebrations or just to treat yourself. I can’t wait for you to dig in and enjoy all those layers of flavor and texture — your kitchen will smell amazing, and your friends will be asking for the recipe in no time!
PrintDecadent Caramelitas with Milk Chocolate and Caramel Recipe
Carmelitas are a delicious layered bar cookie combining a buttery oat crust, a rich caramel layer, and a smooth milk chocolate topping. This dessert features a perfect balance of sweet caramel and chocolate with a satisfying oat base, making it a crowd-pleaser for any occasion.
- Prep Time: 15 minutes
- Cook Time: 30 minutes
- Total Time: 45 minutes
- Yield: 24 bars 1x
- Category: Dessert
- Method: Baking
- Cuisine: American
Ingredients
Oat Crust
- 1½ cups all purpose flour
- 1½ cups old fashioned oats
- 1 cup salted butter, melted
- ¾ cup light brown sugar, tightly packed
- 2 teaspoons pure vanilla extract
- 1 teaspoon baking soda
- ½ teaspoon kosher salt
Chocolate and Caramel Layer
- 1½ cups milk chocolate chips
- 11 ounces individually wrapped caramels
- ½ cup heavy cream
Instructions
- Prepare the Crust: In a large mixing bowl, combine the flour, oats, baking soda, and kosher salt. Stir in the melted salted butter, light brown sugar, and vanilla extract until all ingredients are thoroughly mixed and form a crumbly dough.
- Form the Bottom Layer: Press about two-thirds of the oat mixture evenly into the bottom of a lined 9×13-inch baking pan, creating a firm, even crust.
- Make the Caramel Layer: Unwrap the caramels and place them in a saucepan with the heavy cream over low heat. Stir continuously until the caramels are completely melted and the mixture is smooth and creamy.
- Top the Crust with Caramel: Pour the melted caramel mixture over the oat crust layer in the baking pan, spreading it evenly to cover the base.
- Add Chocolate Layer: Sprinkle the milk chocolate chips evenly over the warm caramel layer, allowing them to soften slightly.
- Top with Remaining Crust: Crumble the remaining oat mixture evenly over the chocolate chips, gently pressing down to adhere the layers together.
- Bake: Preheat your oven to 350°F (175°C) and bake the assembly for 25-30 minutes, or until the oat topping is golden brown and the edges are bubbly.
- Cool and Cut: Remove the pan from the oven and allow the caramelitas to cool completely in the pan on a wire rack before cutting them into bars. This helps the layers set firmly for clean slices.
Notes
- Use a lined baking pan with parchment paper for easy removal and cleanup.
- Ensure the caramel mixture is warm when pouring over the crust, so it spreads evenly but not too hot to melt the oats excessively.
- For extra chewiness, slightly underbake, but be cautious to avoid a doughy texture.
- Store bars in an airtight container at room temperature for up to 4 days or refrigerate for longer shelf life.
- For a nutty variation, sprinkle chopped nuts like pecans or walnuts between the caramel and chocolate layers.
Keywords: Carmelitas, oat bars, caramel bars, chocolate bars, layered dessert, easy dessert, sweet bars