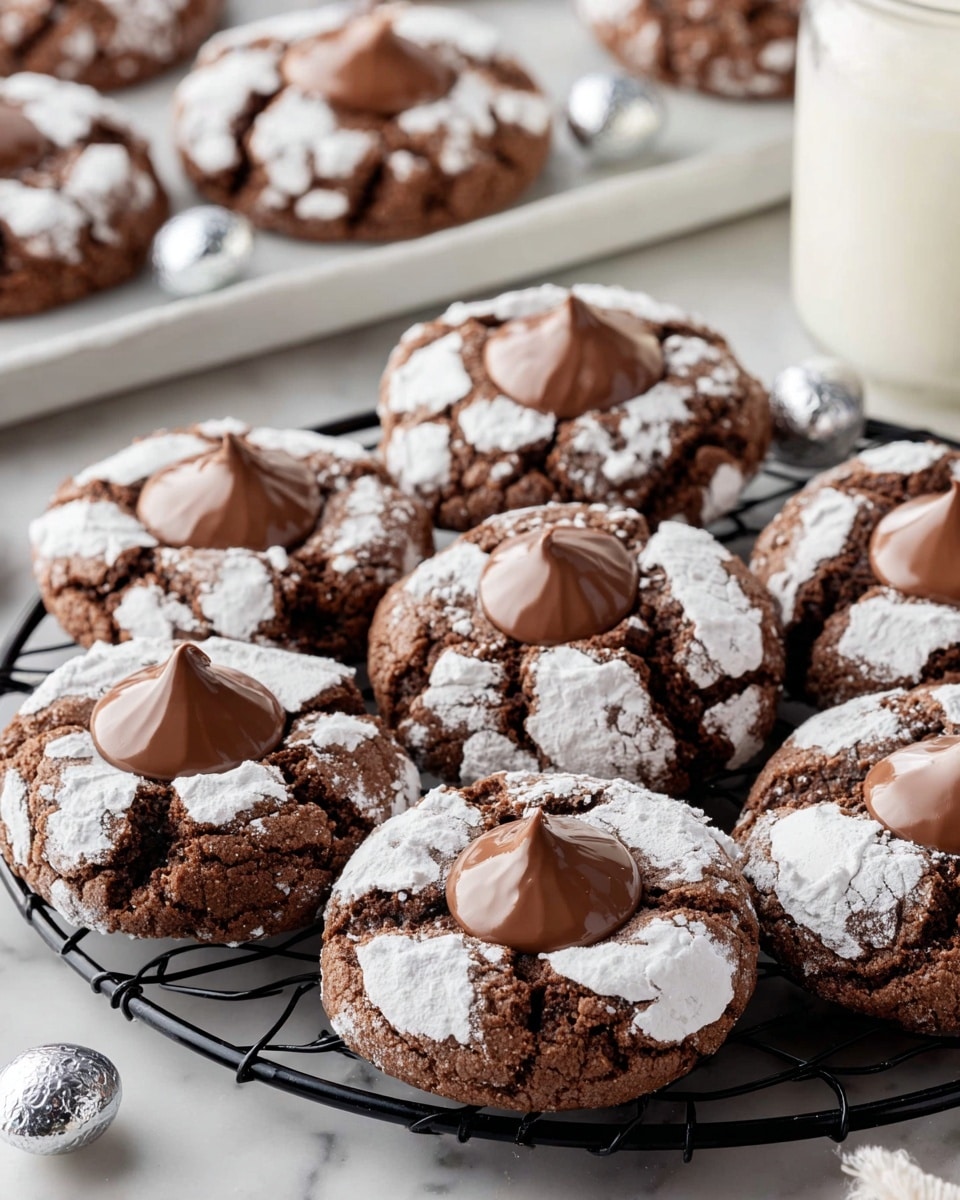
Chocolate Puddles Recipe
Alright, let me tell you about this Chocolate Puddles Recipe that’s become my go-to when I want a warm, cozy treat without fussing over complicated steps. It’s like the best of a cookie and a brownie had a delicious little love child — soft, chocolatey, and perfectly sweet. I love how they puff up just a bit and then settle into these gorgeous little puddles of rich chocolate — hence the name!
If you’re looking for a dessert that’ll impress with minimal effort, this Chocolate Puddles Recipe is a winner. Whether for a casual weeknight dessert, a bake sale, or sharing with friends during the holidays, it always gets rave reviews. Plus, it’s super versatile — you can tweak the flavors and toppings to make it your own.
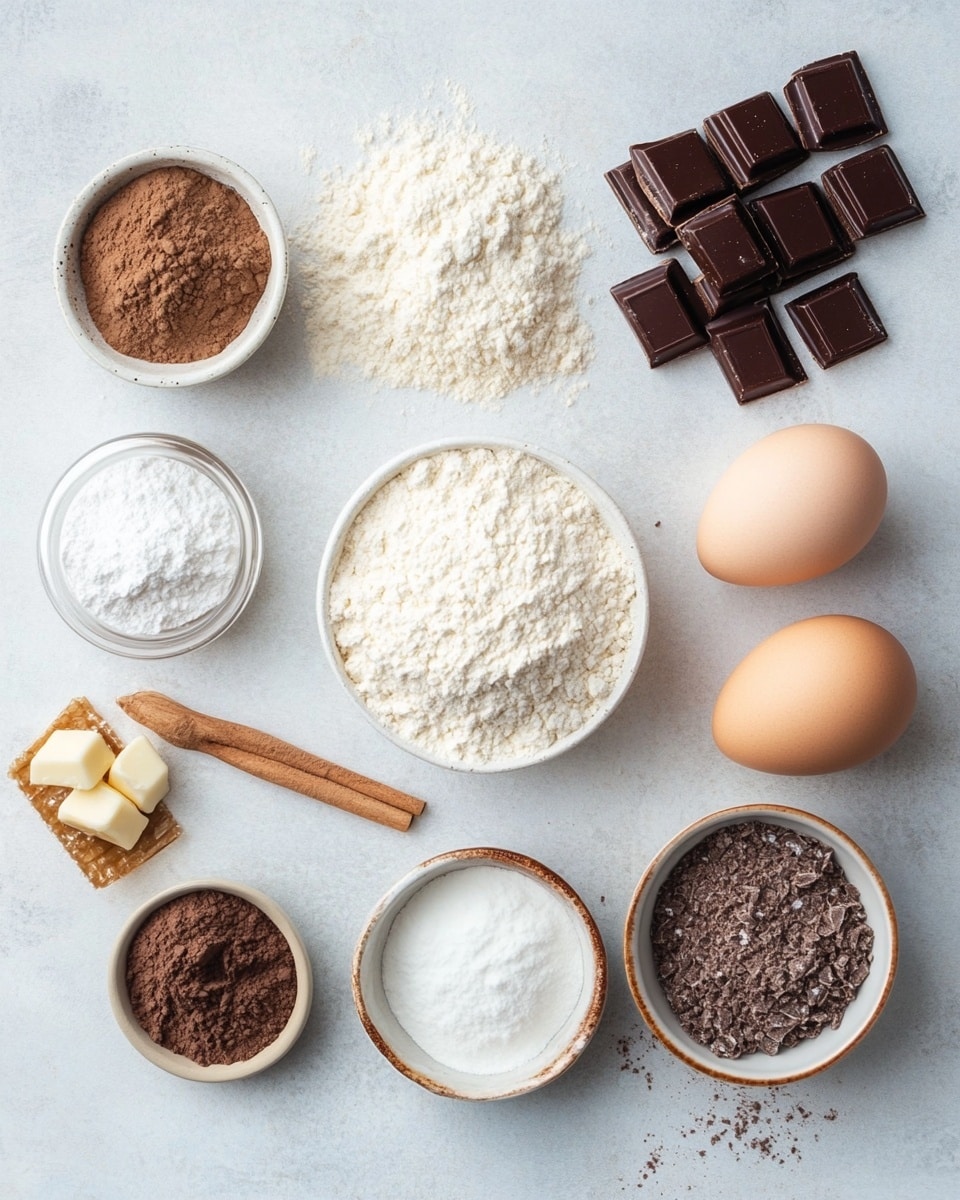
Ingredients You’ll Need
The magic of this Chocolate Puddles Recipe starts with simple pantry staples working together — each ingredient plays a role in giving you that tender, moist texture with a rich chocolate punch. When shopping, try to choose good-quality cocoa powder and fresh eggs; the difference is worth it!
- All-purpose flour: This forms the base, giving structure without toughness.
- Cocoa powder: Use unsweetened for deep chocolate flavor; Dutch-processed works well if you want a smoother taste.
- Baking soda: Helps the puddles rise nicely and stay fluffy.
- Baking powder: Works alongside baking soda for the perfect lift and texture.
- Cornstarch: A little secret weapon to keep the puddles tender and soft.
- Salted butter: Adds richness — I always make sure it’s softened for easy mixing.
- Granulated sugar: Sweetens without overpowering, balancing the chocolate.
- Light brown sugar: Adds moisture and a hint of caramel flavor, which I swear makes all the difference.
- Eggs: Room temperature eggs blend easier and help create a smoother batter.
- Vanilla extract (or peppermint extract): Vanilla is classic, but peppermint gives a festive twist that’s divine.
- Powdered sugar: For dusting — it makes the finished puddles look pretty and adds a light sweet touch.
- Hershey’s kisses: The crowning glory on top — they melt slightly and add a fun chocolate finish.
Variations
One of my favorite things about the Chocolate Puddles Recipe is how easy it is to make it your own. I often swap out the extract depending on my mood or the season, and I encourage you to try whatever you love!
- Mint Chocolate Puddles: Using peppermint extract instead of vanilla instantly gives the puddles a cool, refreshing kick — perfect for holiday gatherings.
- Nutty Twist: Add chopped walnuts or pecans for some crunch. I tossed some in last time and loved the texture contrast.
- Gluten-Free Version: Substitute the flour with a gluten-free baking mix that includes xanthan gum to keep that perfect soft puddle feel.
- Extra Chocolatey: Toss in mini chocolate chips right into the batter for pockets of melty goodness.
- Spiced Chocolate Puddles: A pinch of cinnamon or cayenne pepper adds warmth and a slight kick — trust me, it’s interesting and delicious!
How to Make Chocolate Puddles Recipe
Step 1: Mix the dry ingredients
Start by whisking together the flour, cocoa powder, baking soda, baking powder, and cornstarch in a medium bowl. This step ensures all the rising agents and chocolate flavor are evenly distributed, so your puddles bake uniformly. It might seem simple, but I’ve learned from experience that skipping this step can cause uneven texture!
Step 2: Cream the butter and sugars
In a separate bowl, cream your softened butter with both granulated and brown sugar until light and fluffy. I like to use a hand mixer here; it helps get that smooth texture faster. This step is crucial because it traps air, giving you those nicely puffed puddles. Don’t rush it — take about 3 to 4 minutes.
Step 3: Add eggs and extracts
Beat in the eggs one at a time, making sure each is well incorporated before adding the next. Then, stir in your vanilla or peppermint extract. Room temperature eggs mix better and prevent your batter from curdling, which I learned the hard way!
Step 4: Combine wet and dry ingredients
Gradually add the dry mixture to your wet ingredients, folding gently. Don’t overmix here — you want everything combined but still light. The batter will be thick, like cookie dough, which is exactly right for this recipe.
Step 5: Scoop and bake
Spoon dollops of batter onto a baking sheet lined with parchment paper, spacing them a couple of inches apart since they’ll spread slightly. Once scooped, press a Hershey’s kiss into the center of each. Bake in a preheated oven at 350°F (175°C) for about 10-12 minutes — the edges will be set, but the centers soft. Be careful not to overbake; you want to keep them tender and fudgy.
How to Serve Chocolate Puddles Recipe
Garnishes
I love dusting these Chocolate Puddles with a light sprinkle of powdered sugar— it makes them look festive and adds a gentle sweetness. Sometimes, I’ll throw on a few mini marshmallows or a drizzle of caramel sauce if I’m feeling indulgent. Fresh mint leaves also add a nice pop of color and pair nicely if you used peppermint extract.
Side Dishes
These puddles are perfect on their own but pair wonderfully with a scoop of vanilla ice cream or a glass of cold milk. For a grown-up twist, I like enjoying them alongside a cup of strong black coffee or a creamy chai latte.
Creative Ways to Present
For special occasions, I’ve arranged these puddles in a layered dessert jar with whipped cream and crushed candy canes—talk about a showstopper! You can also serve them on a rustic wooden board with a selection of berries and nuts for a more casual, shared vibe. Presentation is half the fun, and these little puddles hold their charm no matter how you plate them.
Make Ahead and Storage
Storing Leftovers
If you have leftovers (which sometimes happens, but rarely!), store them in an airtight container at room temperature for up to three days. I find putting a slice of bread in the container with them helps keep the puddles moist and soft—magic trick I swear by.
Freezing
I’ve frozen these puddles a couple of times without losing that lovely texture. Just freeze them uncovered on a baking sheet first, then transfer to a freezer bag. They keep well for up to two months, which is perfect if you want to stash some treats for later.
Reheating
To enjoy leftovers warm, let the puddles come to room temperature or microwave them for about 15 seconds. If frozen, thaw overnight in the fridge and then warm gently. They’re best served slightly warm to bring out the melty kiss and soft center.
FAQs
-
Can I use dark chocolate instead of Hershey’s kisses in the Chocolate Puddles Recipe?
Absolutely! Using dark chocolate bars or chunks works great and adds a richer, bittersweet flavor. Just place one piece in the center of each dollop before baking, similar to the Hershey’s kisses. It’s a lovely variation if you want to balance sweetness.
-
How do I make the Chocolate Puddles Recipe vegan?
To go vegan, swap the butter for a plant-based margarine or coconut oil, and use flax eggs (1 tablespoon flaxseed meal + 3 tablespoons water per egg). Make sure to check your cocoa powder is dairy-free, and choose vegan-friendly chocolate for topping. The texture might be slightly different but still delicious!
-
Why do you add cornstarch in the Chocolate Puddles Recipe?
Cornstarch helps to soften the texture and keep these puddles tender. It prevents them from becoming too cakey or chewy, contributing to that perfect melt-in-your-mouth feeling I love.
-
Can I make the batter ahead of time?
Yes, you can prep the batter a few hours ahead and keep it covered in the fridge. Just give it a gentle stir before scooping and baking. This is great for busy days when you want to have your dessert ready to go!
-
What’s the best way to prevent the puddles from spreading too much?
Make sure your butter is only softened, not melted, and chill the batter for 15-20 minutes before baking if you notice too much spreading. Also, spacing them well on the baking sheet helps keep their shape intact.
Final Thoughts
I can’t recommend the Chocolate Puddles Recipe enough if you’re craving something chocolatey, soft, and just downright comforting. They’re quick to pull together, forgiving to bake, and always a crowd-pleaser. Really, it’s like a warm hug in cookie form — and who doesn’t need that? So go ahead, give this recipe a try, and surprise yourself with how easy and delicious baking can be.
PrintChocolate Puddles Recipe

Delightfully rich and fudgy, Chocolate Puddles are soft cocoa-flavored cookies topped with a luscious melted Hershey’s Kiss. These cookies balance the deep chocolate taste from cocoa powder with a tender crumb thanks to cornstarch, and their iconic peppermint or vanilla kiss adds a festive touch perfect for holiday treats or any chocolate lover’s craving.
- Prep Time: 15 minutes
- Cook Time: 11 minutes
- Total Time: 26 minutes
- Yield: 24 cookies 1x
- Category: Dessert
- Method: Baking
- Cuisine: American
Ingredients
Dry Ingredients
- 1¾ cups all-purpose flour
- ½ cup cocoa powder
- 1 teaspoon baking soda
- ¾ teaspoon baking powder
- 2 tablespoons cornstarch
Wet Ingredients
- ½ cup salted butter, softened
- ½ cup granulated sugar
- ½ cup packed light brown sugar
- 2 large eggs, room temperature
- 2 teaspoons vanilla extract, or 1 teaspoon peppermint extract
Topping
- ½ cup powdered sugar
- 24 Hershey’s kisses
Instructions
- Preheat and Prepare: Preheat your oven to 350°F (175°C). Line baking sheets with parchment paper or silicone baking mats to prevent sticking and ensure even baking.
- Mix Dry Ingredients: In a medium bowl, whisk together the all-purpose flour, cocoa powder, baking soda, baking powder, and cornstarch. This combination ensures a soft, tender cookie texture with deep chocolate flavor.
- Cream Butter and Sugars: In a large bowl, use a hand mixer or stand mixer to cream the softened butter, granulated sugar, and light brown sugar until light and fluffy, about 2-3 minutes. This step creates a light base for the cookies.
- Add Eggs and Extracts: Beat in the eggs one at a time, ensuring each is fully incorporated before adding the next. Stir in vanilla or peppermint extract to flavor the dough.
- Combine Wet and Dry: Gradually add the dry ingredient mixture to the wet ingredients, mixing on low speed just until combined to avoid overworking the dough.
- Form Cookies: Scoop the dough by rounded tablespoons and form into balls. Roll each ball lightly in powdered sugar to coat. Place them on the prepared baking sheet spaced about 2 inches apart.
- Bake: Bake for 10-11 minutes, or until the edges are set but the centers still look slightly soft. The cookies will firm up upon cooling.
- Add Hershey’s Kisses: Immediately after removing the cookies from the oven, press a Hershey’s Kiss gently into the center of each cookie. The residual heat will slightly melt the chocolate, creating a signature puddle effect.
- Cool and Serve: Let the cookies cool on the baking sheet for about 5 minutes before transferring them to a wire rack to cool completely. This prevents the cookies from breaking apart.
Notes
- For peppermint flavor, substitute vanilla extract with peppermint extract as per the recipe.
- Do not overbake the cookies; they should look slightly underdone in the center to ensure a soft texture.
- Rolling the cookie dough balls in powdered sugar before baking helps create a pretty crackled surface and adds a touch of sweetness.
- Allow the cookies to cool completely before storing in an airtight container to maintain freshness.
- These cookies can be frozen before baking; scoop and roll the dough balls, then freeze on a tray before transferring to a freezer-safe bag.
Keywords: chocolate cookies, Hershey’s kisses cookies, peppermint chocolate cookies, soft chocolate cookies, holiday cookies, fudgy cookies