
Baked Italian Sub Sandwiches Recipe
If you’ve ever longed for a hearty, crowd-pleasing sandwich that tastes like it came straight from an Italian deli—but without the hassle of running out to buy one—this Baked Italian Sub Sandwiches Recipe is your new best friend. It’s everything you want in a sandwich: layers of savory meats, gooey melted cheese, and fresh veggies, all snug inside a warm, toasty roll. Plus, baking these subs melts the flavors together in a way that’s pure magic.
I love making this recipe whenever friends or family drop by, or when I want a satisfying dinner that feels special but doesn’t need tons of fuss. You’ll find it works perfectly for cozy weeknight dinners, casual get-togethers, or even meal prep for lunches later in the week. Trust me, once you try this Baked Italian Sub Sandwiches Recipe, it’ll quickly become one of your go-to quick comfort meals.
Ingredients You’ll Need
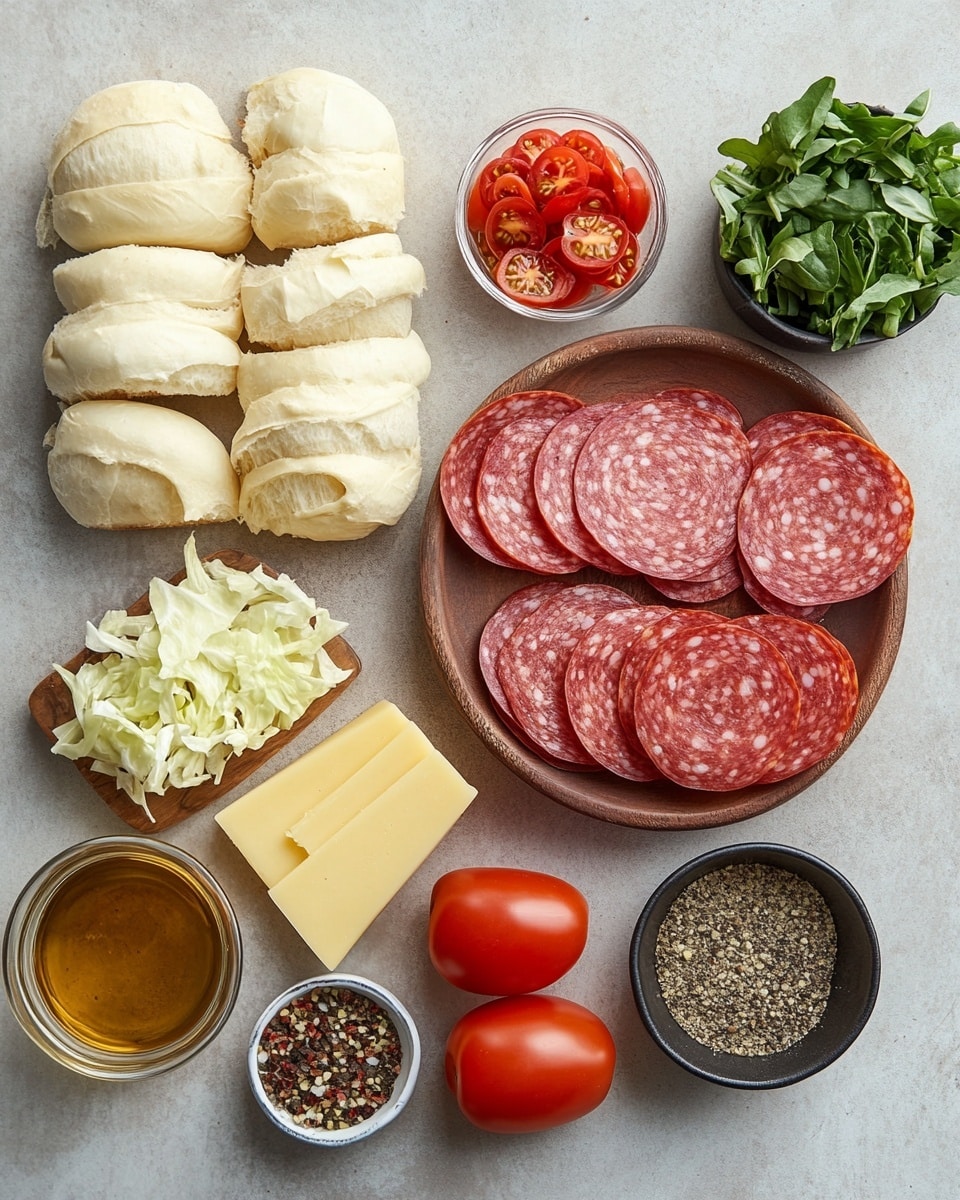
The ingredients here are simple but thoughtfully chosen to create that classic Italian deli vibe. Each element brings its own unique flavor, from the spicy pepperoni to the creamy provolone cheese. When shopping, look for fresh sub rolls and good-quality sliced meats for the best results.
- Sub rolls: Choose fresh, sturdy rolls around 6 inches; they hold the fillings perfectly and crisp up nicely in the oven.
- Salami: Adds a bold, slightly spicy flavor that contrasts well with milder meats.
- Pepperoni: Gives a smoky kick that wakes up the whole sandwich.
- Ham: Brings a sweet and savory balance to the pepperoni and salami.
- Provolone cheese: Melts beautifully and adds a mild, nutty taste that ties everything together.
- Olive oil: I like to brush this over the rolls before baking to get a perfect golden crust.
- Dried oregano: A sprinkle here enhances that authentic Italian flavor.
- Medium tomato: Fresh, juicy slices add brightness and moisture for balance.
- Shredded lettuce: Use crisp leaves for a refreshing crunch that keeps each bite lively.
Variations
I love how easily you can tweak this Baked Italian Sub Sandwiches Recipe to suit different tastes or dietary needs. Feel free to swap ingredients or add extras to make it your own—it’s all about what you enjoy!
- Meat-free version: I’ve tried replacing the deli meats with marinated roasted veggies and some sliced mozzarella for a tasty vegetarian take.
- Spice it up: Add banana peppers or a drizzle of hot sauce if you like a little heat.
- Cheese swap: Try mozzarella or fontina if you want a different cheese melt.
- Seasonal twist: In summer, fresh basil instead of oregano adds a fragrant note.
- Make it gluten-free: Use gluten-free sub rolls so everyone can indulge.
How to Make Baked Italian Sub Sandwiches Recipe
Step 1: Prep Your Ingredients and Preheat the Oven
Start by preheating your oven to 375°F (190°C). While it warms up, slice your tomato and shred the lettuce if it’s not pre-shredded. Arrange your sliced meats and cheese so you can layer them quickly when assembling. Getting organized at this point makes assembly smooth and stress-free.
Step 2: Assemble the Subs
Slice the sub rolls lengthwise but not all the way through—think of them like little boats holding all your delicious ingredients. Brush the inside of each roll with olive oil, then layer in the meats (salami, pepperoni, ham) first. Follow with your provolone slices so they can melt over the meats, then top with tomato slices.
Step 3: Add Oregano and Bake
Sprinkle dried oregano over the assembled subs for that signature herb flavor. Place your sandwiches on a baking sheet and pop them into the oven. Bake for about 12-15 minutes, or until the cheese is melted and the bread is lightly toasted. Keep an eye on them so they don’t get too crisp—just golden and warm is perfect.
Step 4: Finish with Fresh Lettuce and Serve
Once out of the oven, pile on the shredded lettuce right before serving so it stays crisp and fresh. Then slice the subs in half (or smaller if sharing) and get ready to enjoy the melty, flavorful goodness in every bite.
How to Serve Baked Italian Sub Sandwiches Recipe
Garnishes
I like to keep it simple with extra oregano or a few pepperoncini on the side for a tangy, spicy kick. Sometimes I’ll drizzle a little balsamic glaze over the tomato slices before baking for a sweet contrast that really elevates the flavor.
Side Dishes
Some crispy kettle chips or a fresh cucumber salad go perfectly alongside these baked subs. For something heartier, a bowl of minestrone soup or a creamy pasta salad balances the meal beautifully.
Creative Ways to Present
For parties, I like slicing the subs into smaller sliders and arranging them on a platter with little toothpicks. It’s a fun way to serve, plus everyone gets to try different flavors and toppings. Wrapping individual sandwiches in parchment paper also makes them super portable for picnics or packed lunches.
Make Ahead and Storage
Storing Leftovers
Leftover baked Italian sub sandwiches stay fresh in an airtight container in the fridge for up to 2 days. I usually wrap each sandwich tightly in foil or plastic wrap to keep the bread from becoming soggy. Adding the lettuce fresh when reheating helps preserve its crunch.
Freezing
While I don’t recommend freezing with fresh lettuce inside, you can freeze the assembled baked subs before adding lettuce. Wrap them tightly in foil and plastic wrap, then freeze for up to 1 month. Thaw in the fridge overnight and reheat in the oven to keep the crust crispy.
Reheating
I reheat leftovers in the oven at 350°F for 8-10 minutes, wrapped loosely in foil to prevent the bread from drying out. After warming, I add fresh shredded lettuce and any extra tomato slices. This method brings back that just-made flavor and texture beautifully.
FAQs
-
Can I use different types of cheese for this Baked Italian Sub Sandwiches Recipe?
Absolutely! While provolone is traditional and melts well, mozzarella, fontina, or even a mild cheddar can work nicely. Choose a cheese that melts evenly and complements the savory meats.
-
How do I keep the bread from getting soggy when making this recipe?
Brushing the rolls with olive oil before baking creates a barrier that prevents sogginess. Also, adding the lettuce just after baking keeps it crisp and stops moisture from softening the bread.
-
Can I prepare these sandwiches ahead of time?
Yes! You can assemble the subs a few hours in advance and keep them refrigerated before baking. Just add the fresh lettuce after baking and before serving for the best texture.
-
What’s the best way to reheat leftover Baked Italian Sub Sandwiches?
Reheat in a 350°F oven wrapped loosely in foil for 8-10 minutes to warm through without drying out the bread. Add fresh veggies afterward to maintain crispness.
Final Thoughts
This Baked Italian Sub Sandwiches Recipe holds a special place in my recipe box because it’s a perfect blend of simplicity and flavor that never disappoints. Whether it’s a busy weeknight or an impromptu lunch with friends, these subs bring everyone together around the table. Give it a try—you’ll find it’s as satisfying to make as it is to eat, and I’m sure it’ll become a favorite in your home, just like it is in mine.
PrintBaked Italian Sub Sandwiches Recipe

These Baked Italian Sub Sandwiches are a delicious twist on a classic deli favorite, featuring layers of salami, pepperoni, ham, and provolone cheese baked to melty perfection inside toasted sub rolls. Topped with fresh tomato slices, crisp shredded lettuce, and a touch of oregano and olive oil, these subs offer a warm, savory, and satisfying meal perfect for lunch or dinner.
- Prep Time: 10 minutes
- Cook Time: 12 minutes
- Total Time: 22 minutes
- Yield: 4 sandwiches 1x
- Category: Sandwiches
- Method: Baking
- Cuisine: Italian-American
Ingredients
Sandwich Ingredients
- 4 sub rolls (6 inches each)
- 4 oz salami, sliced
- 4 oz pepperoni, sliced
- 4 oz ham, sliced
- 4 oz provolone cheese, sliced
- 1 medium tomato, sliced
- 1 cup shredded lettuce
Seasoning & Dressing
- 2 tbsp olive oil
- 1 tsp dried oregano
Instructions
- Preheat the Oven: Set your oven to 375°F (190°C) to ensure it reaches the right temperature while you prepare the sandwiches.
- Prepare the Sub Rolls: Slice each sub roll lengthwise, being careful not to cut completely through, creating a pocket for the fillings.
- Layer the Meats and Cheese: Inside each roll, evenly layer the sliced salami, pepperoni, ham, and provolone cheese to build a hearty and flavorful filling.
- Season and Add Olive Oil: Drizzle each sandwich with olive oil and sprinkle with dried oregano to enhance the Italian flavor profile.
- Bake the Sandwiches: Place the prepared subs on a baking sheet and bake in the preheated oven for about 10 to 12 minutes, or until the cheese is melted and the rolls are toasted.
- Add Fresh Vegetables: Remove the sandwiches from the oven and top with fresh sliced tomato and shredded lettuce to add a refreshing contrast to the warm, savory fillings.
- Serve: Serve the sandwiches warm immediately for the best taste and texture.
Notes
- For a crunchier roll, broil the subs for an additional 1-2 minutes, but watch closely to prevent burning.
- Customize your sandwich by adding other veggies like onions or peppers if desired.
- Store leftovers in the refrigerator and reheat in the oven to maintain crispiness.
Keywords: Italian sub, baked sandwich, salami sandwich, pepperoni sub, ham and cheese sandwich