Easter Sugar Cookies with Royal Icing Recipe
I’m so excited to share this Easter Sugar Cookies with Royal Icing Recipe with you! These cookies have become my go-to for springtime celebrations, especially around Easter. They’re delightfully soft yet sturdy enough to hold all those colorful, intricate royal icing designs that make the holiday extra special.
Whether you’re baking with kids, hosting a brunch, or just want that perfect homemade treat to share, this recipe strikes the perfect balance between simplicity and beauty. Plus, I’ll walk you through tips that helped me nail the texture and decorating every time, so you’ll feel like a pro too.
The secret to these cookies is the rich buttery dough combined with a royal icing that dries just right for decorating. I love how you can freeze both the dough and decorated cookies, making it easier to prep ahead and enjoy stress-free Easter fun. This Easter Sugar Cookies with Royal Icing Recipe is a hit with everyone I’ve shared it with — I think you’ll love it as much as I do!
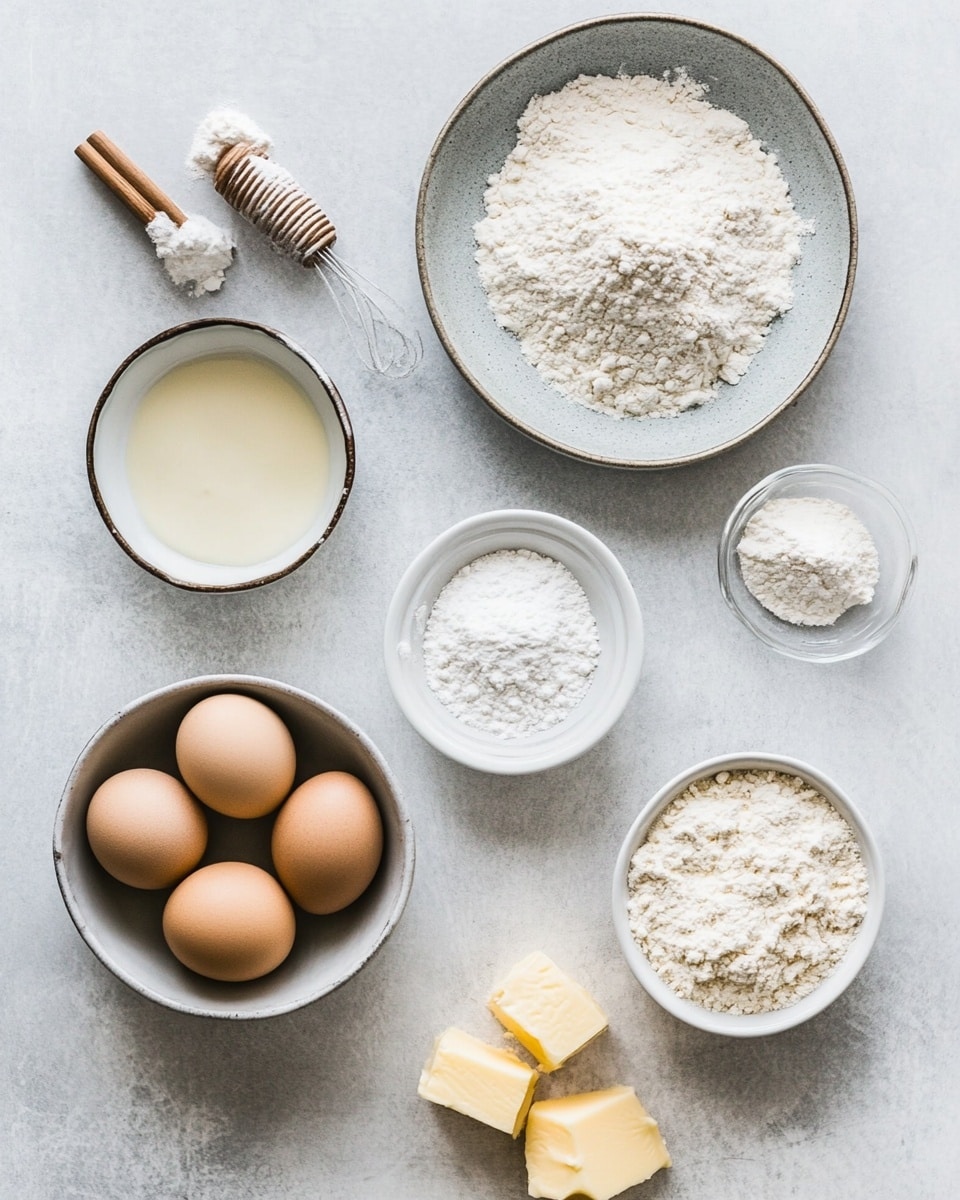
Ingredients You’ll Need
Each ingredient here plays a role in creating that perfect cookie base and smooth royal icing. When shopping, look for high-quality butter and pure vanilla extract — they really boost the flavor. Also, sift your icing sugar for the best piping texture!
- Plain, all-purpose flour: The foundation for your cookies; helps keep them tender but sturdy enough for decorating.
- Baking powder: Just a pinch to give the cookies a little lift without making them cakey.
- Salt: Balances the sweetness and enhances flavors.
- Unsalted butter: Softened but not melted — this is crucial for achieving the right dough consistency.
- Caster or granulated sugar: Sweetens the dough and helps with that slight crunch on the edges.
- Large egg: Binds the dough together, ensuring it doesn’t fall apart while baking.
- Vanilla extract: Adds warmth and depth — I always use pure vanilla for the best taste.
- Royal icing sugar (also known as powdered sugar mixed for royal icing): Sifted for smooth, lump-free icing.
- Water (room temperature): Helps you achieve the perfect flow for piping and flooding the cookies.
Variations
I love playing around with colors and adding personal flair to this Easter Sugar Cookies with Royal Icing Recipe. Sometimes I swap vanilla for almond extract to switch things up, or I use natural food colorings when I want a more subtle palette. It’s easy to customize, so make it your own!
- Gluten-free version: I’ve had success swapping regular flour with a 1-to-1 gluten-free blend — just be sure to chill the dough well for easier rolling.
- Flavored icing: Adding a hint of lemon juice or orange zest to the royal icing gives a fresh twist that pairs beautifully with the vanilla cookie.
- Sprinkles or edible glitter: For extra fun, toss on some pastel-colored sprinkles before the icing sets — kids absolutely love this touch!
- Vegan adaptation: I haven’t personally tried this, but replacing the butter with a plant-based alternative and using aquafaba instead of egg could be a great starting point.
How to Make Easter Sugar Cookies with Royal Icing Recipe
Step 1: Prepare and Chill the Dough for Perfect Texture
Start by mixing your flour, baking powder, and salt in a bowl — having this ready means no scrambling later. In your mixer, beat softened butter until it’s pale and fluffy; this usually takes about 2 minutes and is key to light cookies. Then add sugar and cream for a couple more minutes before tossing in the egg and vanilla extract. Make sure to scrape down the sides so everything mixes evenly.
When you fold in the flour mixture, do so gently and on low speed until just combined — overmixing can make the cookies tough. Divide your dough in two, roll it between baking paper to about 5mm thick, and chill for at least an hour or preferably overnight. This chill time helps the dough firm up so your cookies don’t lose their shapes while baking.
Step 2: Cutting and Baking Your Cookie Shapes
Preheat your oven to 180°C (160°C fan) and line trays with baking paper. Working with one dough disk at a time, cut out your favorite Easter shapes using cookie cutters. Don’t worry about scraps — just gently re-roll and cut again. Place the cookies on the tray with a bit of space between each.
Bake for about 10 minutes, rotating the trays halfway to ensure even baking. The edges should turn a light golden brown — that’s your cue! Let them cool on the tray briefly before transferring to a wire rack to cool completely. This cooling step prevents your royal icing from melting on contact.
Step 3: Mixing and Applying the Royal Icing
Combine sifted royal icing sugar with water in your mixer and whisk for about 2 minutes. You’re aiming for a consistency where the icing drizzles slowly and smooths out in about 10-12 seconds — kind of like a watery honey. If it’s too thick, add water a teaspoon at a time; if too thin, add more icing sugar. Trust me, this adjustment makes all the difference when decorating.
Divide the icing into bowls for coloring. I use gel food coloring because it gives vibrant hues without changing texture. Use a separate toothpick for each color to avoid mixing. Once colored, fill piping bags and snip tiny tips for better control.
Start by outlining the edges of your cookies and let that dry for a few minutes—it acts like a dam to hold in your flood icing without it spreading too thin. Then flood the inside area with thinner icing, using a toothpick to nudge it into corners. Give the cookie a gentle tap on the table to level the icing evenly. Let everything dry fully before adding more details or stacking.
How to Serve Easter Sugar Cookies with Royal Icing Recipe
Garnishes
I love finishing off these cookies with a sprinkle of tiny pastel nonpareils or edible glitter—it adds just the right amount of sparkle and whimsy for Easter. Sometimes, adding a few piped flowers or little dots in contrasting colors really makes the design pop. Plus, it’s super fun to get creative while decorating!
Side Dishes
These sugar cookies are versatile, but I often pair them with a light springtime tea, like jasmine or chamomile. They also go beautifully with fresh fruit platters or a mild cream cheese spread if you’re serving a larger brunch. It makes the whole table feel cohesive and festive.
Creative Ways to Present
For Easter gatherings, I like arranging these cookies on a tiered cake stand with fresh flowers tucked in between. Wrapping individual cookies in clear cello bags tied with pastel ribbons also makes for charming party favors. And if you want to get fancy, stacking iced cookies with edible gold leaf accents can elevate your dessert table instantly.
Make Ahead and Storage
Storing Leftovers
Once your cookies are completely decorated and the icing has dried, I store them in an airtight container at room temperature for up to 7 days. Layer them between sheets of baking paper to avoid sticking or smudging. This way, they stay fresh and beautiful, perfect for enjoying throughout the week.
Freezing
I freeze these cookies decorated or plain for up to 3 months with great results. For decorated ones, I always layer them between baking paper before placing in a freezer-safe container to protect the icing. If I freeze the dough instead, I shape it into disks and wrap well before freezing — makes baking fresh batches later a breeze.
Reheating
Since these cookies are best enjoyed at room temperature, I usually let frozen cookies thaw on the counter for a couple of hours before serving. I’ve found that reheating isn’t necessary and can sometimes soften the icing too much. Just plan ahead, and they’ll taste fresh and delicious!
FAQs
-
Can I use regular powdered sugar instead of royal icing sugar for the icing?
Great question! Royal icing sugar is typically superfine powdered sugar mixed specifically for royal icing, which helps it dry hard and smooth. You can use regular powdered sugar if you sift it well and adjust the water quantity to get the right consistency. Just expect slightly less stable icing, so avoid heavy decorations or stacking until fully dry.
-
How long does the royal icing take to dry completely?
Drying time can vary depending on humidity and thickness but expect 3 to 6 hours for a solid dry surface. Overnight drying is best for layering or packing cookies. Thinner layers dry faster, so if you’re in a hurry, flood with thinner icing for quicker setting.
-
Can I make the dough and icing ahead of time?
Absolutely! The dough can be made, shaped into disks, wrapped, and frozen for up to 3 months. Thaw in the fridge and bring back to room temperature before rolling out. The royal icing can be made 2-3 days ahead and stored sealed in the fridge; just whisk it well before use to recombine separated ingredients.
-
What’s the best way to prevent cookies from spreading too much during baking?
Chilling the dough thoroughly before cutting and baking is key. Also, avoid overworking the dough as excess warmth can cause spreading. Bake on parchment-lined trays and avoid stacking the cut cookies too close to let them keep their shape.
Final Thoughts
This Easter Sugar Cookies with Royal Icing Recipe has been such a joyful part of my holiday traditions, and I hope it becomes yours too. It’s the kind of recipe that invites creativity and togetherness—whether you’re decorating with family or surprising friends with colorful treats. Once you get the hang of the dough and icing, you’ll find yourself coming back to this recipe year after year. So grab your rolling pin, your favorite cookie cutters, and let’s make some sweet Easter memories!
PrintEaster Sugar Cookies with Royal Icing Recipe

These Easter Sugar Cookies are a delightful treat perfect for the holiday season. Made with a classic sugar cookie dough that is soft and buttery, then decorated with smooth royal icing in vibrant colors. The cookies are rolled thin, cut into festive shapes, and baked to a light golden perfection. The royal icing adds a beautiful, glossy finish and can be customized with various colors to suit your style. Ideal for sharing or gifting, these cookies are simple to make and fun to decorate.
- Prep Time: 1 hour
- Cook Time: 10 minutes
- Total Time: 4 hours 10 minutes
- Yield: 30 cookies 1x
- Category: Baking
- Method: Baking
- Cuisine: American
- Diet: Vegetarian
Ingredients
For the Sugar Cookies:
- 280 g plain, all purpose flour
- ½ teaspoon baking powder
- ¼ teaspoon salt
- 170 g unsalted butter, softened
- 150 g caster or granulated sugar
- 1 large egg
- 1 teaspoon vanilla extract
For the Royal Icing:
- 500 g royal icing sugar, sifted
- 9–10 tablespoons room temperature water
Instructions
- Prepare Dry Ingredients: In a medium bowl, mix together the flour, baking powder, and salt. Set aside for later use.
- Cream Butter and Sugar: In the bowl of an electric mixer, beat the softened butter on medium-high speed until pale and fluffy, about 2 minutes. Add sugar and continue to cream for about 2 more minutes until well combined and creamy.
- Add Egg and Vanilla: Add the egg and vanilla extract to the butter mixture and beat on high speed until fully incorporated, scraping down the sides and bottom of the bowl as needed to ensure even mixing.
- Incorporate Dry Ingredients: Gradually add the flour mixture into the wet mixture, mixing on low speed until just combined, avoiding overmixing the dough.
- Chill Dough: Divide the dough into two equal parts. Lightly dust a baking sheet or silicone mat with flour and place one dough half on it. Cover with another sheet of baking paper and roll out to about 5mm thickness. Repeat layering if stacking. Transfer the rolled dough to the fridge to chill for at least 1-2 hours, ideally overnight, to firm up the dough.
- Preheat Oven and Prepare Baking Trays: Preheat the oven to 180°C (160°C fan). Line baking trays with baking paper.
- Cut Out Cookies: Remove one rolled dough piece from the fridge. Using your favorite cookie cutters, cut out shapes. Re-roll scraps and continue until dough is used. Repeat with second dough piece.
- Bake Cookies: Transfer cut cookies to the prepared trays and bake on the middle shelf for about 10 minutes, rotating halfway through. Cookies are done when edges are lightly browned. Let cool on tray for 5 minutes, then transfer to a wire rack to cool completely.
- Make Royal Icing: In a mixer bowl fitted with whisk attachment, combine royal icing sugar and 9-10 tablespoons of water. Beat for about 2 minutes until well combined. The icing should drizzle down from the whisk and smooth out within 10-12 seconds, indicating perfect consistency.
- Adjust Icing Consistency: If icing is too thick, add water one teaspoon at a time until desired flow is reached. If too thin, add sifted royal icing sugar in small amounts.
- Color Icing: Divide icing into separate bowls and add gel food coloring drops. Mix with toothpicks or skewers to achieve desired colors. Transfer icing to piping bags and snip the tips for decorating.
- Decorate Cookies: Outline cookies with a border line of icing and let dry for a few minutes. Then flood the cookies by filling in the inside with icing, working in a top-to-bottom or edge-to-center motion. Use a toothpick to fill gaps and tap gently to spread icing evenly. Let icing dry completely before adding additional layers or details.
Notes
- Plain or decorated cookies can be stored in an airtight container at room temperature for up to 7 days.
- Cookies can be frozen (plain or decorated) for up to 3 months; layer decorated cookies between baking paper in a freezer-safe container.
- Cookie dough can be frozen for up to 3 months. Divide dough into disks, wrap in clingfilm, freeze, thaw in fridge, then bring to room temperature before rolling and baking.
- Royal icing can be made 2-3 days ahead and stored in a sealed container in the fridge. Bring to room temperature and whisk before use.
- Royal icing can be frozen for up to 3 months when stored in a zip-lock bag with air squeezed out; thaw at room temperature or in fridge.
- Ensure the dough is well chilled before rolling for best shape retention during baking.
Keywords: Easter sugar cookies, royal icing cookies, holiday cookies, decorated sugar cookies, festive cookie recipe