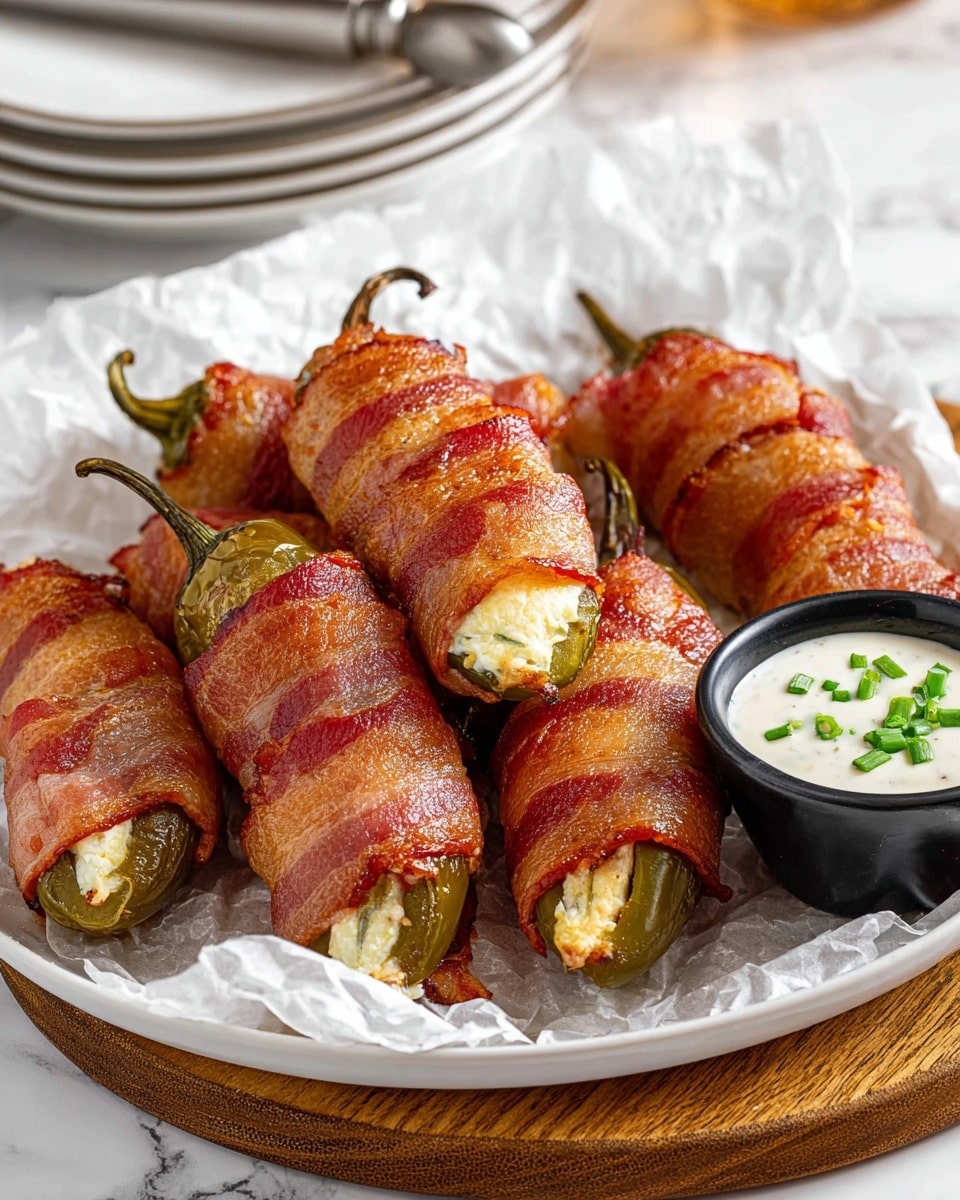
Bacon Wrapped Pickles with Cream Cheese Recipe
Alright, if you’re looking for a snack that’s downright addictive, let me introduce you to my Bacon Wrapped Pickles with Cream Cheese Recipe. Picture this: crunchy dill pickles, creamy cheese filling, all wrapped in smoky, crispy bacon. It’s got that satisfying mix of textures and flavors that I swear could cure just about any craving—and it’s super easy to make!
I’ve found this recipe to be a knockout at parties or casual get-togethers, but honestly, it’s perfect whenever you’re in the mood for something salty, tangy, and cheesy all in one bite. Plus, since it’s just a few simple ingredients, you can whip it up in no time. Trust me, once you try this Bacon Wrapped Pickles with Cream Cheese Recipe, you’ll want to keep it in your snacking rotation.
Ingredients You’ll Need
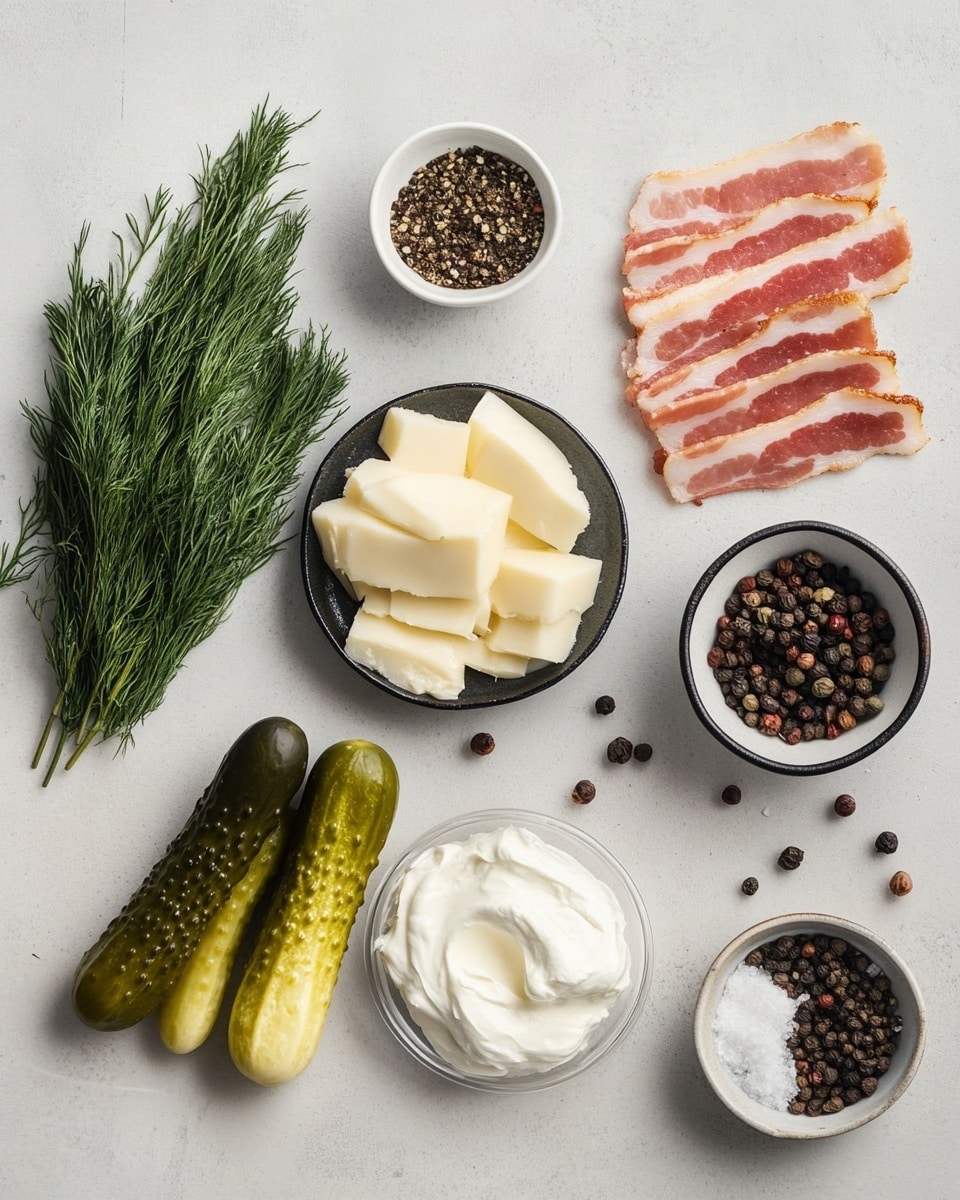
Now, let’s talk ingredients. These few staples work so well together because the tanginess of the dill pickles balances the richness of the cream cheese and that irresistible crisp bacon finish. When shopping, look for firm, crunchy pickles to avoid sogginess and quality smoked bacon for maximum flavor.
- Dill pickle spears: I like using Vlasic brand for their consistent crunch and size. You’ll want firm ones so they hold up well when baked.
- Cream cheese: Softened cream cheese makes spreading and filling the pickles a breeze. Try to use full-fat for creamier richness.
- Smoked bacon slices: Grab a good quality smoked bacon—the smoky flavor really elevates the snack. Also, keep an eye on thickness; thinner bacon crisps better.
Variations
I love how versatile this Bacon Wrapped Pickles with Cream Cheese Recipe is. I’ve played around with a few tweaks, and honestly, making it your own is part of the fun. Feel free to swap ingredients and try new twists to suit your taste or dietary preferences.
- Spicy kick: Adding a spoonful of diced jalapeños or a dash of hot sauce into the cream cheese filling gave me such a delightful zip. If you like heat, definitely give this a shot!
- Herb infusion: Mix fresh chives or dill into the cream cheese for a fresh herbal note—it brightens the whole bite beautifully.
- Cheese swap: Instead of plain cream cheese, try flavored varieties like garlic & herb or even a little shredded cheddar mixed in for extra cheesiness.
- Vegetarian twist: If you want to skip bacon, try wrapping the pickles with thin slices of smoked gouda or a vegetarian bacon alternative before baking.
How to Make Bacon Wrapped Pickles with Cream Cheese Recipe
Step 1: Prep Your Oven and Rack
Start by preheating your oven to 375°F. Next, line a baking sheet with parchment paper or heavy-duty aluminum foil – this makes cleanup so much easier. Then, place a wire cooling rack over the lined sheet and spray it with nonstick cooking spray. This setup allows the bacon to crisp nicely on all sides because the heat circulates underneath, preventing sogginess.
Step 2: Hollow Out Your Pickles
Grab a small spoon and carefully scrape out the center of each dill pickle spear. This step makes room for the cream cheese filling and keeps the bacon-wrapped treats from bursting during baking. I usually use a grapefruit spoon with a serrated edge—it’s the perfect size and shape for scraping.
Step 3: Dry the Pickles Thoroughly
Lay your hollowed pickle spears hollow side down on paper towels, then pat the pickles dry with another paper towel on top. Drying them well is key—it helps the cream cheese stick better and ensures the bacon crisps up instead of steaming. This little step might seem tedious, but it totally pays off.
Step 4: Fill with Cream Cheese and Assemble
Using a butter knife, gently spread about a tablespoon of softened cream cheese inside the hollowed area of each pickle spear. Smooth it flat so each bite has a nice even layer of creamy goodness. Then, sandwich two filled pickle spears cream cheese sides together—this creates the perfect size for wrapping.
Step 5: Wrap With Bacon
Take one slice of smoked bacon and wrap it snugly around each pickle sandwich. Overlap the bacon so it covers the middle and both sides of the pickle pair. If you find the bacon is slipping, feel free to secure it with a toothpick—which you can leave in when serving or remove for a cleaner look. I usually wrap twice with bacon slices, depending on the size of the pickle.
Step 6: Bake Until Crispy and Golden
Place your bacon-wrapped pickles on the sprayed wire rack and bake for 25-30 minutes. But don’t forget all ovens cook a little differently, so start checking at the 22-minute mark to avoid overcooking. You’re looking for golden brown bacon that’s nice and crispy. Pull them out, let them cool just slightly, and get ready to indulge!
How to Serve Bacon Wrapped Pickles with Cream Cheese Recipe
Garnishes
I like to sprinkle mine with freshly chopped green onions or chives for a pop of fresh color and mild onion flavor. A dash of smoked paprika or a drizzle of barbecue sauce can also elevate the presentation and add another layer of smoky sweetness that pairs beautifully with the bacon.
Side Dishes
These Bacon Wrapped Pickles with Cream Cheese Recipe bites go wonderfully with classic comfort sides like crispy fries or onion rings. For a lighter touch, pairing with a fresh green salad or coleslaw balances out the richness perfectly. I also love serving them alongside a tangy dipping sauce, like ranch or spicy aioli.
Creative Ways to Present
For parties, I like arranging them on a wooden platter with toothpicks poking out for easy grab-and-go snacking. You can even line them up in mini muffin tins to hold them upright—looks adorable and keeps the bacon in place while serving. If you’re feeling fancy, a side bowl of flavored sour cream or mustard dip adds that special touch.
Make Ahead and Storage
Storing Leftovers
I usually keep any leftover Bacon Wrapped Pickles with Cream Cheese in an airtight container in the fridge, and they stay good for up to 2 days. The key is to let them cool completely before storing to avoid soggy bacon.
Freezing
I’ve tried freezing these, and while it’s doable, the texture changes a bit—especially the bacon crispiness. If you want to freeze, wrap each pickle well in plastic wrap and then place in a freezer bag. When thawing, reheat in the oven to help revive that crisp bacon texture.
Reheating
To reheat leftovers, pop them back into a 375°F oven for 5-8 minutes. This reheats the cream cheese filling gently and crisps up the bacon again without drying out the pickles. Using the oven instead of a microwave makes a big difference in texture.
FAQs
-
Can I use whole pickles instead of spears in the Bacon Wrapped Pickles with Cream Cheese Recipe?
Absolutely! You can slice whole pickles down the center and hollow out the pulp to create the same creamy pocket. The baking time stays the same, but just make sure your pickle halves don’t get too soggy by drying them well before filling and wrapping.
-
Is it necessary to hollow out the pickles before filling with cream cheese?
Yes, hollowing out the pickles creates a perfect cavity to hold the cream cheese, preventing it from oozing out during baking. It also helps balance the flavors and textures in each bite.
- Can I prepare the Bacon Wrapped Pickles with Cream Cheese Recipe ahead of time?
Yes! You can assemble the pickle sandwiches a day in advance, store them in an airtight container in the fridge, and then bake them when ready. This saves prep time on the day you want to serve them.
- What are some good dipping sauces to serve with Bacon Wrapped Pickles with Cream Cheese Recipe?
Ranch, spicy aioli, or a sweet and tangy barbecue sauce pair beautifully with these pickles. Feel free to experiment based on your taste—sometimes just a little mustard or a chipotle mayo works wonders!
- How do I ensure the bacon stays crispy on the Bacon Wrapped Pickles with Cream Cheese Recipe?
Using a wire rack during baking helps air circulate so the bacon crisps evenly without getting soggy. Also, patting the pickles dry before assembly reduces moisture, which can steam the bacon. Wrapping tightly and checking the oven starting at 22 minutes helps avoid over or under-cooking.
Final Thoughts
I have to say, this Bacon Wrapped Pickles with Cream Cheese Recipe has become one of my go-to snacks whenever I want something quick, flavorful, and satisfying. It’s the kind of recipe you share with friends and find yourself making over and over because it just hits the spot every time. Give it a try—you might just find yourself hooked, and I promise you’ll impress everyone at your next gathering!
PrintBacon Wrapped Pickles with Cream Cheese Recipe

These Bacon Wrapped Pickles are a deliciously savory appetizer featuring dill pickle spears stuffed with creamy cheese, wrapped in smoked bacon, then baked to crispy perfection. Perfect for snack time or party appetizers, this easy recipe combines tangy pickles with rich cream cheese and crispy bacon for a delightful flavor burst in every bite.
- Prep Time: 10 minutes
- Cook Time: 25-30 minutes
- Total Time: 35-40 minutes
- Yield: 6 servings 1x
- Category: Appetizer
- Method: Baking
- Cuisine: American
Ingredients
Pickle Filling
- 12–14 dill pickle spears (Vlasic brand recommended)
- 6 ounces cream cheese, softened
Wrapping
- 12–14 slices smoked bacon (Great Value brand suggested)
Instructions
- Preheat and Prepare Rack: Preheat your oven to 375°F. Line a baking sheet with parchment paper or heavy-duty aluminum foil. Place a wire cooling rack on top and spray the rack lightly with nonstick cooking spray to prevent sticking.
- Hollow Out Pickles: Use a small spoon to carefully scrape out the center of each dill pickle spear to create space for the cream cheese filling.
- Dry Pickles: Lay the hollowed pickles soft side down on a paper towel-lined plate. Pat them dry with additional paper towels to remove excess moisture. This step is important to help the cream cheese adhere and to ensure crisp bacon.
- Fill with Cream Cheese: Using a butter knife, gently fill each hollowed-out pickle spear with about 1 tablespoon of softened cream cheese. Smooth the cream cheese flat inside the cavity.
- Assemble Pickle Sandwiches: Take two cream cheese filled pickle spears and press them cream cheese side together to form a sandwich.
- Wrap with Bacon: Wrap each pickle sandwich with one slice of bacon starting from the middle and overlapping toward one end, then wrap a second slice around the other end of the sandwich. Make sure the bacon overlaps slightly to hold it together. Place each bacon-wrapped sandwich onto the prepared rack.
- Bake: Bake for 25-30 minutes in the preheated oven or until the bacon is golden brown and crispy. Begin checking at 22 minutes as oven temperatures vary. Remove from oven once done.
- Serve: Serve warm with your favorite dipping sauce. Optionally, toothpicks can be used to secure the bacon or for serving.
Notes
- Store leftovers in an airtight container in the refrigerator for up to 2 days.
- Reheat in the oven at 375°F for 5-8 minutes before serving.
- You can assemble pickles a day ahead and keep them refrigerated until baking.
- Use parchment paper or foil on the baking sheet with a wire rack for best results.
- Patting pickles dry ensures crisp bacon and prevents sogginess.
- Check at 22 minutes since oven heat varies.
- Toothpicks help keep bacon secure and can be left in for serving or removed for presentation.
- If using whole dill pickles cut in half, hollow out the pulp and fill similarly; bake time remains the same.
- Optional: Brush bacon with barbecue sauce, maple syrup, or fruit preserves before baking for added flavor.
Keywords: Bacon Wrapped Pickles, Appetizer, Cream Cheese, Bacon Appetizer, Party Snack, Oven Baked Snack