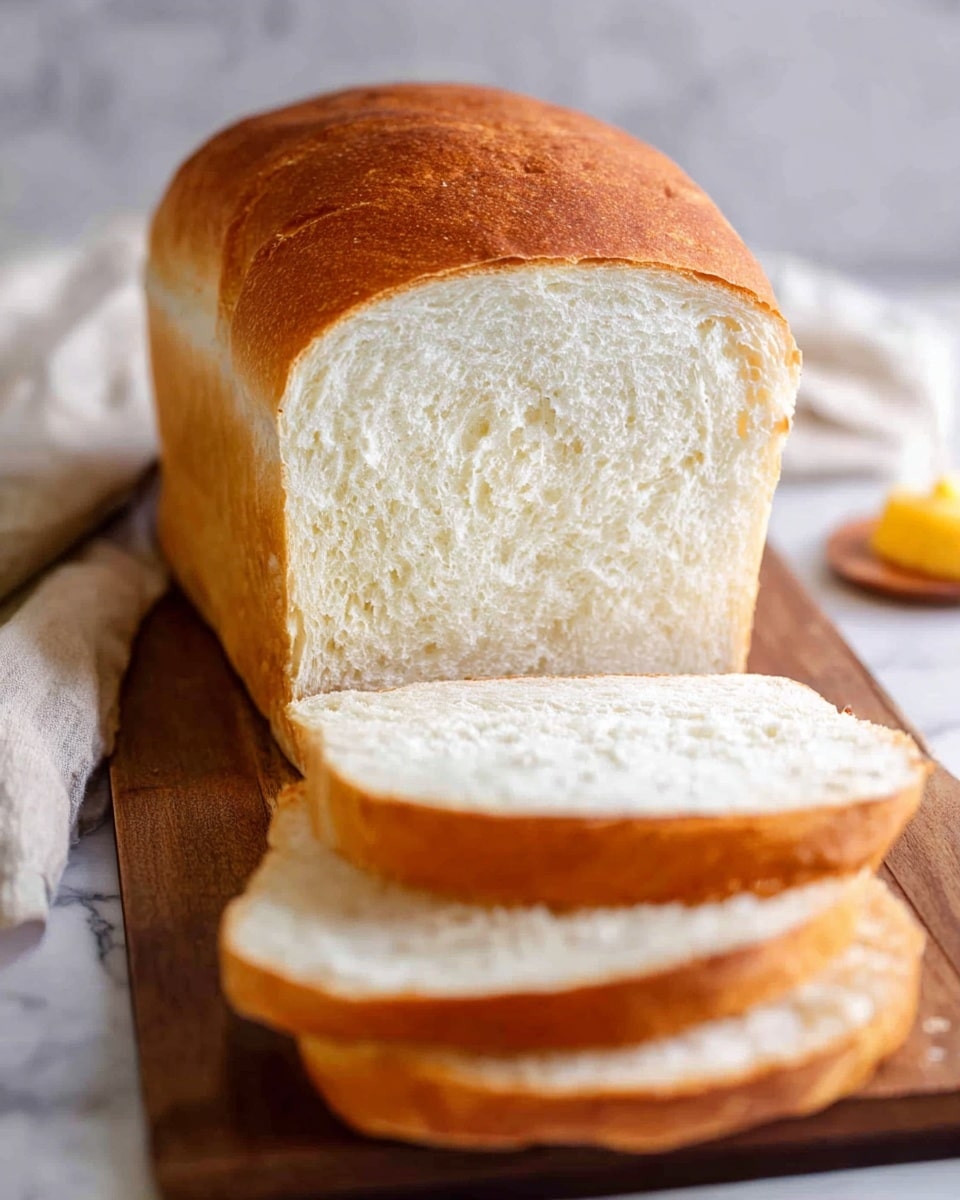
Homemade Bread Recipe
There’s nothing quite like the smell of freshly baked bread wafting through your home—it’s cozy, comforting, and makes any kitchen feel warm and inviting. This Homemade Bread Recipe is one of my absolute favorites because it’s so straightforward and flexible, perfect for those days when you want that fresh-baked goodness without spending all day in the kitchen. Plus, it’s ideal any time you want to skip the store-bought stuff and enjoy wholesome bread made with love right at home.
I remember the first time I tried making this recipe; I was a bit nervous about handling yeast and dough, but it came out beautifully golden crusted and fluffy inside. What makes this Homemade Bread Recipe a keeper is how well it fits into any routine—you can dress it up with herbs or seeds or keep it classic for sandwiches and toast. If you follow a few simple tips I learned along the way, I promise you’ll have bakery-worthy bread that’s perfect for breakfast, lunch, or just a snack with butter.
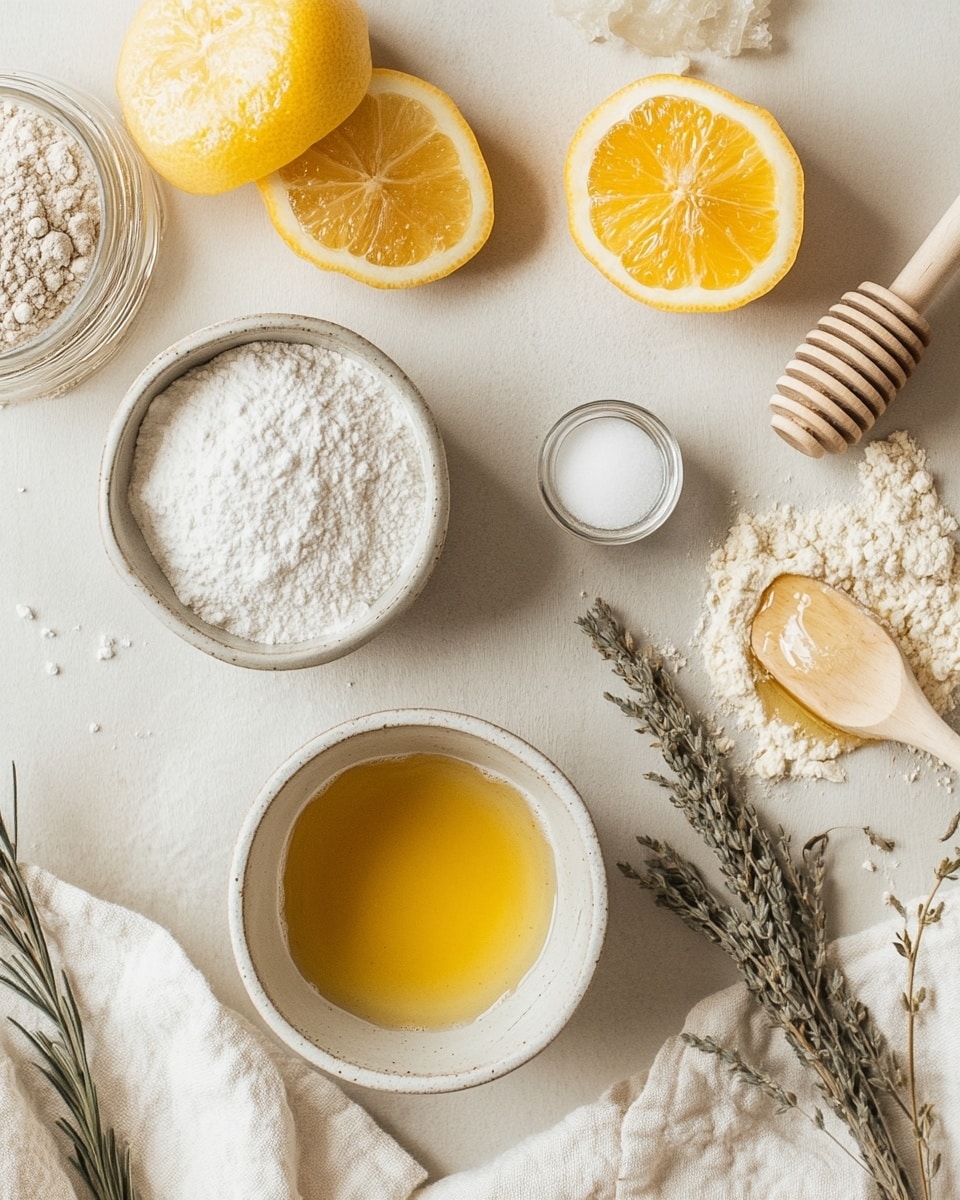
Ingredients You’ll Need
The ingredients in this Homemade Bread Recipe come together to create that perfect balance of flavor, texture, and rise. Using quality basics and a good yeast will help you achieve a loaf with a tender crumb and crispy crust every time.
- Warm water: It should be between 105-115°F to activate your yeast properly without killing it.
- Active dry yeast: Make sure it’s fresh—expired yeast can make your dough disappointingly flat.
- Honey or sugar: These feed the yeast and add a touch of sweetness that balances the salt.
- Salt: Essential for flavor—don’t skip or reduce it too much or your bread will taste bland.
- Oil (canola or vegetable): Adds softness and helps with the dough’s elasticity.
- All-purpose or bread flour: Bread flour gives a chewier texture due to higher gluten; all-purpose works well too if it’s what you have on hand.
Variations
I love playing around with this Homemade Bread Recipe depending on my mood or what’s in my pantry. You can easily customize it to fit your taste or dietary preferences without complicating the process.
- Whole wheat version: Swap about half the flour for whole wheat for a nuttier flavor and more fiber. I usually add a bit more water because whole wheat absorbs moisture differently.
- Herb-infused bread: Mix in fresh rosemary, thyme, or basil for a lovely aroma—perfect if you’re serving it with Italian dishes.
- Gluten-free adaptation: Though tricky, you can try using a gluten-free flour blend plus xanthan gum, but keep in mind the texture will be different.
- Sweet bread twist: Add cinnamon and raisins for a simple, slightly sweet bread great with morning coffee.
How to Make Homemade Bread Recipe
Step 1: Activate Your Yeast
Start by pouring the warm water into a large mixing bowl—test it with your finger to make sure it’s comfortably warm but not hot, around 105 to 115 degrees Fahrenheit. Sprinkle the active dry yeast over the surface and add the honey or sugar. Give it a gentle stir, then let it sit for about 5-10 minutes. You’ll know your yeast is ready when it’s foamy and bubbly on top—this bubbling is a sign it’s happily waking up and ready to work its magic.
Step 2: Mix in the Rest of the Ingredients
Add the salt, oil, and about 4 cups of flour to the yeast mixture. Stir everything together with a wooden spoon or a dough hook if you’re using a stand mixer. The dough will start coming together but will be sticky—that’s normal. Don’t add all the flour at once; you want your dough to be soft and pliable, not dry or crumbly.
Step 3: Knead Until Smooth
Turn the dough out onto a lightly floured surface and knead for about 8-10 minutes. Use the heels of your hands to push the dough away from you, fold it back, and repeat. If you’ve got a stand mixer, use the dough hook for 6-7 minutes on medium speed. You’re aiming for a dough that’s elastic and a little tacky but not sticky enough to stick to your fingers. This step is key for developing gluten, which gives the bread that lovely chewy texture.
Step 4: First Rise
Lightly oil a large bowl and place your dough inside, turning it to coat with oil so it doesn’t dry out. Cover the bowl with a clean kitchen towel or plastic wrap and place it in a warm, draft-free spot. Let it rise until doubled in size, usually about 1 to 1 ½ hours. If your kitchen is cooler, give it more time or try warming your oven slightly, then turning it off before placing the dough inside.
Step 5: Shape the Loaf and Second Rise
After it’s puffed up, punch down the dough gently to release the air. Transfer it to a floured surface again, shape it into a loaf or divide into smaller loaves or rolls. Place the shaped dough on a greased or parchment-lined baking sheet or in a loaf pan. Cover it loosely and let it rise again for about 30-45 minutes until it’s nearly doubled in size once more.
Step 6: Bake Until Golden
Preheat your oven to 375°F (190°C) about 20 minutes before baking. Just before you pop the dough in, you can brush the top with a little water or milk for a soft crust, or use an egg wash for shine. Bake the loaf for 30-35 minutes until it’s beautifully golden and sounds hollow when tapped on the bottom. If you have a thermometer, the internal temperature should be around 190°F (88°C).
How to Serve Homemade Bread Recipe
Garnishes
I like to keep it simple by slathering warm slices with good quality butter or a drizzle of honey. Sometimes, I sprinkle flaky sea salt or fresh minced herbs like rosemary on top for an extra flavor boost.
Side Dishes
This homemade bread recipe pairs wonderfully with soups, stews, and hearty salads. For a cozy meal, serve it alongside tomato basil soup or a classic chicken noodle. It also makes an amazing base for sandwiches—trust me, it elevates even a simple ham and cheese to something special.
Creative Ways to Present
For holiday dinners or special occasions, I like to slice the bread into bite-sized cubes and toast them for homemade croutons or create a bread basket mixed with different flavored buns. You can also make a rustic bread board with cheeses, cured meats, and fruits for a casual but elegant appetizer spread.
Make Ahead and Storage
Storing Leftovers
I usually wrap my leftover bread tightly in plastic wrap or place it in an airtight container at room temperature. It typically stays fresh for about 2-3 days that way. For best texture, avoid refrigeration since it can dry bread out.
Freezing
Freezing is a great option if you want to make this Homemade Bread Recipe ahead. I slice the loaf first, then wrap individual slices or the whole loaf tightly in plastic wrap and aluminum foil for a double layer of protection. When I thaw, the bread tastes close to fresh, which is a huge time saver on busy mornings.
Reheating
To enjoy day-old bread, I pop slices in a toaster or warm the whole loaf in a 350°F oven for about 10 minutes wrapped in foil to refresh that crispy crust and soft interior. You’ll get that just-baked feel in no time.
FAQs
-
Can I use instant yeast instead of active dry yeast in this Homemade Bread Recipe?
Yes! You can substitute instant yeast for active dry yeast in this recipe. The main difference is that instant yeast can be mixed directly into the flour without proofing it in water first. If you use instant yeast, just reduce the warm water slightly and mix it in with the dry ingredients before adding liquids.
-
How do I know if my bread is fully baked?
The best way is to tap the bottom of the loaf—it should sound hollow. You can also use an instant-read thermometer; the inside should be around 190°F (88°C). If it feels dense or doughy, it needs more time.
-
Why is my bread dough too sticky or too dry?
Sticky dough usually means you added too much liquid or didn’t knead enough; dry dough means not enough liquid or overadded flour. Aim for a tacky but manageable dough that pulls away from your hands and surface. Adjust by adding a little flour or water, a tablespoon at a time.
-
Can I add seeds or nuts to this Homemade Bread Recipe?
Absolutely! Adding seeds like sunflower, flax, or pumpkin or nuts such as walnuts can add texture and flavor. I usually fold them into the dough during the last few minutes of kneading to distribute evenly without interfering with gluten development.
-
How long does it take to make this Homemade Bread Recipe from start to finish?
The entire process—including mixing, two rises, and baking—takes about 3 hours. Most of that is hands-off rising time, so it’s great to prep in the morning and bake by lunch or start in the afternoon for dinner.
Final Thoughts
This Homemade Bread Recipe has become one of my kitchen staples because it’s approachable yet so rewarding. I love how it fills the house with the wonderful scent of baking and results in perfect slices for everything from sandwiches to dunking in soups. Give it a try—you’ll be amazed how gratifying it is to create something so delicious from scratch, and your family or guests will definitely notice the difference. Once you get the hang of it, there’s a lot of fun to be had experimenting with your own favorite add-ins and shapes. Happy baking, friend!
PrintHomemade Bread Recipe
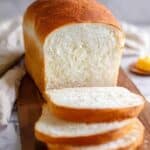
This homemade bread recipe yields a soft, flavorful loaf with a golden crust. Using simple ingredients like warm water, yeast, honey, salt, oil, and flour, it is easy to make at home and perfect for sandwiches or toast.
- Prep Time: 20 minutes
- Cook Time: 35 minutes
- Total Time: 2 hours 30 minutes
- Yield: 1 medium loaf (about 12 slices) 1x
- Category: Baking
- Method: Baking
- Cuisine: American
Ingredients
Wet Ingredients
- 2 cups warm water (105–115 degrees Fahrenheit) (474g)
- 1 tablespoon active dry yeast
- 1/4 cup honey or sugar (85g honey or 50g sugar)
- 2 tablespoons oil (canola or vegetable) (30 ml)
Dry Ingredients
- 2 teaspoons salt
- 4 to 5 1/2 cups all-purpose or bread flour (500g-688g)
Instructions
- Activate the Yeast: In a large mixing bowl, combine the warm water and active dry yeast. Stir gently and let it sit for 5-10 minutes until the mixture becomes foamy, indicating the yeast is active.
- Add Sweetener and Oil: Mix in the honey or sugar and the oil into the yeast mixture. Stir until fully combined.
- Mix Dry Ingredients: In a separate bowl, whisk together the salt and 4 cups of the flour. Gradually add this to the wet ingredients, stirring continuously until a dough forms.
- Knead the Dough: Transfer the dough to a lightly floured surface and knead for about 8-10 minutes, adding more flour as needed, until the dough is smooth and elastic but still slightly tacky.
- First Rise: Place the dough in a lightly oiled bowl, cover with a clean kitchen towel or plastic wrap, and let it rise in a warm place for 1 to 1.5 hours, or until doubled in size.
- Shape the Loaf: Punch down the risen dough to release the air. Shape it into a loaf by folding and pinching, then place it into a greased loaf pan.
- Second Rise: Cover the loaf pan and let the dough rise again for 30 to 45 minutes until it has puffed up above the rim of the pan.
- Bake the Bread: Preheat the oven to 375°F (190°C). Bake the loaf for 30 to 35 minutes, or until the crust is golden brown and the bread sounds hollow when tapped.
- Cool: Remove the bread from the oven and let it cool in the pan for 10 minutes. Then transfer the loaf to a wire rack to cool completely before slicing.
Notes
- Use warm water between 105-115°F to properly activate the yeast without killing it.
- Adjust the flour amount based on dough consistency; it should be slightly sticky but manageable.
- Honey adds moisture and flavor but sugar is an acceptable substitute.
- Letting the dough rise in a warm, draft-free environment improves yeast activity.
- Store bread wrapped at room temperature for up to 3 days or freeze for longer storage.
Keywords: homemade bread, yeast bread, easy bread recipe, soft crust bread, basic bread