Festive Christmas Icebox Cookies Recipe
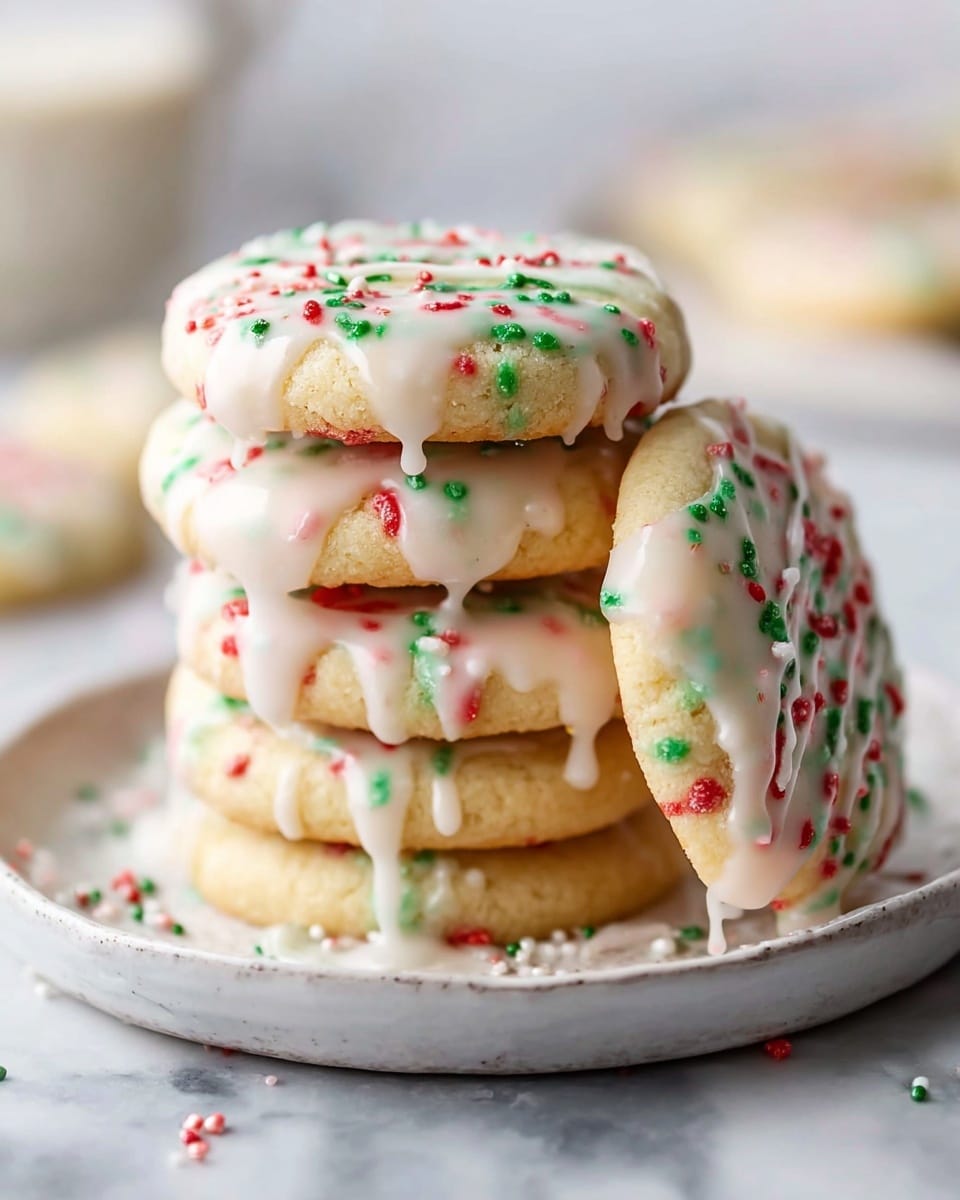
I can’t wait to share this Festive Christmas Icebox Cookies Recipe with you! These cookies are a total game-changer during the holidays — not just because they’re delicious, but because they’re so simple to make ahead of time and look absolutely adorable with those red, green, and white sprinkles. They have that perfect buttery snap, subtly sweet flavor, and festive look that makes your cookie platter pop at Christmas parties or cozy family gatherings.
What I love most about this Festive Christmas Icebox Cookies Recipe is how forgiving and straightforward it is, even if you’re new to baking. You mix up a simple dough, roll it into a log, chill it, then slice and bake when you want fresh cookies. It’s an ideal recipe for busy holiday days when you want homemade cookies without the stress — plus, the sprinkles make the whole process feel extra joyful and festive!
Ingredients You’ll Need
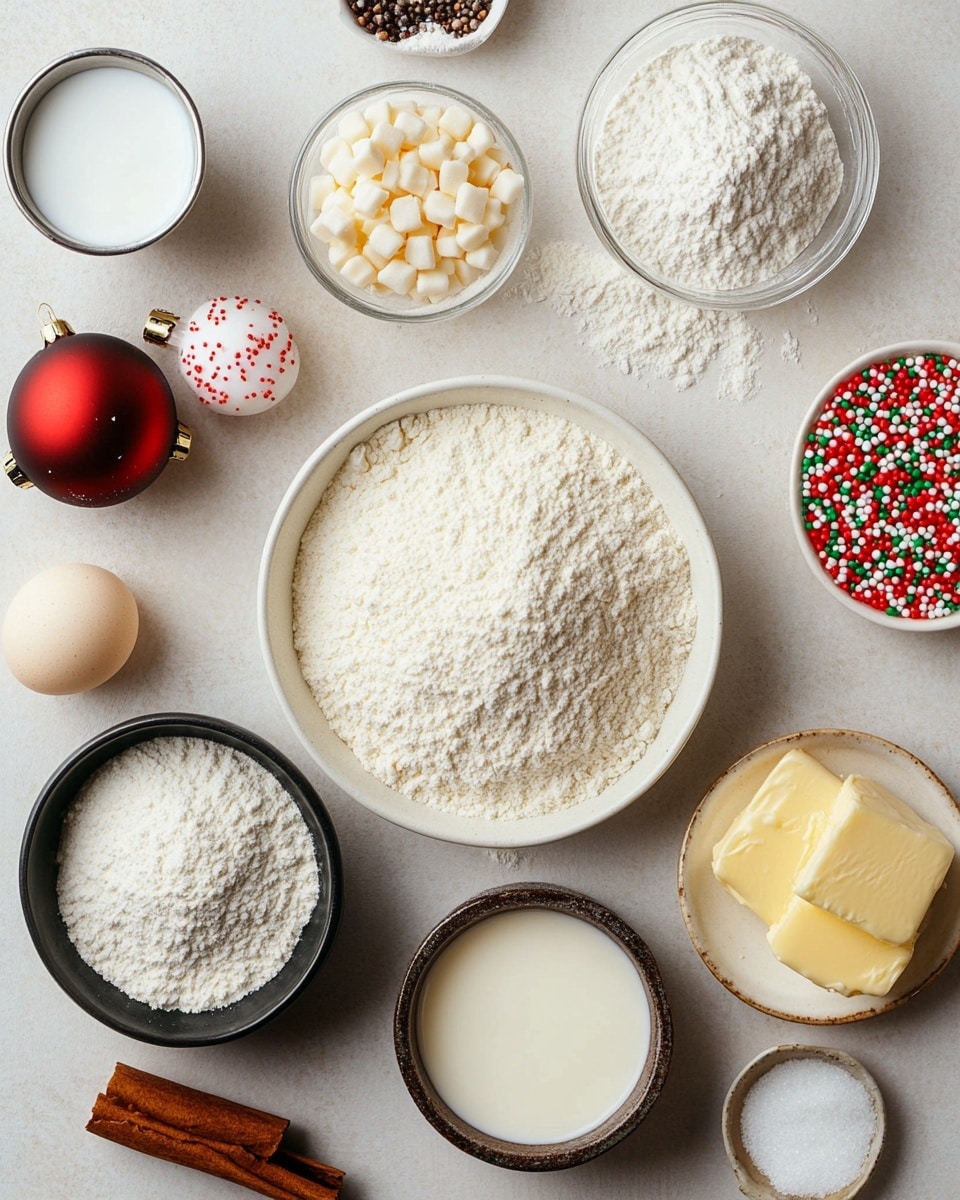
The ingredients in this Festive Christmas Icebox Cookies Recipe all come together to create that perfect balance of soft, buttery cookies with a touch of sweetness. I like to use room temperature butter so the dough mixes smoothly, and fresh sprinkles really make these cookies pop visually!
- All-purpose flour: The base for these cookies; using all-purpose flour gives them that classic texture.
- Baking powder: Just a pinch to help the cookies rise slightly and keep them light.
- Salt: Enhances the sweetness and balances flavor.
- Red, green, and white Christmas sprinkles: These add festive color and a little crunch – don’t skip them!
- Unsalted butter: Room temperature butter results in a smooth dough and rich flavor.
- Granulated sugar: Provides sweetness and helps cookies crisp up.
- Egg: Binds everything together and adds richness.
- Vanilla extract: Brings warmth and depth of flavor.
- Powdered sugar: For a light dusting glaze that adds extra sweetness and a pretty finish.
- Milk: Mixed with powdered sugar to create the glaze for a delicate sheen.
Variations
I’ve had fun tweaking this Festive Christmas Icebox Cookies Recipe before, and the best part is that it’s totally customizable to your holiday vibe. Feel free to swap out sprinkles for mini chocolate chips, chopped nuts, or even crushed peppermint candies for a minty twist!
- Peppermint Variation: I once added crushed peppermint candies to the dough and it instantly became a refreshing holiday hit with that cool crunch.
- Gluten-Free Option: Using a gluten-free flour blend works well here — just keep an eye on the dough since it might be a little softer and chill it a bit longer.
- Vegan Version: Try substituting the butter with a plant-based alternative and use a flax egg; the cookies came out just as tasty when I experimented for my vegan friends.
How to Make Festive Christmas Icebox Cookies Recipe
Step 1: Mix the Dry Ingredients
Start by whisking together the all-purpose flour, baking powder, salt, and your colorful Christmas sprinkles in a medium bowl. This step’s important because it evenly distributes everything, especially those sprinkles, so every cookie gets a festive pop of color. If you mix the sprinkles in thoroughly here, they won’t clump and will look beautiful sliced in each cookie later.
Step 2: Cream Butter and Sugar
In a separate large bowl, beat the room temperature butter with granulated sugar until it’s light and fluffy — this usually takes about 3-5 minutes on medium speed with a mixer. This step is a personal favorite because watching the butter turn a paler color means you’re on track for those melt-in-your-mouth cookies.
Step 3: Add Egg and Vanilla
Next, add the egg and vanilla extract to your creamed butter and sugar, mixing until the batter is smooth. I always pause here to scrape down the bowl so everything blends beautifully — it helps avoid any pockets of unmixed ingredients that can affect texture.
Step 4: Combine Dry and Wet Ingredients
Slowly add the flour mixture to your wet ingredients, mixing on low speed until just combined. The dough will be a bit stiff but pliable — don’t overmix! When you’ve got a dough that holds together, stop. Overworking it can make your cookies tough, which nobody wants.
Step 5: Shape and Chill Your Cookie Log
Turn your dough onto a sheet of plastic wrap and shape it into a rough log about 2 inches in diameter. I usually wrap it tightly and chill it in the fridge for at least 2 hours or overnight if you can — this step is key because chilling firms up the dough, making slicing much cleaner and your cookies hold their shape beautifully.
Step 6: Slice and Bake
Preheat your oven to 350°F (175°C). When your dough is chilled, unwrap it and slice it into ¼-inch thick rounds. Place the slices on a parchment-lined baking sheet with some space in between. Bake for around 10-12 minutes, or until the edges just start to turn golden. Keep an eye on them — they should be firm but not browned.
Step 7: Add the Powdered Sugar Glaze
While the cookies cool on a wire rack, whisk together powdered sugar and milk until smooth to make a simple glaze. Drizzle or brush it lightly over the top of each cookie for a beautiful, delicate finish. It adds just enough sweetness and makes them look extra special, like a little snow glaze!
How to Serve Festive Christmas Icebox Cookies Recipe
Garnishes
I like adding a few extra sprinkles or tiny edible silver balls on top of the glaze to amp up the festive look — it’s such an easy and fun way to make them extra sparkly for company. Sometimes a light dusting of powdered sugar works just as well for that sneaky winter wonderland vibe.
Side Dishes
These cookies go perfectly with a hot cup of cocoa or spiced holiday tea. I often serve them alongside a cheese board or fruit platter during parties — they’re a sweet companion to savory flavors and make for a festive dessert station that your guests will adore.
Creative Ways to Present
Gift-wrapping these cookies in cellophane bags tied with red and green ribbons has been my go-to for gifting neighbors and coworkers. Another fun idea is stacking them in a festive tin with wax paper between layers; it looks charming and keeps them fresh if you’re hosting a cookie swap or bringing treats to holiday events.
Make Ahead and Storage
Storing Leftovers
I store leftover cookies in an airtight container at room temperature with parchment paper between layers to keep them from sticking and maintain crisp edges. They usually last about a week tasting just as good as fresh — though they’re often gobbled up sooner around here!
Freezing
If you want to freeze, I recommend slicing the dough first, then freezing the cookie rounds on a tray until firm before transferring to a freezer-safe bag. That way, you can bake fresh cookies straight from the freezer whenever the craving hits, no thawing required.
Reheating
To warm up cookie leftovers, pop them in a 300°F oven for about 5 minutes. This refreshes their texture perfectly — softening slightly inside while keeping the edges nicely crisp. Just keep an eye so they don’t overbake!
FAQs
-
Can I skip chilling the dough in this Festive Christmas Icebox Cookies Recipe?
Chilling is definitely recommended because it firms up the dough, making it easier to slice and helping the cookies hold their shape while baking. If you skip it, the cookies may spread too much and not have that pretty, uniform look. If you’re in a hurry, chill the dough for at least 30 minutes rather than skipping entirely.
-
Can I make the glaze thicker or omit it altogether?
You can adjust the glaze thickness by adding more powdered sugar for a stiffer consistency or more milk for a thinner drizzle. If you prefer, skipping the glaze is fine too — the cookies are delicious on their own with the sprinkles baked right in for color and sweetness.
-
How long do these cookies stay fresh?
Stored properly in an airtight container, these icebox cookies usually stay fresh for up to a week at room temperature. If you want to keep them longer, freezing the dough or baked cookies is your best bet.
Final Thoughts
This Festive Christmas Icebox Cookies Recipe has become my go-to during the busy holiday season because it’s not only simple and quick but brings so much cheer to any gathering. I honestly think you’ll enjoy the process as much as the cookies themselves — it’s the kind of recipe that’s both nostalgic and surprisingly versatile. So grab those sprinkles, chill the dough, and get ready to wow your family or guests with homemade treats that look and taste like you’ve been baking for hours, even on your busiest days.
PrintFestive Christmas Icebox Cookies Recipe

These Easy Christmas Icebox Cookies are a delightful holiday treat featuring a buttery, soft sugar cookie dough studded with festive red, green, and white sprinkles. Perfect for slicing, baking, and sharing, these cookies offer a simple yet festive option for holiday baking with a smooth vanilla-flavored frosting to finish.
- Prep Time: 15 minutes
- Cook Time: 12 minutes
- Total Time: 2 hours 27 minutes
- Yield: Approximately 24 cookies 1x
- Category: Cookies
- Method: Baking
- Cuisine: American
Ingredients
Dry Ingredients
- 2 ½ cups all-purpose flour
- ½ teaspoon baking powder
- ½ teaspoon salt
- ½ cup red, green, and white Christmas sprinkles
Wet Ingredients
- 1 cup unsalted butter, room temperature
- ¾ cup granulated sugar
- 1 large egg
- 1 teaspoon vanilla extract
Frosting
- ½ cup powdered sugar
- 1 tablespoon milk
Instructions
- Prepare the dough: In a medium bowl, whisk together the all-purpose flour, baking powder, and salt. In a separate large bowl, cream the unsalted butter and granulated sugar together until light and fluffy. Add the egg and vanilla extract, mixing well until fully incorporated.
- Combine dry and wet ingredients: Gradually add the flour mixture to the butter mixture, mixing until just combined. Carefully fold in the Christmas sprinkles to evenly distribute them without overmixing the dough.
- Shape the dough: Divide the dough in half and shape each half into a log approximately 2 inches in diameter. Wrap each log tightly in plastic wrap and refrigerate for at least 2 hours or until firm to make slicing easier.
- Preheat and slice: Preheat your oven to 350°F (175°C). Remove the dough from the refrigerator and slice into ¼-inch thick rounds using a sharp knife. Place the slices on a baking sheet lined with parchment paper, spaced about 2 inches apart.
- Bake the cookies: Bake the cookies in the preheated oven for 10 to 12 minutes or until the edges are lightly golden. Remove from the oven and allow the cookies to cool on the baking sheet for 5 minutes before transferring to a wire rack to cool completely.
- Make the frosting: In a small bowl, whisk together the powdered sugar and milk until smooth. Adjust consistency by adding more milk or powdered sugar if necessary.
- Decorate the cookies: Once the cookies are completely cool, spread a thin layer of the frosting on each cookie. Allow the frosting to set before serving or storing.
Notes
- For best results, chill the dough thoroughly to make slicing easier and ensure the cookies hold their shape.
- Use room temperature butter to ensure smooth creaming with the sugar.
- Store cookies in an airtight container at room temperature for up to 5 days.
- You can customize the sprinkles to match any holiday or celebration theme.
- If frosting is too runny, add more powdered sugar; if too thick, add a tiny bit more milk.
Keywords: Christmas cookies, icebox cookies, sugar cookies, holiday baking, festive cookies, easy cookie recipe, sprinkles cookies