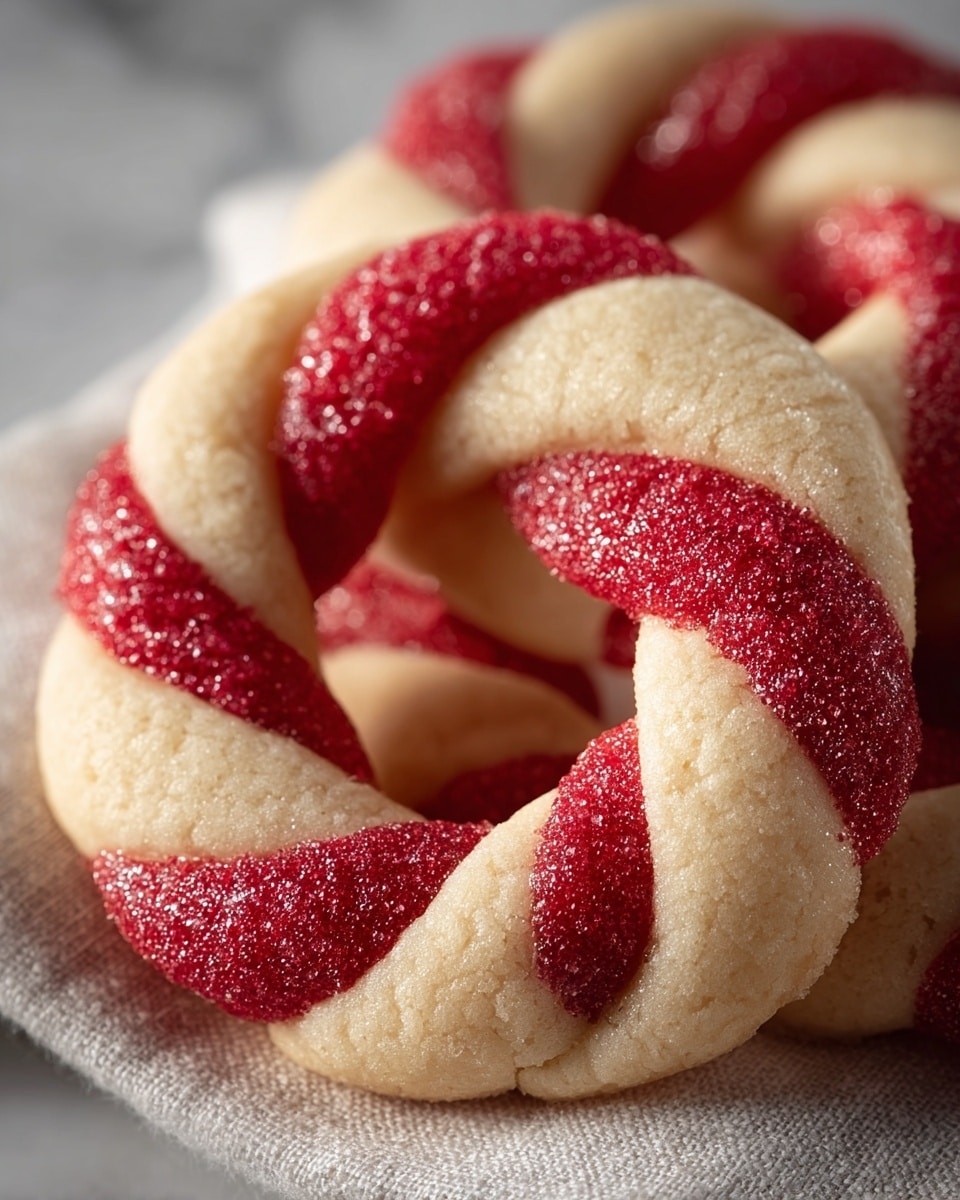
Magic of Candy Cane Cookies Recipe
There’s something truly enchanting about the Magic of Candy Cane Cookies Recipe that just brings all the feels of the holiday season right to your kitchen. These cookies perfectly balance buttery richness and a refreshing peppermint kick, making them an irresistible treat. Whether you’re baking for a festive party or just to cozy up at home, these cookies always steal the show.
I’ve found that the charm of the Magic of Candy Cane Cookies Recipe isn’t just in the taste but in the joyful process of making them. Painting that delicate red stripe with gel food coloring to create a candy cane look always makes me smile, and watching the cookies come together — soft, crumbly, and peppermint-scented — is so satisfying. You’ll love how easy it is to impress family and friends with this classic twist!
Ingredients You’ll Need
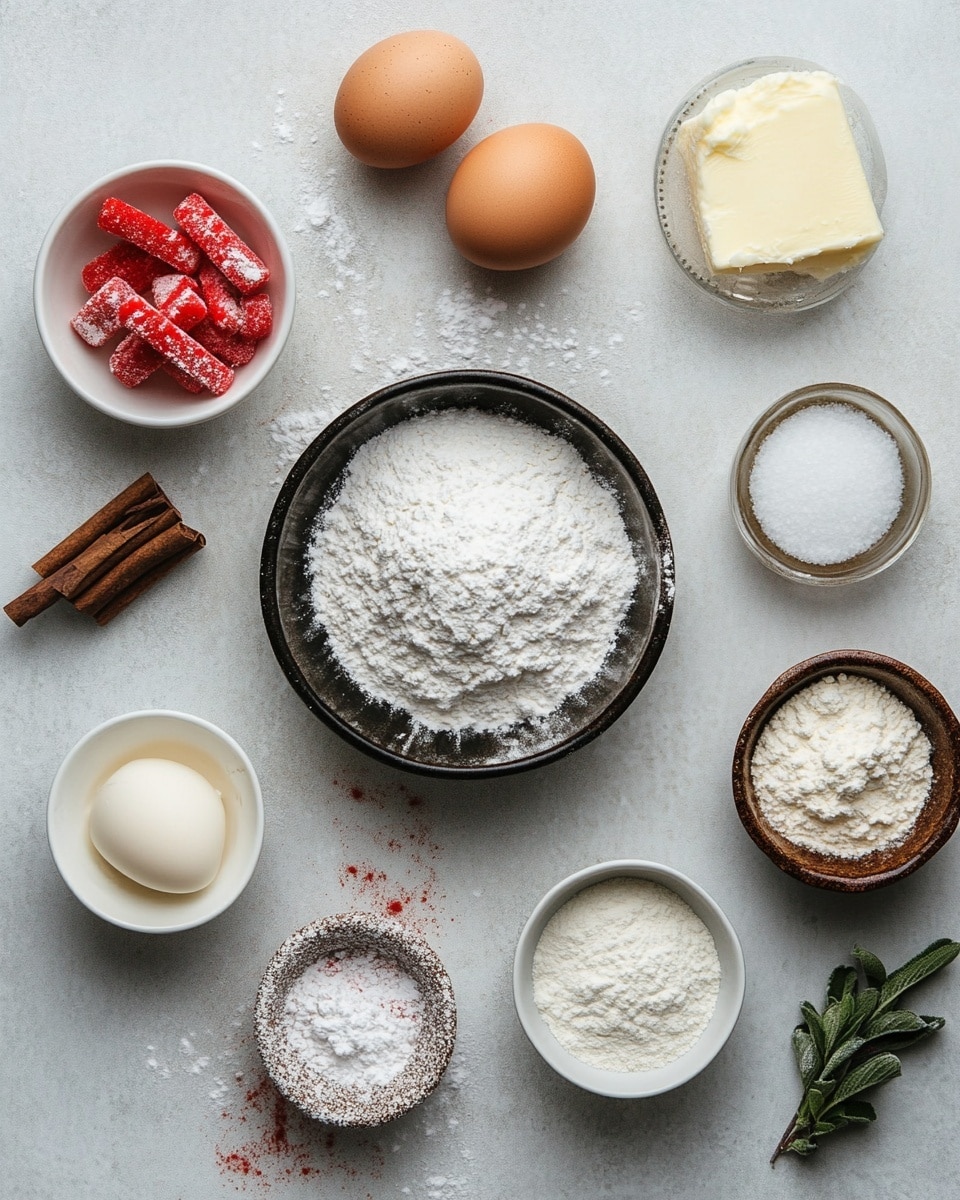
Simple ingredients come together beautifully in this recipe, each playing a crucial role in achieving that melt-in-your-mouth texture with a peppermint punch. Pro tip: Using room temperature ingredients makes the dough easier to handle and helps the cookies bake evenly.
- Unsalted butter: Using unsalted butter lets you control the salt level, and softened butter creams better with sugar, creating tender cookies.
- Powdered sugar: Powdered sugar gives the cookies a fine, delicate crumb and a touch of sweetness without grittiness.
- Large egg (room temp): The egg binds everything together and adds moisture; letting it come to room temp helps it blend smoothly.
- Vanilla extract: This adds warmth and depth to balance the peppermint flavor.
- Peppermint extract: The star of the show—just a little goes a long way, so measure carefully for that festive minty zing.
- All-purpose flour: Provides the base structure; make sure to spoon and level when measuring for accuracy.
- Salt: Enhances all the flavors and complements the sweetness.
- Red gel food coloring: Gel is ideal because it gives vibrant color without adding extra liquid to the dough, which could change the texture.
Variations
I love how this Magic of Candy Cane Cookies Recipe is a perfect canvas to tailor to your taste buds or dietary needs. Over time, I’ve tried a few tweaks that make the cookies uniquely mine, and I encourage you to put your personal spin on them too.
- Gluten-free variation: I’ve swapped all-purpose flour for a gluten-free blend, and the cookies still stay tender and delicious—just watch the baking time closely.
- Chocolate Peppermint: Adding mini chocolate chips into the dough amps up the indulgence factor; I often do this when I want something richer for gift baskets.
- White chocolate drizzle: Drizzling melted white chocolate over the cooled cookies adds a festive touch and extra sweetness that’s hard to resist.
- Mint and Citrus twist: Adding a teaspoon of orange zest with the peppermint extract creates a bright flavor combo that I like for a fresher, less sweet edge.
- Spiced version: A pinch of cinnamon or nutmeg adds warmth and complexity, which was a hit when I made these for a Christmas brunch.
How to Make Magic of Candy Cane Cookies Recipe
Step 1: Cream Butter and Sugar Until Fluffy
Start by beating the softened butter and powdered sugar together until the mixture looks light and fluffy — about 3 to 4 minutes with a hand mixer or stand mixer. This step is key because well-creamed butter traps air, giving your cookies a tender crumb. Don’t rush it! Scrape down the sides of your bowl halfway through to make sure everything blends evenly.
Step 2: Add Egg and Extracts
Beat in the large egg until fully incorporated. Then add the vanilla and peppermint extracts—these two together build a flavor dimension that sets this recipe apart. Peppermint extract is super potent, so a little goes a long way; trust the recipe here to keep it balanced.
Step 3: Mix Dry Ingredients
In a separate bowl, whisk the flour and salt. Gradually add the flour mixture into your butter mixture, mixing on low speed until the dough just comes together. Overmixing can make cookies tough, so stop as soon as you don’t see dry flour.
Step 4: Divide and Color the Dough
Divide your dough into two portions—about 3/4 for the white base and 1/4 for the red stripes. Add several drops of red gel food coloring to the smaller portion and knead it gently to get that festive bright red without streaks. Gel coloring is great because a little gives you a vivid color without messing with dough consistency.
Step 5: Shape and Layer for the Candy Cane Look
Roll the white portion into a rough log, then roll the red dough into a thinner log. Press the red dough onto the white log, then gently twist the two together to mimic the classic candy cane stripes. Chill the log in the fridge for about 30 minutes before slicing—that helps keep the shape when baking.
Step 6: Slice and Bake
Preheat your oven to 350°F (175°C). Slice the dough log into thin rounds, about 1/4 inch thick. Place them on a parchment-lined baking sheet, leaving some space to allow for slight spreading. Bake for about 10-12 minutes until edges are just turning light golden—overbaking will dry them out. Let them cool on the tray a bit before transferring to a wire rack.
How to Serve Magic of Candy Cane Cookies Recipe
Garnishes
When I serve these cookies, I often sprinkle a little crushed candy cane on top right after baking for extra crunch and festive flair. It adds a fun texture and boosts the peppermint vibe. A tiny drizzle of white chocolate is another favorite garnish I use for special occasions—it adds a creamy contrast that’s just dreamy.
Side Dishes
These cookies pair beautifully with a warm mug of hot cocoa or peppermint-spiked coffee. I also like serving them alongside a cheese board with mild cheeses for a surprising sweet-and-savory combo at holiday gatherings. Trust me, your guests will love the contrast!
Creative Ways to Present
I’ve found that stacking Magic of Candy Cane Cookies Recipe neat on a pretty plate and tying them with red-and-white striped twine makes for a charming gift or table centerpiece. For kids’ parties, I like arranging them in a circle like a wreath on a platter, decorated with fresh cranberries and greenery for that extra “wow” factor.
Make Ahead and Storage
Storing Leftovers
I keep leftover candy cane cookies in an airtight container at room temperature, and they stay fresh and chewy for up to a week. Layer them between parchment paper to avoid sticking, especially if you added any drizzle or crushed candy garnish.
Freezing
I’ve had success freezing both the dough log (wrapped tightly in plastic wrap) and the baked cookies. Dough can be frozen for up to 2 months; just thaw in the fridge overnight before slicing and baking. Baked cookies freeze well in freezer bags with parchment layers and thaw quickly at room temp.
Reheating
To refresh your cookies after storage, pop them in a 300°F oven for 5 minutes to restore that just-baked warmth and slight softness. It’s a little trick I picked up that never fails to bring them back to life, especially if they’ve dried out a bit.
FAQs
-
Can I substitute peppermint extract with something else?
While peppermint extract is the best choice for authentic candy cane flavor, you can experiment with spearmint extract or even vanilla extract if peppermint isn’t on hand. Keep in mind the flavor will change—peppermint offers that cooling, unmistakable minty taste essential to this cookie’s magic.
-
How thin should I slice the cookie dough?
Aim for about 1/4 inch thick slices; thinner slices might bake too quickly and crisp up too much, while thicker ones could be doughy in the center. Consistency in thickness helps your cookies bake evenly.
-
Can I make this recipe egg-free?
Yes! You can substitute the egg with a flax egg (1 tablespoon ground flaxseed mixed with 3 tablespoons water, chilled) or use a commercial egg replacer. The texture might be slightly different—perhaps a bit more crumbly—but the peppermint flavor will still shine.
-
Why is gel food coloring recommended over liquid?
Gel food coloring provides vivid color without adding extra liquid to the dough, which helps maintain the perfect cookie texture. Liquid colorings can thin the dough and potentially affect baking times or spreading.
-
How do I avoid the cookies being too hard?
Be careful not to overbake—cookies are best when you pull them out just as the edges start to turn golden. Using powdered sugar instead of granulated sugar also helps keep them soft. Storing them properly in airtight containers maintains their tenderness.
Final Thoughts
The Magic of Candy Cane Cookies Recipe holds a special place in my heart, not just because of its festive cheer but because of the happy memories it creates every time I bake it. Sharing these peppermint beauties with friends and family instantly lifts spirits, and I hope you find the same joy—and maybe a few new traditions—when you try making these yourself. Trust me, once you’ve made them, your holiday baking won’t be quite complete without these sweet, minty delights.
PrintMagic of Candy Cane Cookies Recipe

These Magic Candy Cane Cookies are a festive and delightful treat perfect for the holiday season. With a buttery, tender texture combined with refreshing peppermint flavor, these cookies are visually striking thanks to their classic red and white swirled design achieved with gel food coloring. Easy to make and irresistibly charming, they bring a magical touch to any cookie platter.
- Prep Time: 20 minutes
- Cook Time: 12 minutes
- Total Time: 42 minutes
- Yield: 24 cookies 1x
- Category: Dessert
- Method: Baking
- Cuisine: American
Ingredients
Cookie Dough
- 1 cup unsalted butter, softened
- 1 cup powdered sugar
- 1 large egg, room temperature
- 1 tsp vanilla extract
- ½ tsp peppermint extract
- 2½ cups all-purpose flour
- ½ tsp salt
- Red gel food coloring
Instructions
- Prepare the dough: In a large mixing bowl, cream together the softened unsalted butter and powdered sugar until light and fluffy. Beat in the egg, vanilla extract, and peppermint extract until well combined.
- Combine dry ingredients: In a separate bowl, whisk together the all-purpose flour and salt. Gradually add this dry mixture to the wet ingredients, mixing until a soft dough forms.
- Divide and color dough: Divide the dough into two equal parts. Leave one part plain, and color the other with several drops of red gel food coloring, kneading gently until evenly combined.
- Shape the dough: Roll out each dough portion into long strips of equal length and thickness. Alternate rolling the red and plain dough strips together to form a candy cane swirl pattern. Twist or roll them gently to create the classic candy cane look.
- Cut and chill: Slice the rolled dough into cookie-sized pieces and lay them on a baking sheet lined with parchment paper. Chill in the refrigerator for 30 minutes to firm up the shape.
- Bake the cookies: Preheat the oven to 350°F (175°C). Bake the chilled cookies for 10-12 minutes or until they are set but not browned. Remove from oven and let cool on the baking sheet for a few minutes before transferring to a wire rack to cool completely.
Notes
- Using gel food coloring instead of liquid helps maintain the dough consistency and achieves vibrant colors.
- Make sure to chill the dough before baking to keep the candy cane shape intact.
- Store cookies in an airtight container to keep them fresh for up to a week.
- For a stronger peppermint flavor, increase peppermint extract slightly, but avoid overpowering the cookie taste.
Keywords: candy cane cookies, peppermint cookies, holiday cookies, festive cookies, Christmas treats