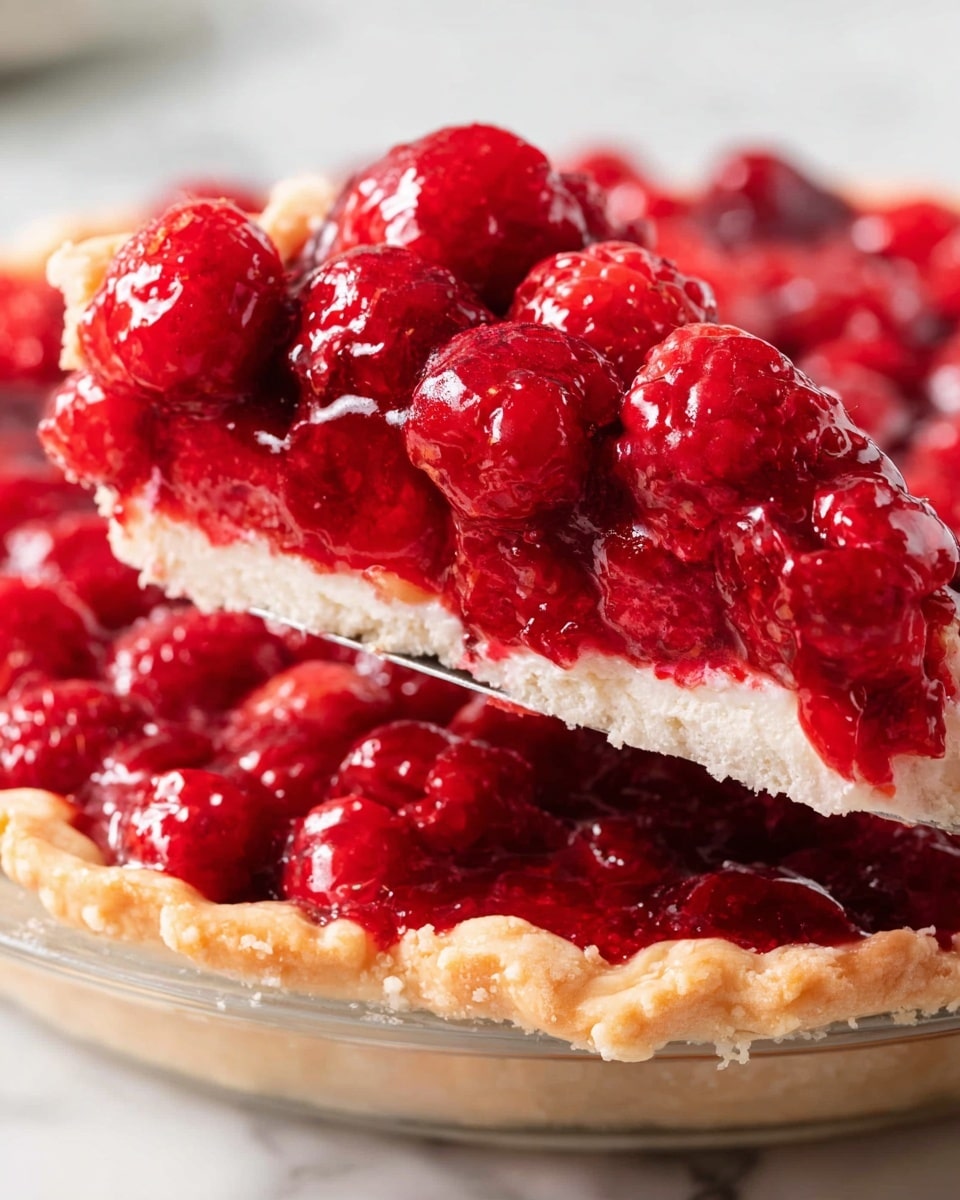
Sweet & Tangy Raspberry Pie with Juicy Fresh Raspberries Recipe
I have to tell you, this Sweet & Tangy Raspberry Pie with Juicy Fresh Raspberries Recipe has become one of my absolute favorites whenever raspberries are in season. There’s just something magical about the bright red color, that wonderful pop of tartness from the fresh berries, and the glossy, sweet fill that makes every bite feel special. Whether you’re bringing it to a summer picnic or just want a refreshing dessert after dinner, this pie is always a crowd-pleaser.
What I love most is how the flavors balance perfectly — you get the natural juiciness of fresh raspberries combined with a sweet and tangy filling that’s set beautifully thanks to the raspberry Jello and a touch of cornstarch. It’s not your typical heavy pie; it’s lighter, more vibrant, and feels like a fresh burst of summer. You’ll enjoy how easy it is to whip up, and trust me, once you try this Sweet & Tangy Raspberry Pie with Juicy Fresh Raspberries Recipe, it might just become your go-to spring and summer dessert.
Ingredients You’ll Need
Choosing the right ingredients here is key to get that perfect balance of tartness and sweetness, plus the ideal texture. Fresh raspberries are essential because they really deliver that juicy punch. The rest is about setting the filling just right without overpowering the berries’ delicate flavor.
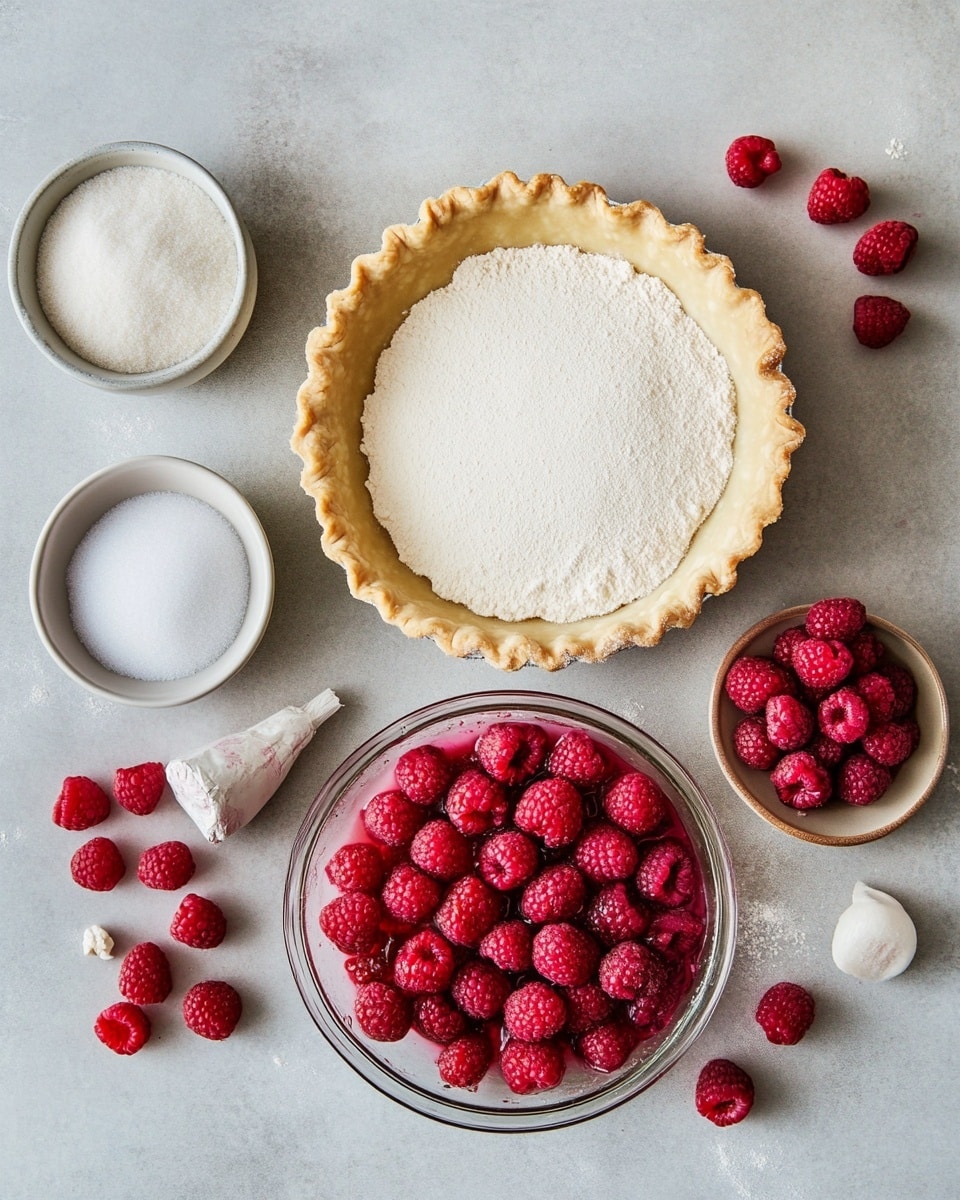
- Pie crust: I prefer a classic 9-inch store-bought crust for convenience, but homemade works beautifully if you’re up for it.
- Sugar: Granulated sugar is perfect here; it sweetens without masking the raspberry flavor.
- Cornstarch: This thickener helps set the pie filling so it’s not runny but still luscious.
- Water: Needed to dissolve the cornstarch and Jello, creating that smooth syrupy base.
- Raspberry Jello: Adds both flavor and a lovely pink tint to the filling; I’ve found the 3-ounce packet works just right for this pie size.
- Fresh raspberries: The star of the show – juicy, ripe berries give the pie its sweet and tangy personality.
Variations
Playing around with this Sweet & Tangy Raspberry Pie with Juicy Fresh Raspberries Recipe is part of the fun! I often tweak it based on what I have or who I’m serving it to — feel free to make it your own.
- Adding lemon zest or juice: One time, I added a teaspoon of lemon zest to brighten the filling even more—game changer for lovers of extra tang!
- Using mixed berries: If raspberries are scarce, blending blackberries or blueberries keeps the sweetness and adds a different flavor dimension I adore.
- Switching the crust: For a gluten-free twist, I’ve tried a gluten-free crust, and it was just as delicious without losing the flaky texture.
- Less sugar option: Using a natural sweetener or cutting sugar down works if you prefer a tarter pie; just keep an eye on your sweetness to tang balance.
How to Make Sweet & Tangy Raspberry Pie with Juicy Fresh Raspberries Recipe
Step 1: Prepare the crust
Start by fitting your 9-inch pie crust into a pie plate if it’s not already. Make sure to gently press the crust into the edges without stretching it, which can cause shrinkage while baking. I like to prick the bottom a few times with a fork to prevent air bubbles. This step makes it easier when the filling goes in later, ensuring it stays nice and flaky.
Step 2: Cook the sweet and tangy filling
In a medium saucepan, combine the sugar and cornstarch, then stir in water gradually until smooth. Turn the heat to medium and cook this mixture, stirring constantly. Trust me on this—keep stirring to avoid lumps and sticking! Once it starts to thicken and bubble, add the raspberry Jello. Stir until it’s fully dissolved and the mixture is silky smooth, then remove from heat.
Step 3: Add fresh raspberries
Gently fold in your 4 cups of fresh raspberries. I always do this off the heat so the berries don’t break down too much and lose that lovely fresh texture. The goal is to have juicy berries bursting in each slice without them turning mushy in the filling.
Step 4: Assemble and chill
Pour the raspberry filling evenly into the prepared pie crust. Smooth the top gently with a spatula. Cover the pie loosely with plastic wrap and place it in the refrigerator. Let it chill for at least 4 hours—overnight is even better. Cooling allows the filling to set perfectly, so when you slice it, it holds together nicely but still stays juicy and soft.
How to Serve Sweet & Tangy Raspberry Pie with Juicy Fresh Raspberries Recipe
Garnishes
When it comes to garnishes, I usually keep things simple but a few extras can really elevate the experience. A dollop of freshly whipped cream sits perfectly on top and adds a creamy contrast. Sometimes I sprinkle a tiny bit of grated lemon zest or some shaved white chocolate, which pairs surprisingly well with raspberries.
Side Dishes
This pie makes a sweet end to lighter meals. I like pairing it with a cup of herbal tea or even a scoop of vanilla bean ice cream for extra indulgence. For brunch, it goes great alongside fluffy scrambled eggs and bacon—something about that mix of savory and sweet just works.
Creative Ways to Present
For a party, I sometimes serve this Sweet & Tangy Raspberry Pie with Juicy Fresh Raspberries Recipe as mini tartlets using small tart pans. It’s adorable and perfect for guests to pick up and enjoy without fuss. Also, layering the filling and berries in individual glass jars is a fun, rustic option that shows off all the bright colors.
Make Ahead and Storage
Storing Leftovers
I always keep leftover pie covered loosely with plastic wrap or in an airtight container in the fridge. It stays fresh for up to 3 days, though honestly, I rarely have much leftover because it’s that irresistible! The filling keeps its texture well if chilled properly.
Freezing
Freezing this pie can be a bit tricky because of the fresh berries and gelatin filling, which may change texture. I’ve tried freezing the filling separately (before adding berries) with okay results, but for best texture, I recommend enjoying it fresh. If you want to freeze it, wrap tightly and thaw overnight in the fridge before serving.
Reheating
This pie is best served chilled, so I don’t recommend reheating. If you prefer it warmer, just take it out of the fridge 20-30 minutes before serving to let it come to room temperature. This softens the filling without compromising its structure or flavor.
FAQs
-
Can I use frozen raspberries for this pie?
Frozen raspberries can work in a pinch, but they tend to release more liquid when thawed, which might make the pie filling runnier. If you use frozen berries, it’s best to thaw and drain them well beforehand and maybe reduce the amount of water slightly in the filling to compensate.
-
Is it necessary to use raspberry Jello? Can I substitute it?
The raspberry Jello helps to set the filling and adds flavor, but if you want to avoid gelatin or artificial additives, you could try using a natural fruit pectin or agar-agar. Keep in mind that the texture might differ slightly.
-
How can I prevent the pie crust from getting soggy?
Blind baking the crust slightly before adding the filling can help firm it up and reduce sogginess. Also, making sure the filling isn’t too watery and chilling the pie thoroughly helps keep the crust nicely textured.
-
Can I make this pie vegan?
To make a vegan version, swap the pie crust for a vegan-friendly one and replace the raspberry Jello with a plant-based gelling agent like agar-agar. Be sure to test your filling set as different agents have unique properties.
-
What’s the best way to slice this raspberry pie?
Use a sharp, serrated knife and clean it between cuts for neat slices. Because the filling is soft and juicy, a gentle sawing motion works better than pressing down hard.
Final Thoughts
This Sweet & Tangy Raspberry Pie with Juicy Fresh Raspberries Recipe holds a spot close to my heart because it’s one of those desserts that feels both nostalgic and fresh at the same time. It brings the joy of summer to any table and is simple enough for weekday baking but elegant enough for guests. I hope you have as much fun making it as I do — and that every slice brings a smile because there’s just nothing like the bright, juicy taste of fresh raspberries in a pie you made yourself. Give it a try, and you’ll have a new favorite on your dessert list, I promise!
PrintSweet & Tangy Raspberry Pie with Juicy Fresh Raspberries Recipe

This classic Raspberry Pie features a buttery 9-inch pie crust filled with a vibrant and sweet raspberry filling thickened with cornstarch and raspberry jello for a perfect balance of tartness and sweetness. Fresh raspberries provide a juicy texture while the filling sets into a glossy, beautiful pie ideal for any occasion.
- Prep Time: 15 minutes
- Cook Time: 10 minutes
- Total Time: 4 hours 25 minutes
- Yield: 8 servings 1x
- Category: Dessert
- Method: Stovetop
- Cuisine: American
Ingredients
Pie Crust
- 1 (9-inch) pie crust
Filling
- 1½ cups granulated sugar
- 2 tablespoons cornstarch
- 1½ cups water
- 3 ounces raspberry jello (gelatin dessert mix)
- 4 cups fresh raspberries
Instructions
- Prepare the Pie Crust: Roll out the 9-inch pie crust and place it into your pie dish, pressing it evenly along the bottom and sides. Set aside while you prepare the filling.
- Mix Dry Ingredients: In a medium saucepan, combine the sugar and cornstarch thoroughly to prevent lumps.
- Add Liquids and Jello: Gradually stir in the water and raspberry jello mix into the sugar and cornstarch mixture until fully dissolved.
- Cook the Filling: Place the saucepan over medium heat and cook the mixture, stirring constantly, until it thickens and becomes clear and glossy, about 5 to 7 minutes.
- Add Fresh Raspberries: Remove the saucepan from heat and gently fold in the fresh raspberries, ensuring they are evenly coated with the thickened jelly mixture without crushing them.
- Fill the Pie Crust: Pour the raspberry filling evenly into the prepared pie crust.
- Chill to Set: Place the pie in the refrigerator and chill for at least 4 hours, or until the filling is fully set and firm.
- Serve: Once chilled, slice and serve the pie cold. Optionally, garnish with whipped cream or fresh raspberries for an extra touch.
Notes
- Use fresh raspberries for the best flavor and texture.
- Chilling the pie adequately is crucial to allow the filling to set properly.
- You can substitute raspberry jello with unflavored gelatin and raspberries sweetened with sugar for a less sweet alternative.
- If using a store-bought crust, pre-bake slightly if desired for a crisper base.
- Keep the pie refrigerated until serving to maintain the filling consistency.
Keywords: Raspberry Pie, Fresh Raspberry Dessert, No-Bake Pie, Classic Pie, Easy Summer Dessert