Halloween Dirt Cups Recipe
I have to tell you, Halloween Dirt Cups Recipe is one of my all-time favorite spooky treats to whip up in the kitchen when fall rolls around. It’s playful, super easy, and instantly brings that fun Halloween vibe to any gathering—even if it’s just a cozy night in with the family. I usually make these when friends come over or when my kids want something special to enjoy after trick-or-treating. The mix of creamy pudding, crunchy cookie “dirt,” and gummy worms makes it a hands-down crowd-pleaser.
What makes this Halloween Dirt Cups Recipe worth trying? It’s not just tasty; it’s also flexible and forgiving. You don’t need fancy ingredients or baking skills, and it comes together in no time. Plus, it’s a perfect way to get kids involved—they love layering the “dirt” and adding creepy candy critters on top. I promise, once you make these, they’ll become a Halloween tradition in your house, just like they did in mine.
Ingredients You’ll Need
This recipe is all about simple, classic ingredients that combine perfectly to create that “dirt” texture and rich flavor. A little tip: grabbing a good-quality pudding mix makes all the difference, and don’t skip the Oreos for the crumbly top—they’re essential!
- Oreo Cookies: These crushed cookies create that perfect chocolate “dirt” topping that’s crunchy and delicious.
- Cool Whip: It adds a light, creamy texture that balances the chocolate pudding nicely. You can substitute with homemade whipped cream if you prefer.
- Instant Chocolate Pudding Mix: I recommend the instant kind for quick prep—chocolate flavor is a must here.
- Milk: Needed to mix with the pudding powder; whole milk makes it richer, but you can use what you have.
- Milano Cookies: These add a nice extra crunch inside the cups and a touch of variety.
- Gummy Worms and Candy Pumpkins (optional): These fun candies bring the Halloween spirit to the surface—totally optional but highly recommended!
- Wilton Black Writing Icing: Great for decorating or adding spooky messages on the cups if you want to dress them up further.
Variations
I like to have fun tweaking this Halloween Dirt Cups Recipe depending on the occasion or who I’m serving. You can totally make it your own with little changes that suit your taste or dietary needs.
- Gluten-Free Version: Use gluten-free cookies instead of Oreos and Milano cookies. I tried this once for a friend, and no one missed the original crunch at all.
- Different Pudding Flavors: Swap chocolate pudding for vanilla or pumpkin spice to mix up the flavors—perfect if you want a fall twist!
- Non-Dairy Option: Use dairy-free pudding mix, plant-based milk, and coconut whipped topping. I’ve done this for a vegan guest, and it worked like a charm.
How to Make Halloween Dirt Cups Recipe
Step 1: Crush the Cookies for the Dirt
Start by placing your Oreo cookies in a ziplock bag and crush them with a rolling pin until you have fine crumbs that look like dirt. Don’t worry if some crumbs are bigger—those add a nice texture. I usually set aside about 2/3 of the crumbs for topping, and keep some larger chunks to mix inside the pudding layers.
Step 2: Prepare the Chocolate Pudding
Whisk the instant chocolate pudding mix with 2 cups of milk until thick and smooth—usually takes about 2 minutes. This is where patience pays off; let it set for a few minutes in the fridge if you can, so it thickens up perfectly for layering.
Step 3: Fold in the Cool Whip
Gently fold in most of the Cool Whip into the pudding until creamy and light. This step ensures your dirt cups aren’t too dense and have that fluffy pudding texture everyone loves. Be gentle here—you want to keep it airy and smooth.
Step 4: Layer Your Cups
Grab your serving cups and start layering! Begin with a spoonful of the pudding mixture, add some crushed Milano cookies for crunch, then another layer of pudding. Top with the Oreo crumbs to make that signature dirt look. Repeat in layers if your cups are deep enough.
Step 5: Add the Creepy Candy Finish
Stick those gummy worms so they look like they’re wriggling out of the dirt. Scatter candy pumpkins around for extra Halloween flair. If you want to get fancy, use the Wilton black icing to write spooky words or draw spider webs on the cups. It’s a little trick but really delights kids and guests.
How to Serve Halloween Dirt Cups Recipe
Garnishes
I’m a sucker for authenticity, so I love adding extra crushed Oreos right before serving to keep the “dirt” crunchy. Sometimes I sprinkle a little edible glitter or colored sugar on top for a festive shimmer. The gummy worms are a must for that fun factor—no Halloween Dirt Cups feel complete without them!
Side Dishes
Since these are rich and sweet, I like to pair them with lighter snacks like apple slices or a crisp cider. They also work wonderfully alongside savory finger foods—think mini sandwiches or popcorn balls—to balance the party spread.
Creative Ways to Present
For a party, I’ve used mini terracotta plant pots lined with plastic wrap to serve dirt cups—it’s a cute way to reinforce the garden theme! You can also grab small jars or mason jars and layer the dirt cups inside for a rustic look. If you’re feeling crafty, add little plastic spiders or tombstones on toothpicks as toppers.
Make Ahead and Storage
Storing Leftovers
I usually cover leftover Halloween Dirt Cups with plastic wrap and store them in the fridge for up to 3 days. The dirt topping may soften a bit, so I like to add fresh crushed Oreos right before serving again. They hold up surprisingly well and taste delicious chilled.
Freezing
Freezing isn’t my go-to for this recipe—it can change the texture of the pudding and whipped cream, making it a bit watery when thawed. I’ve tried freezing them once and found the best way is to freeze the pudding mixture separately before assembly, then build the cups fresh later.
Reheating
Since these are served cold, reheating isn’t really necessary or recommended. Just take them out of the fridge a few minutes before serving so they’re not too chilly, and add any fresh toppings to refresh them.
FAQs
-
Can I make Halloween Dirt Cups Recipe without Cool Whip?
Absolutely! You can substitute Cool Whip with homemade whipped cream or any whipped topping you prefer. Just make sure it’s slightly sweetened and folded gently into the pudding for the same light texture.
-
How long do Halloween Dirt Cups stay fresh in the fridge?
These cups stay fresh in the refrigerator for about 3 days if well covered. After that, the texture of the cookie crumbs may start to soften, so it’s best to enjoy them within that time frame.
- Can I use homemade chocolate pudding for this recipe?
Definitely! Homemade pudding will add a rich, fresh flavor, though the instant pudding makes the recipe quicker and easier, which is great if you’re short on time.
-
What if I don’t want to use gummy worms?
No worries at all—you can get creative with Halloween sprinkles, candy eyeballs, or even small plastic decorations that you place on top instead of gummy worms. The key is to have fun with it!
-
Can kids help make this Halloween Dirt Cups Recipe?
Yes! This recipe is perfect for kids because it involves simple layering, crushing cookies (which kids love), and decorating with candies. Just supervise with any sharp utensils or when crushing cookies.
Final Thoughts
Honestly, making this Halloween Dirt Cups Recipe feels like a little Halloween magic in a cup every time. It’s fun, simple, and even a bit nostalgic. If you want to impress your family or guests without stressing in the kitchen, this is your go-to recipe. I can’t wait for you to try it and hear how much everyone loves it—as much as we do in my house. Go ahead, grab those Oreos and pudding mix, and let’s get dirty!
PrintHalloween Dirt Cups Recipe

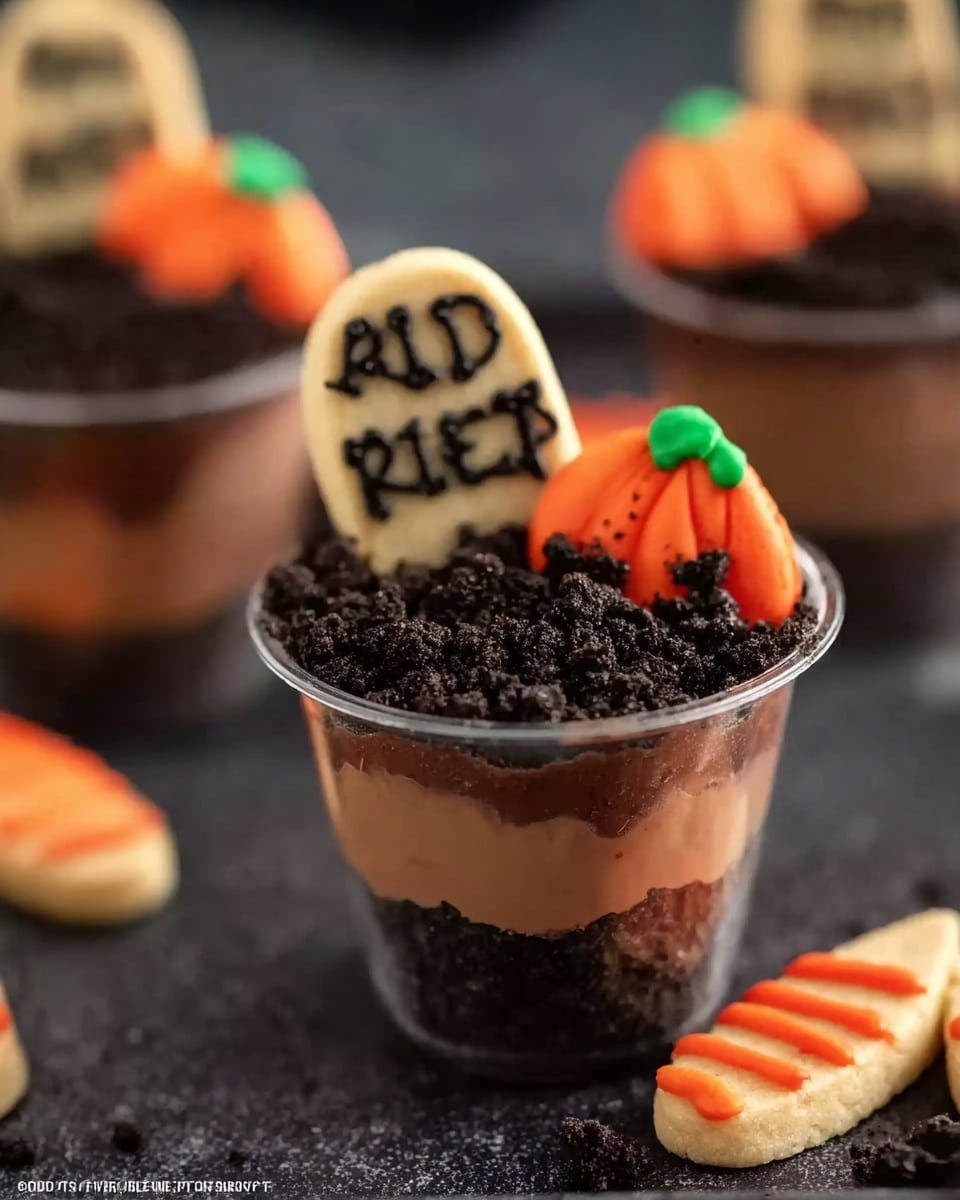
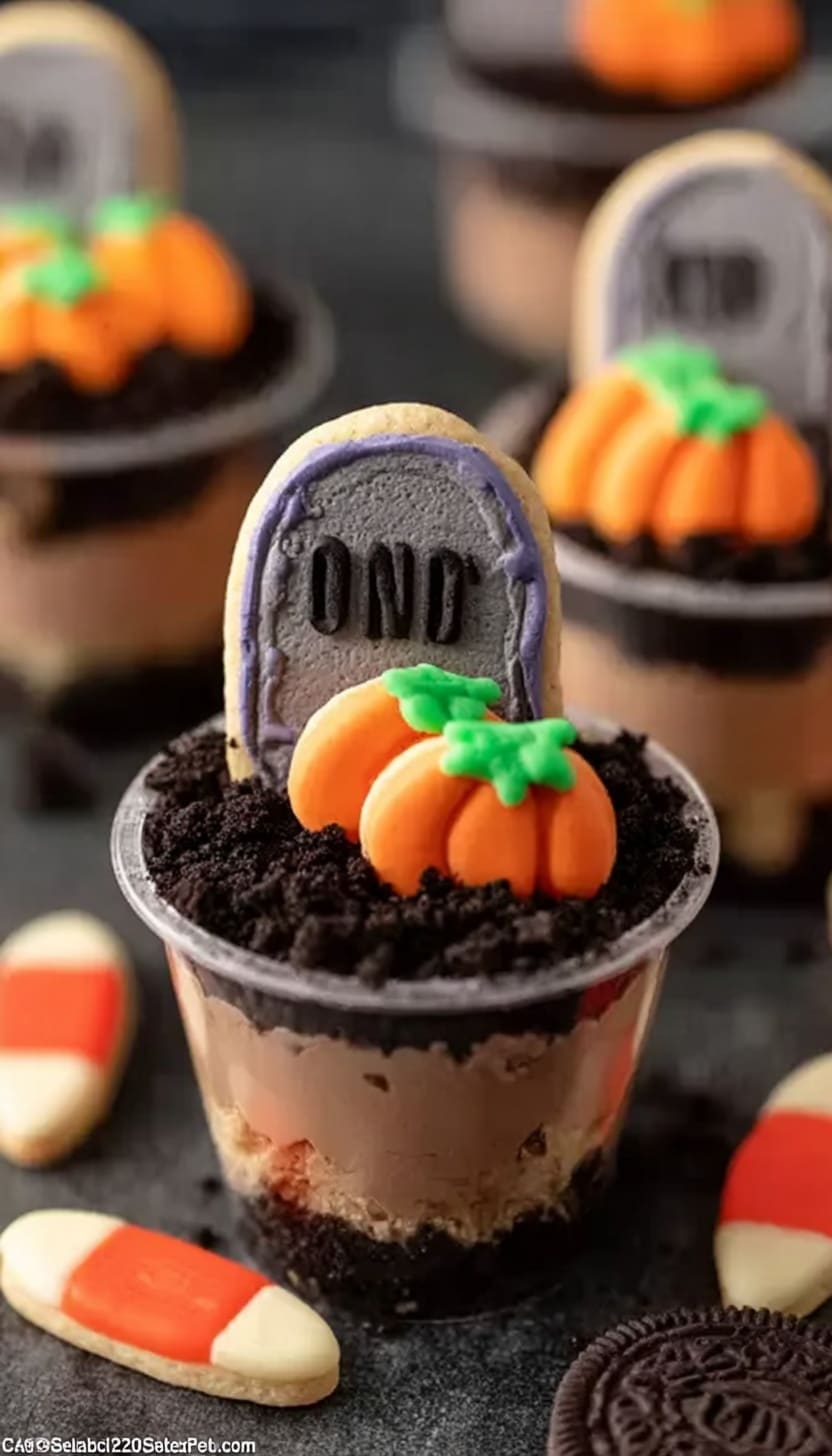
Halloween Dirt Cups are a fun and spooky dessert perfect for Halloween parties. These easy-to-make treats combine creamy instant chocolate pudding with crushed Oreo cookies to mimic dirt, topped with gummy worms, candy pumpkins, and decorative black icing for a creepy effect. They’re chilled to set and sure to delight kids and adults alike with their playful presentation and rich chocolate flavor.
- Prep Time: 15 minutes
- Cook Time: 0 minutes
- Total Time: 45 minutes
- Yield: 6–8 servings 1x
- Category: Dessert
- Method: No-Cook
- Cuisine: American
- Diet: Vegetarian
Ingredients
Base and Topping
- 12 Oreo Cookies, crushed
- 8 Milano Cookies, whole
- Gummy Worms, as desired
- Candy Pumpkins, as desired
- Wilton Black Writing Icing, for decoration
Pudding Mixture
- 1 box Instant Chocolate Pudding Mix (3.3 oz)
- 2 cups Milk
- 16 oz Cool Whip, thawed
Instructions
- Prepare the Pudding: In a mixing bowl, whisk together the instant chocolate pudding mix and 2 cups of cold milk until the mixture thickens and sets, typically about 2 minutes.
- Combine with Cool Whip: Gently fold 16 oz of thawed Cool Whip into the prepared pudding until fully incorporated, creating a light and creamy mixture.
- Crush Oreos: Place the 12 Oreo cookies in a zip-top bag and crush them into fine crumbs using a rolling pin or by hand.
- Layer the Dirt Cups: In serving cups or small jars, start by adding a layer of crushed Oreo crumbs to resemble dirt, then add a layer of the pudding mixture. Repeat the layering until cups are nearly full.
- Add Garnishes: Top each dirt cup with whole Milano cookies, gummy worms, candy pumpkins, and drizzle Wilton black writing icing on top for a spooky effect.
- Chill: Refrigerate the assembled dirt cups for at least 30 minutes to allow the pudding to set and flavors to meld before serving.
Notes
- For a firmer layer, chill the pudding mixture for a few minutes before layering.
- Use crushed chocolate sandwich cookies other than Oreos if preferred.
- Gummy worms and candy pumpkins are optional but add a festive Halloween touch.
- Wilton black writing icing can be substituted with any black decorating gel or icing you prefer.
- Prepare the dirt cups a few hours in advance to enhance flavor and texture.
Keywords: Halloween dessert, dirt cups, instant pudding dessert, Halloween treats, no-bake dessert